Warning: Super long blog post here. Might want to grab a cup of coffee or tea and a snack before settling in ... ;)
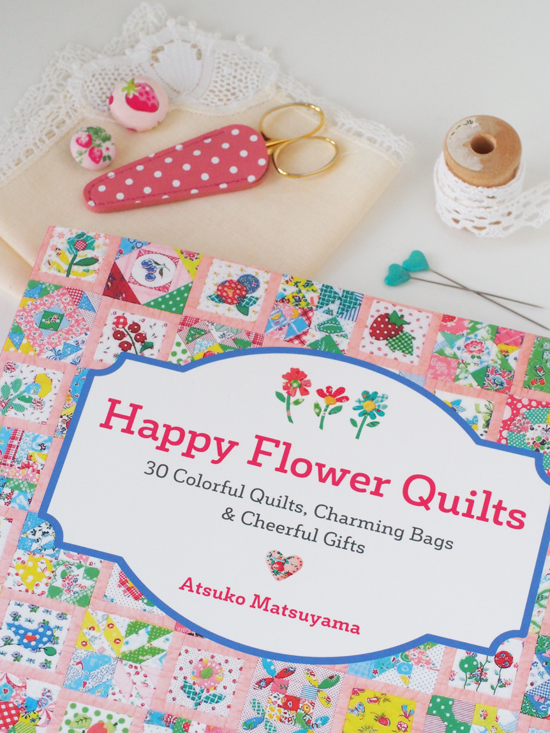
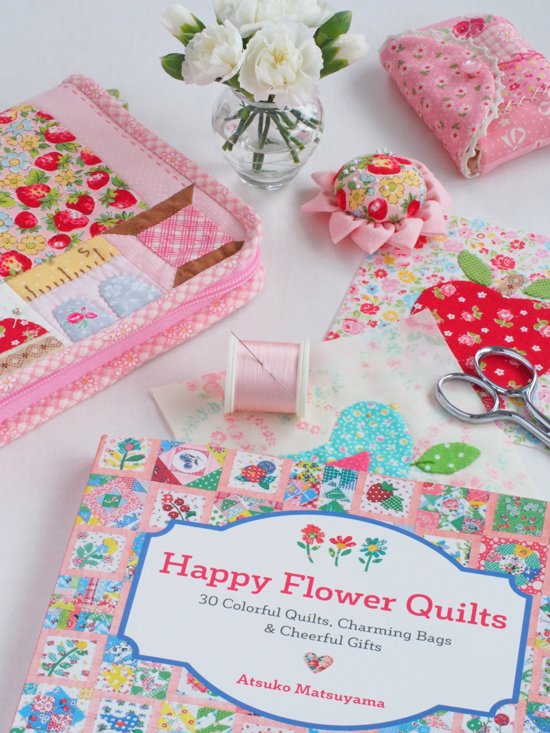
 Whew! I think this book has got to be the most anticipated publication for people like me who can't get enough pretty-pink-sweet-floral-fun-cute-feedsack-Japanese-style sewing and quilting projects. :) Happy Flower Quilts indeed!
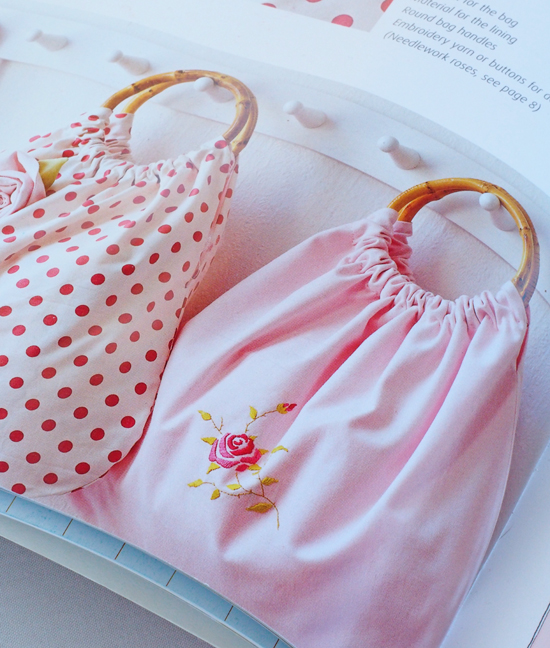
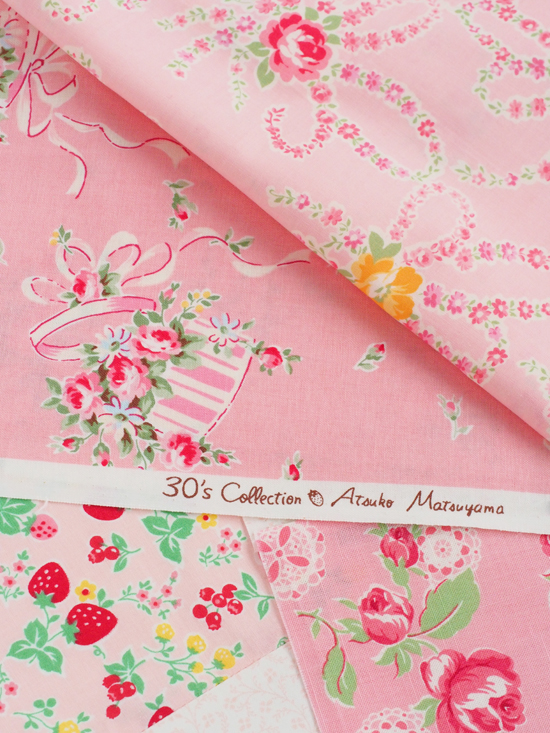
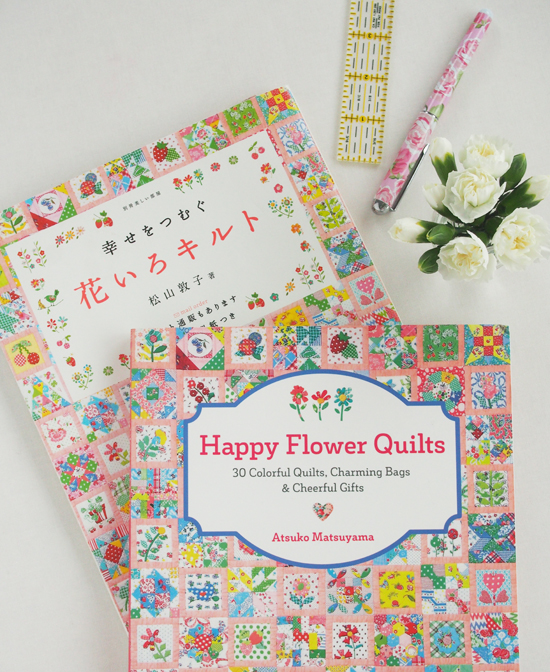 I've owned the Japanese version (at least I think it's Japanese .. it may be Korean ... not entirely positive ... if you know please clue me in) that was originally published in 2009 for about 6 years now and it is my hands-down favourite quilt/craft book. Until recently, I always referred to it as "That-Pink-Japanese-Quilt-Book". And it took me a few years to connect the author as one of my favourite fabric designers, Atsuko Matsuyama (she designs for both Yuwa and Lecien). It's like she crawled into my brain and my heart and wrote this book just for me. I know she didn't ... we've never met. But that's how much I relate to the lovely projects that fill the pages of Happy Flower Quilts. I flip through it regularly, I fantasize about making everything in it, I study the delicious fabrics and the beautiful photography, and I've even made a few things from it.
Fun fact: I was hired as one of the technical editors for this book. (Still can't believe I had the honour. Thank you again zakkaworkshop for asking me!) Kinda weird/marvelous how the universe works.
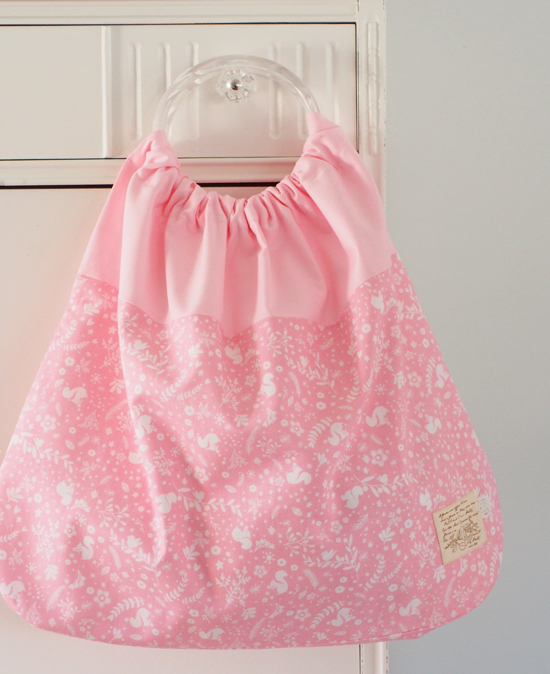
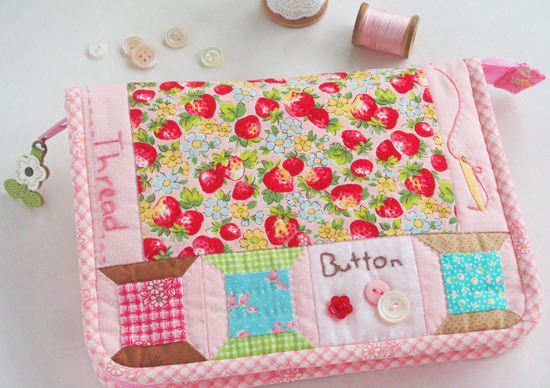
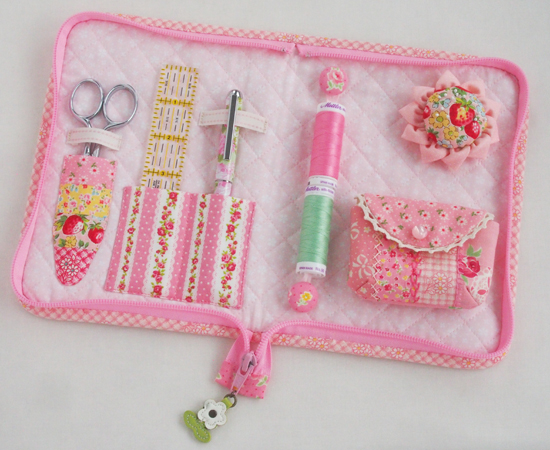
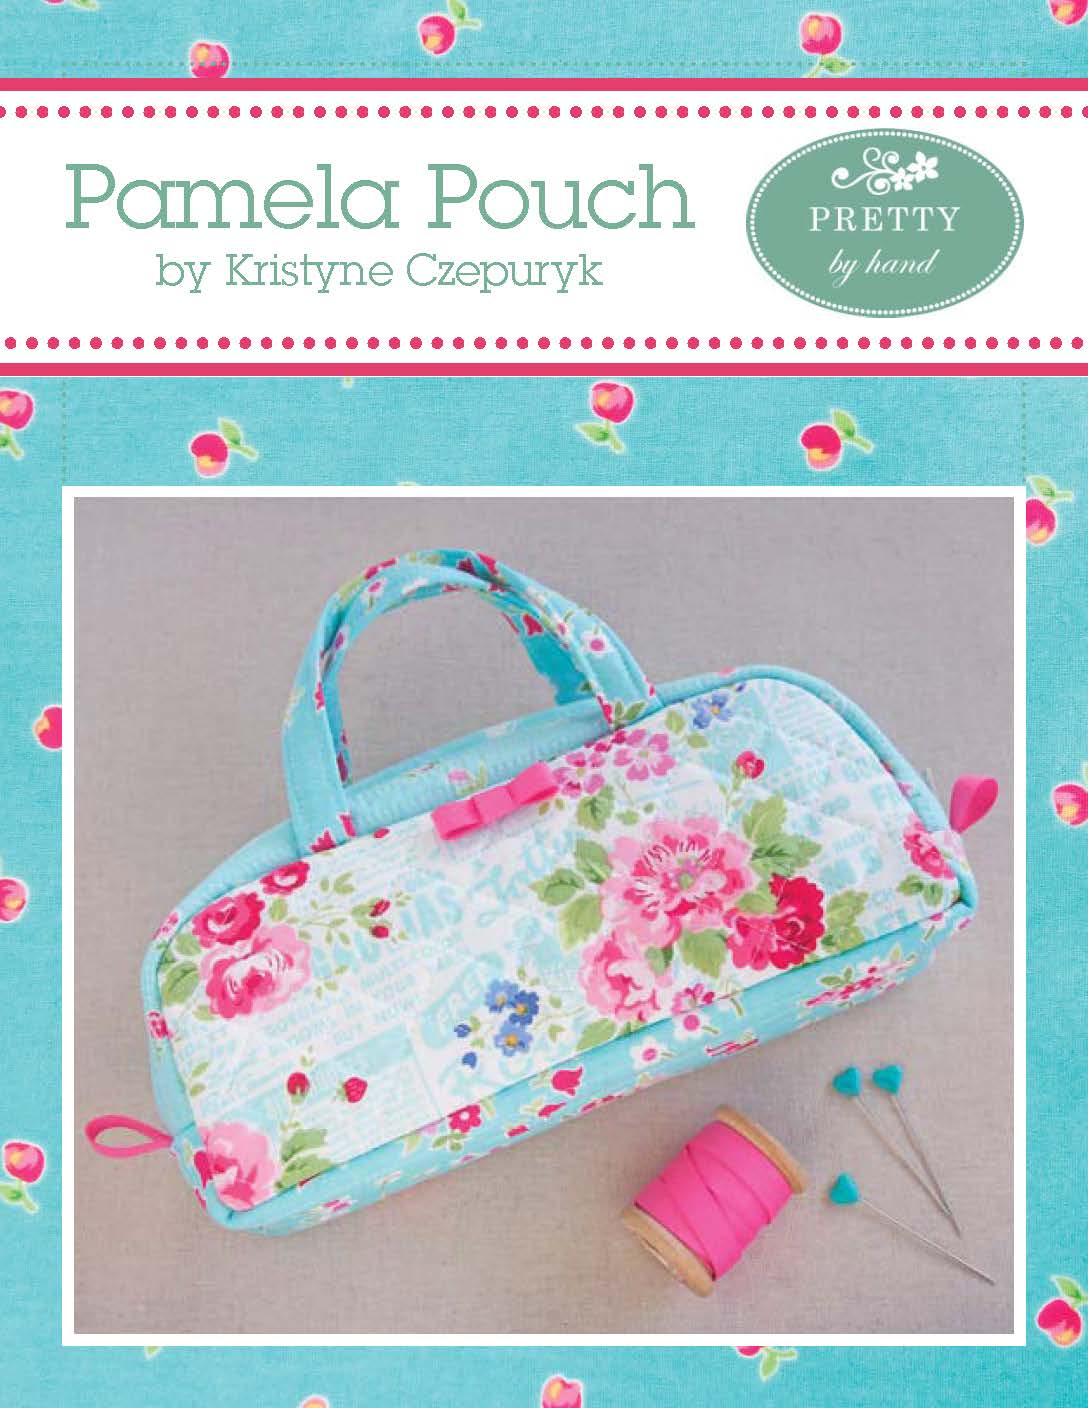
 The invitation to be part of this blog hop was more like a gift because it gave me the perfect excuse/opportunity to make what I've always considered the best project of all ... the sewing kit.
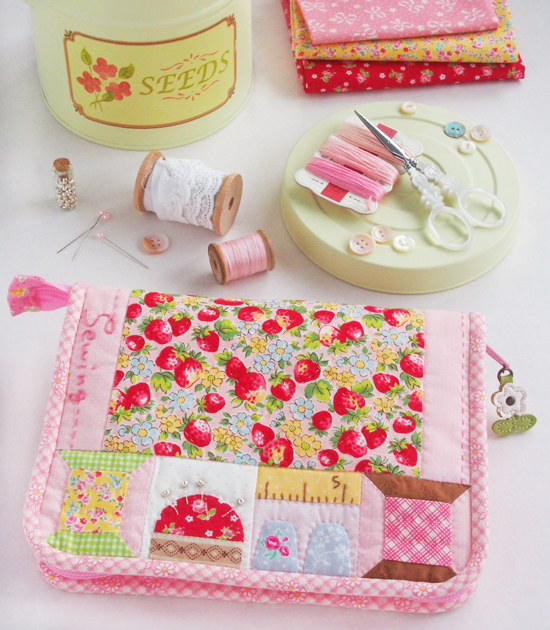
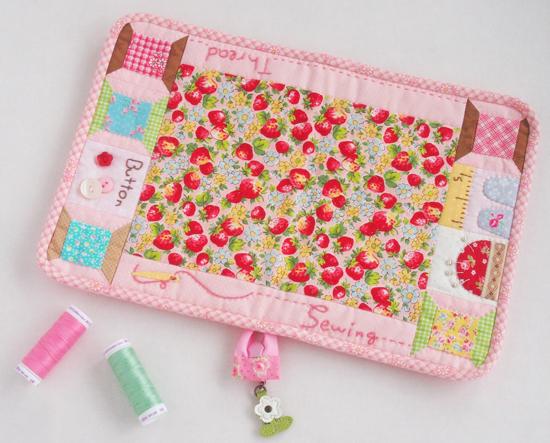 It is hard to pick a favourite ... all the projects are so pretty. But there's just something about this kit. I've spent a LOT of time studying it and enjoying the photographs.
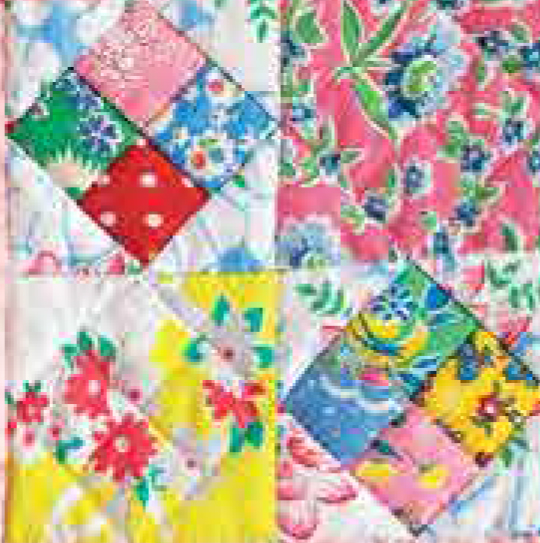
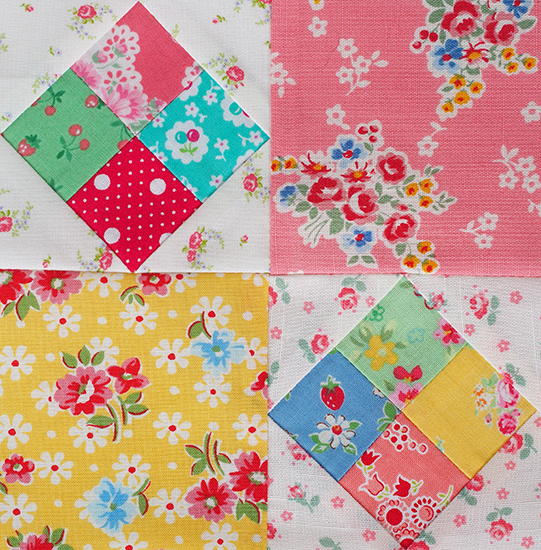
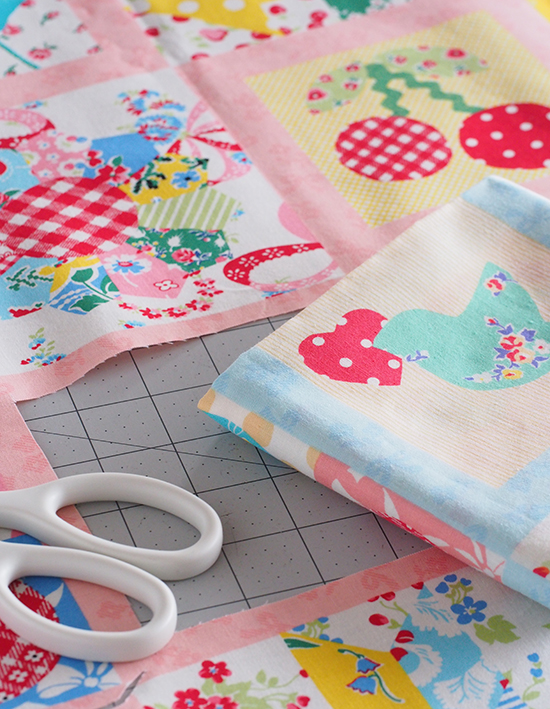
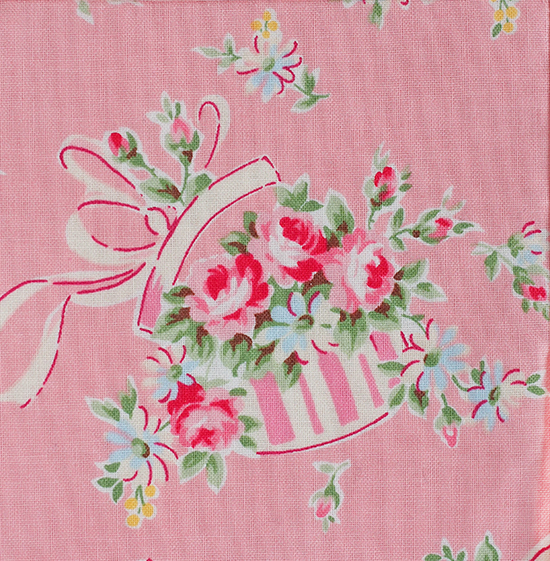
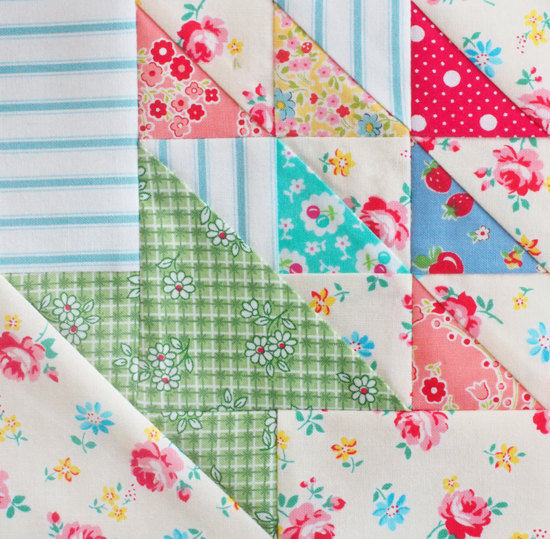
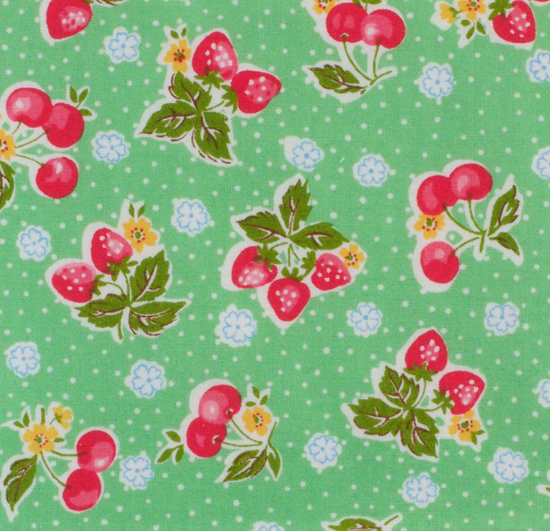
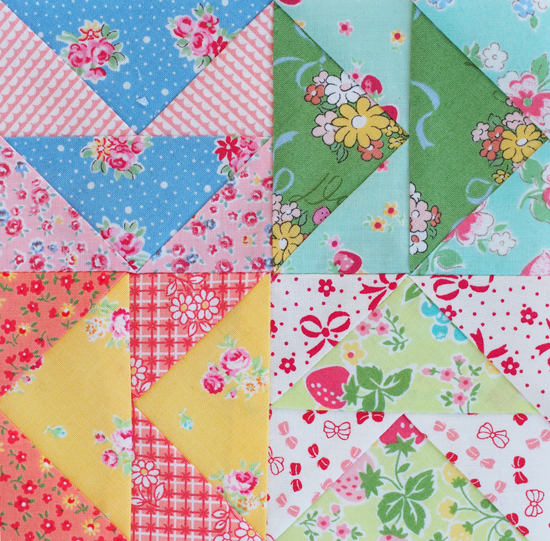
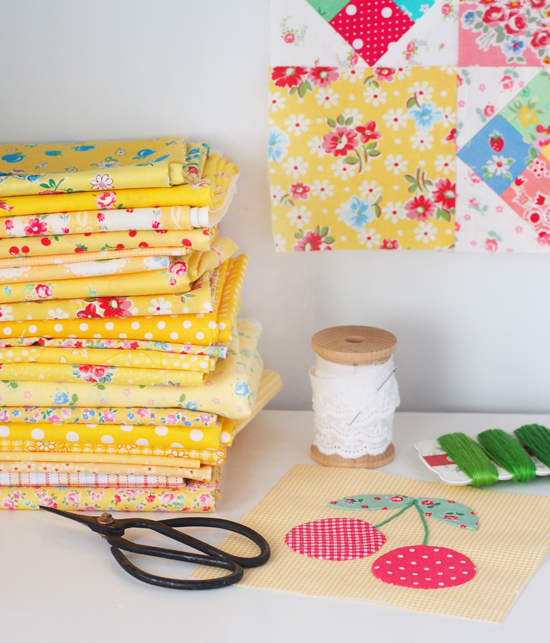
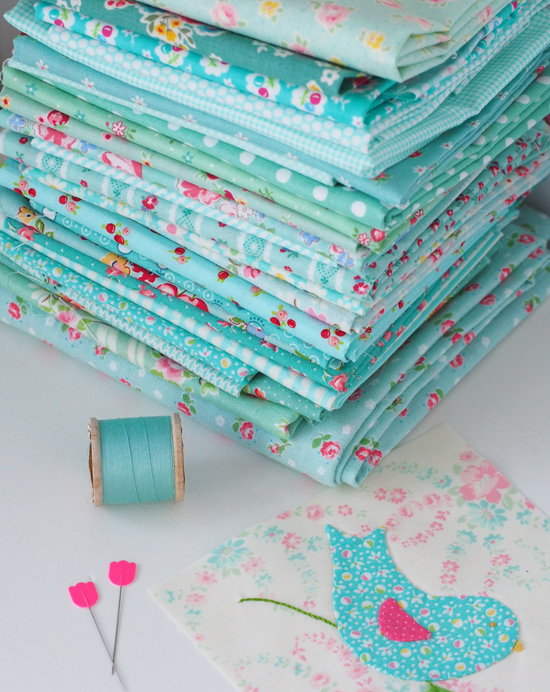
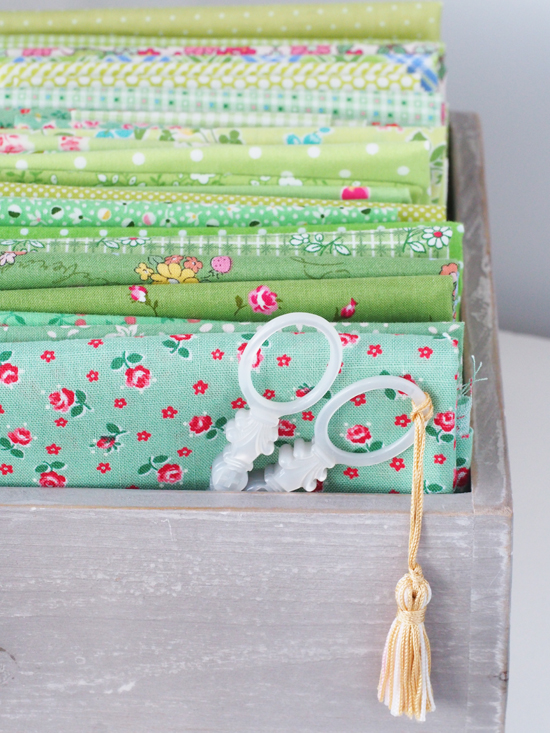
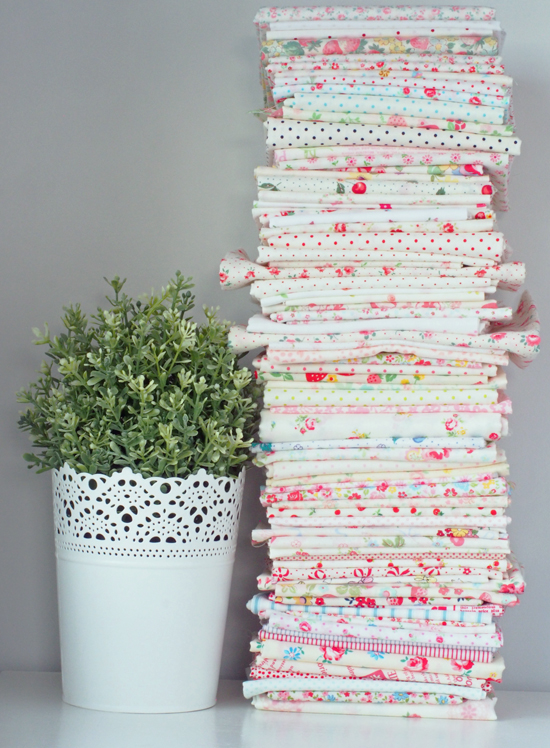
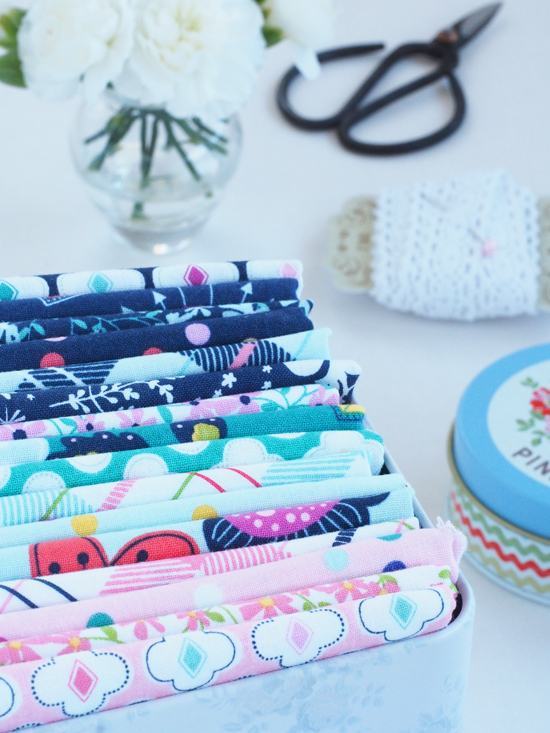
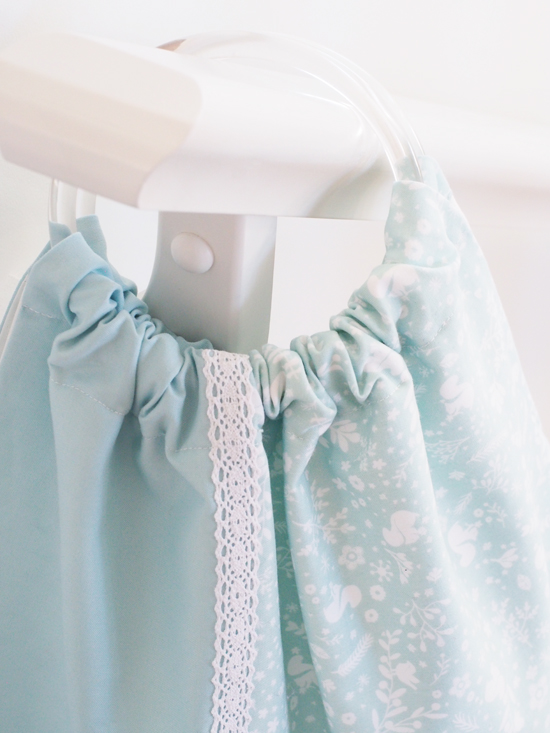
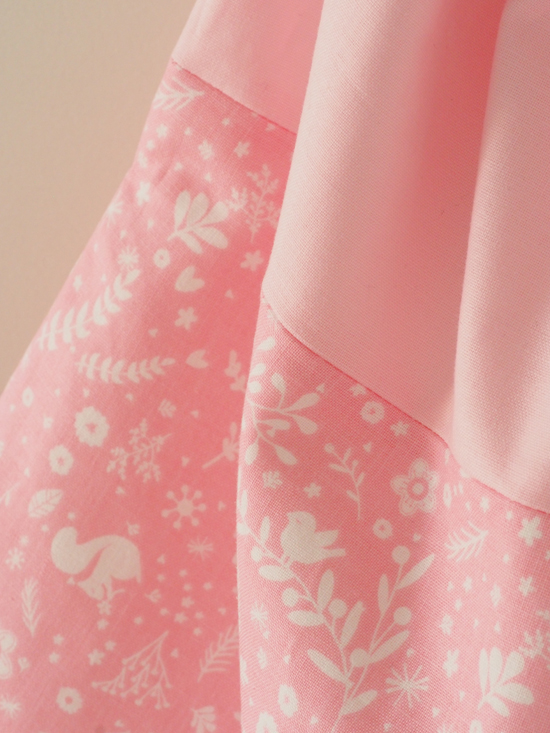
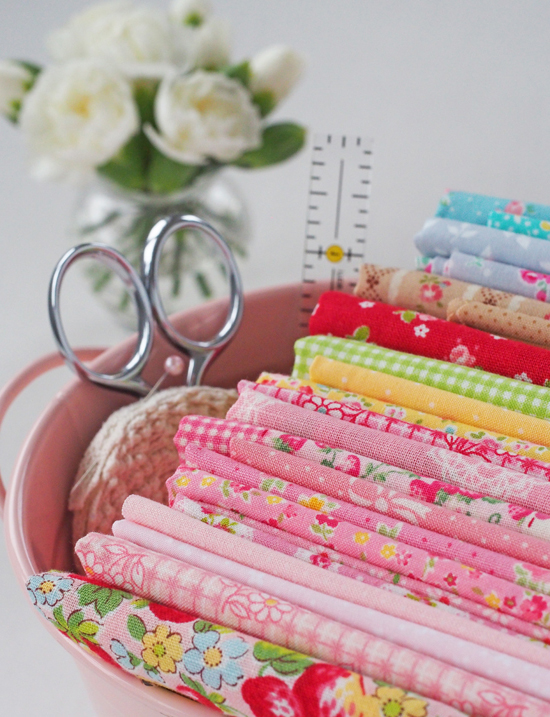
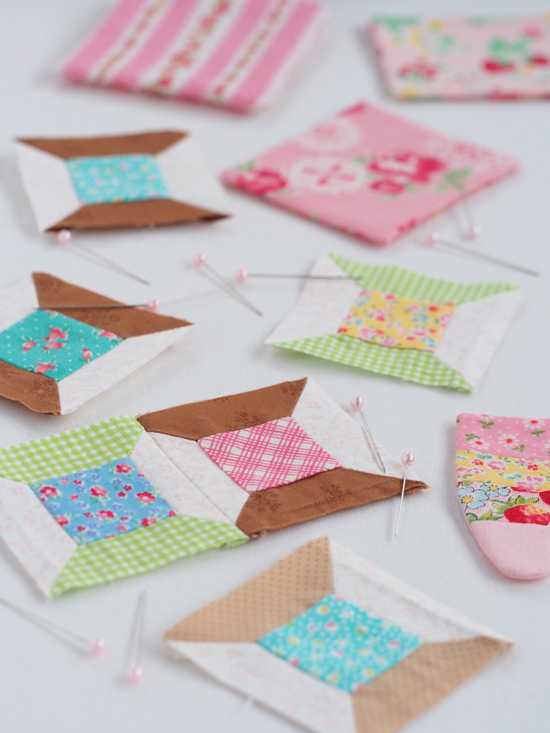
Fabrics ... I ended up using a whopping 23 prints for this project. But I probably auditioned 3X that. I heart my stash. :) Most of them are by Atsuko and a good number of them have been in my stash for several years. I followed many colour/pattern cues from the book. I normally wouldn't even think of using a green/white gingham for a spool. But that's what Atsuko used for hers and if it's good enough for her, it's definitely good enough for me.
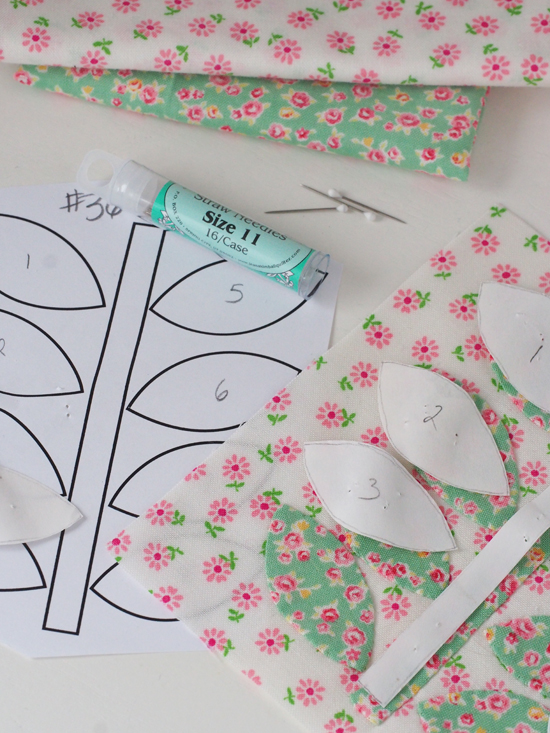
 Templates ... there are several templates for this pattern. If you're going to make this kit, please note that some templates have the seam allowance included and some do not. Don't worry, they are all clearly marked. The only "tricky" one is the pouch body. But graph paper is so awesome. Otherwise, it's super easy to simply add the seam allowance with your quilting ruler and rotary cutter. No stress. :)
 (Haha! I just noticed that I photocopied the templates from my Japanese copy. The new book is ALL in English, I assure you!)
In the interest of full disclosure, I had plenty of "do-overs" with this one. I was quite determined to make my kit as close to perfect as I could get. After wanting to make it for so many years, I wasn't about to settle for anything less than my best. Most of my redos were the result of my ever changing mind ... and too many fabric choices ... if there is such at thing ;).
I "committed" to the cover feature fabric 5 times and changed my mind on the cover border fabric two or three ... once after I'd made all the spools. But now I get to make something with the leftovers ... yum! :)
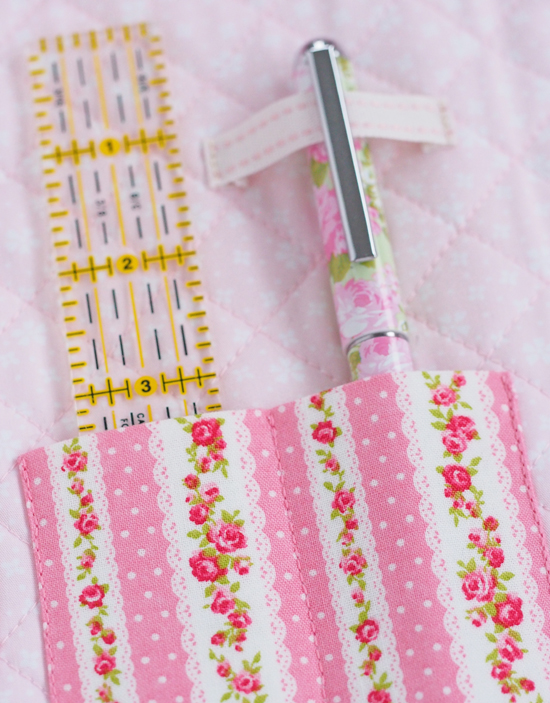
 I changed my mind 3 times for the ruler pocket fabric (and messed up once because I had the rectangle going in the wrong direction) but I know I finally got it right. I also found that the bit of lace for the pocket didn't look right with the lacy, vertical stripe print I chose, so I simply left it off (after much hemming and hawing, because you know me and lace ...).
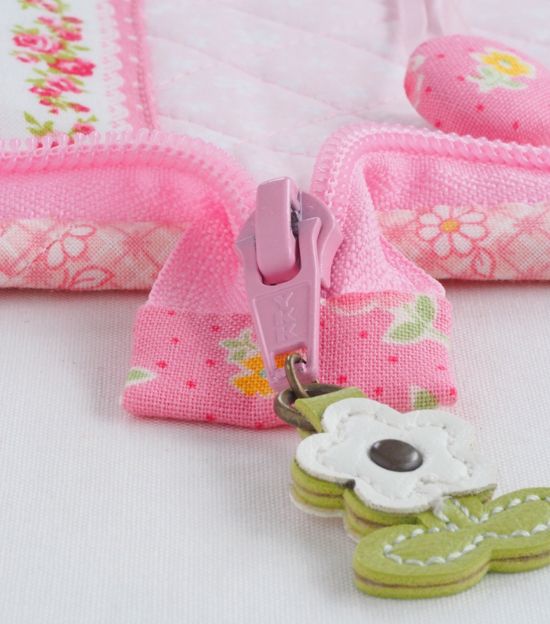
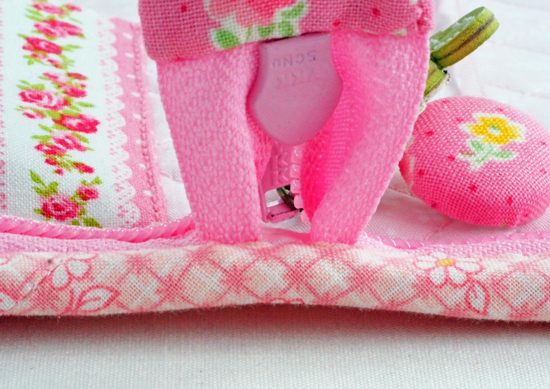
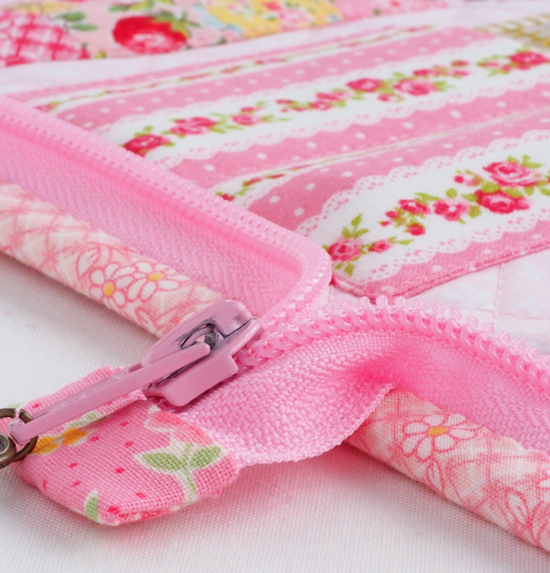
 I had to unpick and resew the zipper like 4 times too. If you don't get it exactly centered, the two sides close a bit wonky and the corners don't line up. Mine is still just ever so slightly off, but I finally had to leave that one to Jesus. ;)
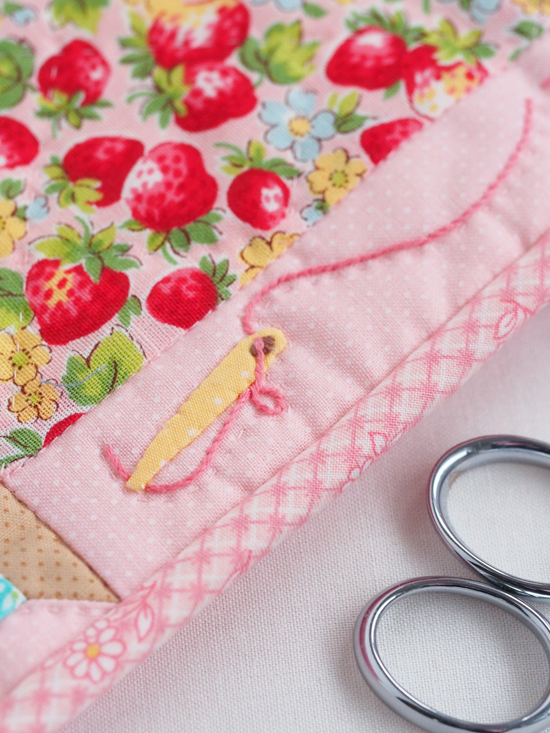
Also, just a quick note, the pattern doesn't explain how to deal with the closed end of the zipper when you're installing it. And there isn't really a clear photo of it in the book. It took me some fiddling around, but I finally got it. So here are a few photos of mine for reference, if you need it.
 And don't even get me started on the covered buttons! LOL!
 At one point I even asked my husband for his opinion. Of course he picked wrong, tee hee. But oh are they ever fun to make and I'm going to enjoy finding ways to use the spares.
I went with these ones because of the zipper. That zipper is an "ok" pink (not perfect, but it was literally the only option available), but it doesn't match anything else in the case. So I found this print (cue the angels) to help the zipper pink play nicer with everything else.
 That said, all my nonsense is really one of the most fun parts of making - for me. It's not a waste of time. I love playing with fabric. I enjoy that balance of technical, creative, and emotional exercise that comes with making. I like discovering what works and what doesn't - according to my eye. And I'm happy to say that at the end of the day, I wouldn't change another thing about my beautiful sewing kit.
Speaking of changing things, I did alter the pattern a bit to suit myself. Nothing major, just a few little things.
On the cover, I flipped the direction of the word "Sewing" so that it would be right side up when the kit was closed. And I prefered the border edge with the pincushion so I switched the borders.

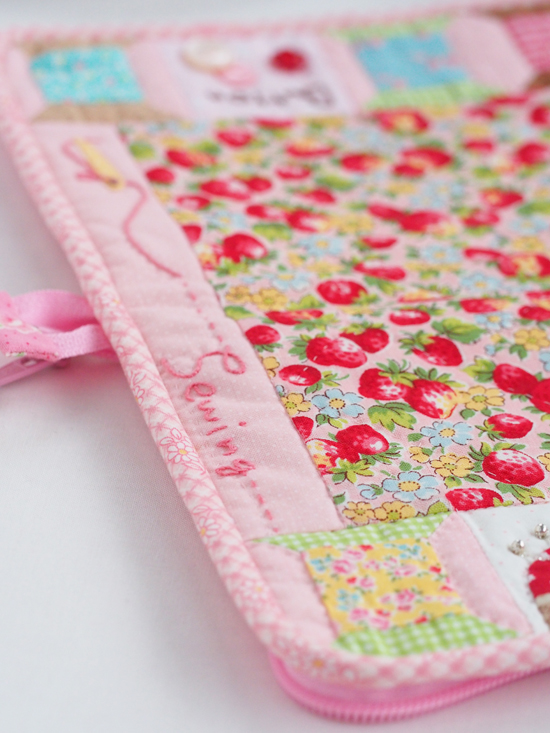
 I quilted the inner lining because I know that after time and use, the center fold line will get creased. Quilting the layers together will minimize that inevitable crinkle.
 My scissors don't stay put when I open and close the kit. I made my scissor pocket slightly taller to accommodate my 4" gingher scissors, (they are the best looking pair I have for this kit, plus they work great for fabric, as well as thread when I'm on the go) but that didn't quite solve the issue. So I'm going to remove the ribbon tab and replace it with a tie for the handles.
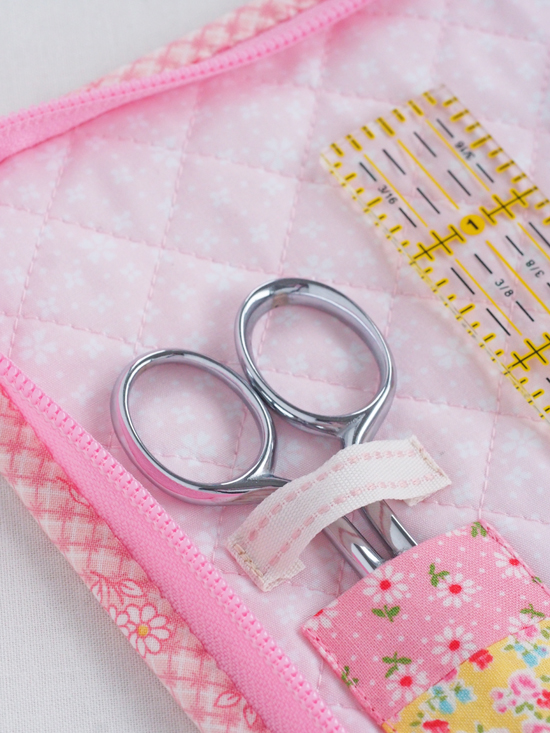
I was having a hard time making the corners on the scissor keep and ruler pocket nicely (perfectly) squared. So instead of making one front and one back of each piece and then sewing around, leaving an opening, and turning right side out ... and then trying to make the corners perfectly square, which I rarely am able to do even when I clip the corners and trim the seam allowance inside ... I did this:
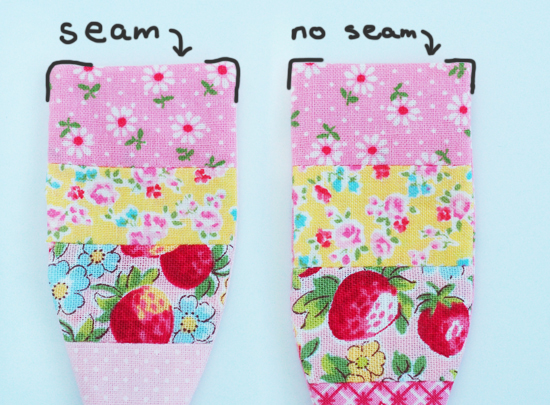
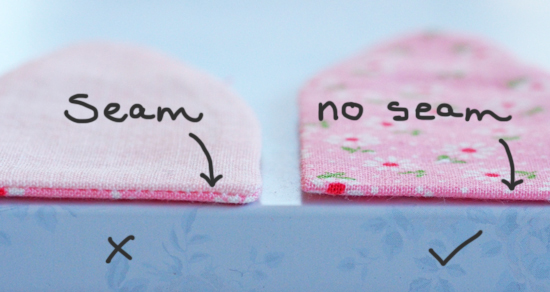 Worked like a charm.
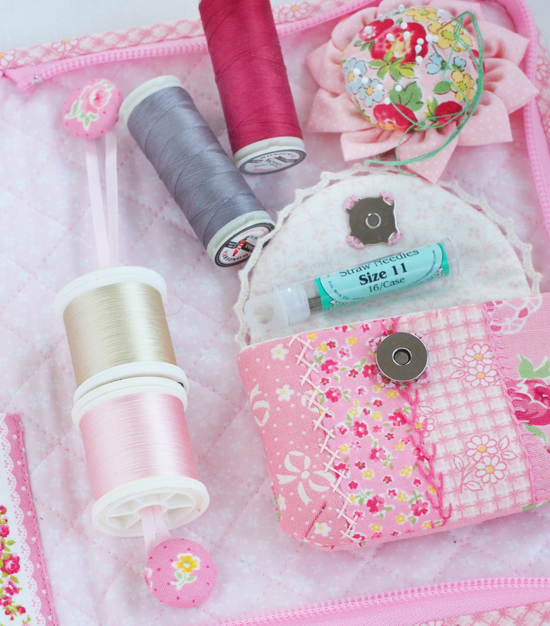
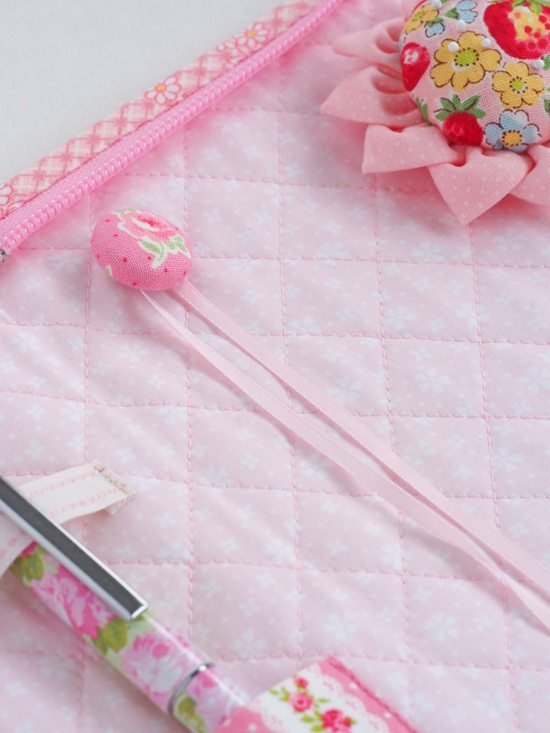
Instead of buying a strip of leather for the thread holder, I used a satin ribbon from my stash.
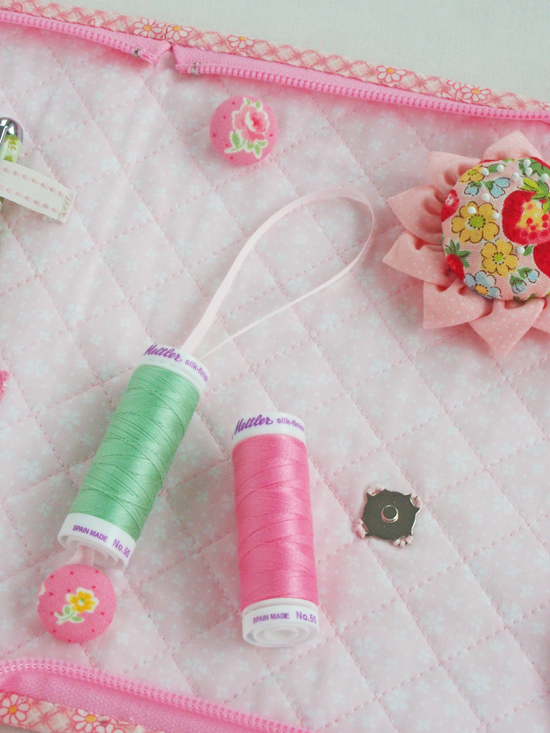
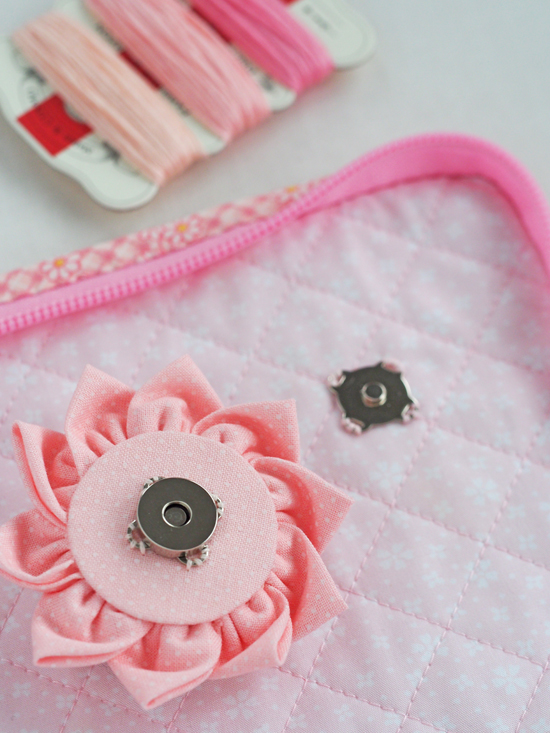
 The pincushion is supposed to be held in place with velcro (loop and hook fastening). I've never been a huge fan of velcro. Stuff gets stuck to it and as a mom, I now associate the sound of velcro separating with little people's shoes. LOL! I used a sew-in magnet instead. The pattern also calls for plastic to form the pincushion bottom. I didn't have any on hand, but I did have some kraft-tex. It worked great. I'm thinking you could also use thin cardboard like from a cereal box.
One note about the pattern - the book doesn't include how much to overlap the petals on the pincushion when you're gathering them together with a running stitch. My overlap is 3/8".
Oh, and I stuffed my pincushion with ground walnut shells (you can find it in a pet store under reptile bedding ... gross, I know) to make it nice and hard.

I used a sew-in magnet for both the little pouch closure and the fastener to hold the pouch to the kit. I figured that pressing on a snap would be cumbersome if there was - for example - a thimble in the pouch. But a magnetic snap is easy peasy to deal with.
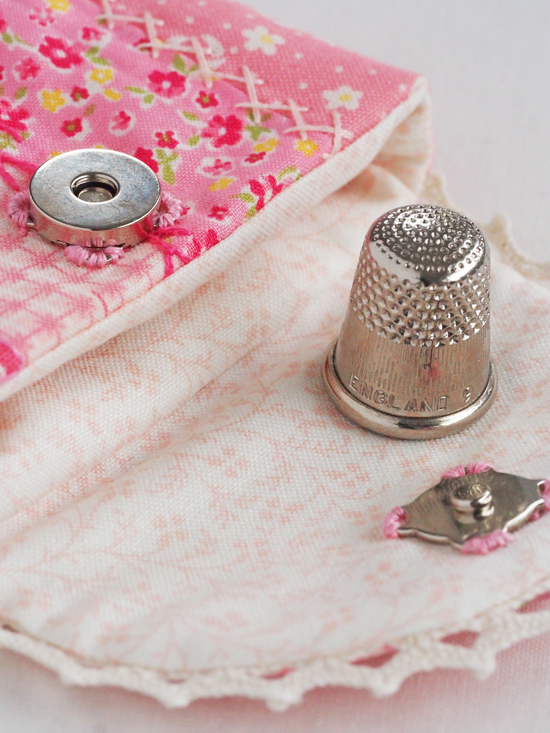
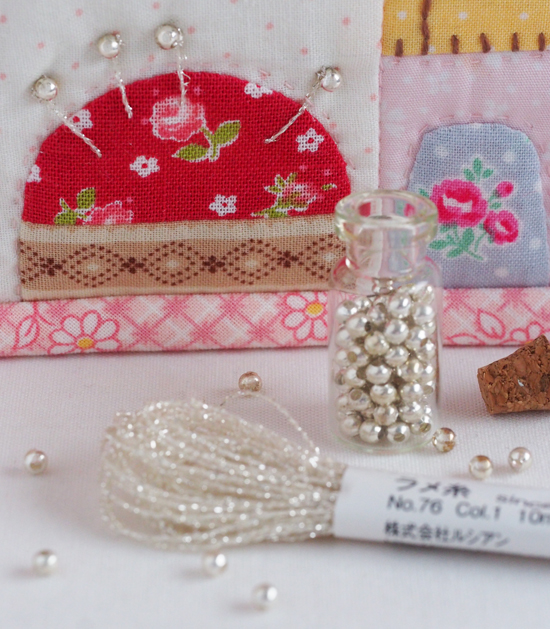
 The literalist in me needed to have silver pins in my pincushion and these ones make me deliriously happy! I used this fabulous COSMO silver thread. I know, I know, metallic thread is NOT fun to stitch with, you're probably thinking. And before I used this product, I would have agreed with you whole-heartedly. But this stuff is different. I don't know why or how, but it's a total dream to use. Honestly. And then finding these silver beads that I bought years ago for some long forgotten project - probably something I saw in a Martha Stewart magazine once upon a time - was like finding a pot of gold silver at the end of a rainbow! Don't they make the perfect pin heads? I started looking for pink beads, but I found these hidden in the same box. (Not going to tell you how long it took me to even find my bead stash ... ugh!) But it is moments like these when I nod my head in thanks to the younger crafty me who wasn't afraid to try new things and managed to stock my craft room with many treasures that really do "come in handy some day".
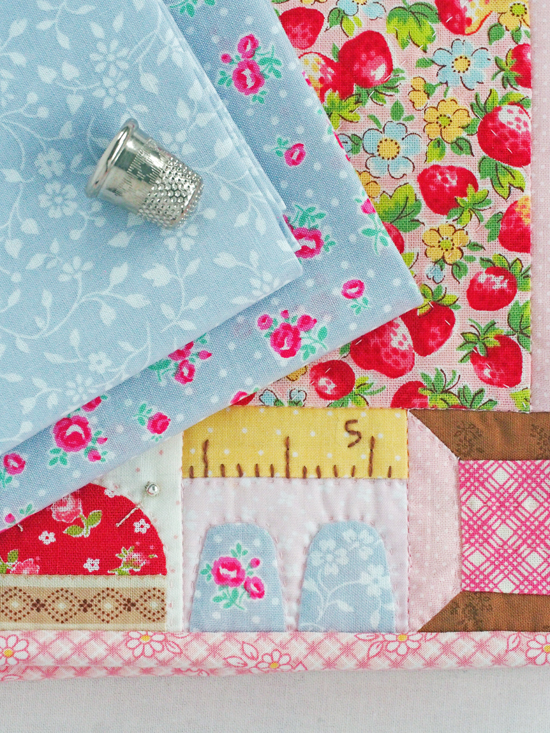
 The same literalist tendency led me to these perfectly silvery/gray prints (Lecien's Flower Sugar) for my thimbles. We all know someone who has/had one of those super cool china thimble collections, right? For me it was an aunt, who ironically didn't even sew. Well, that's kind of the look I was going for when I fussycut the fabric for this coordinating pair.
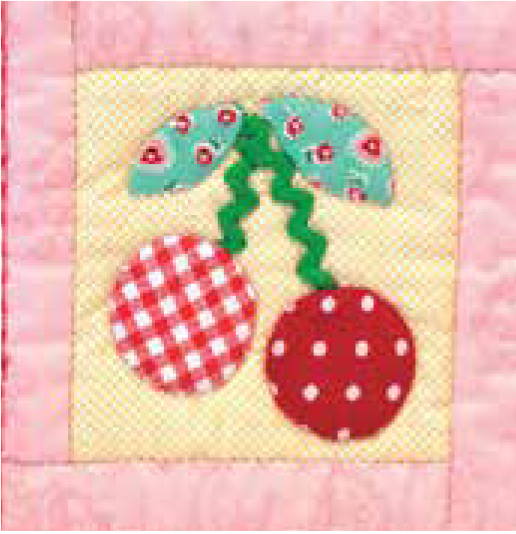
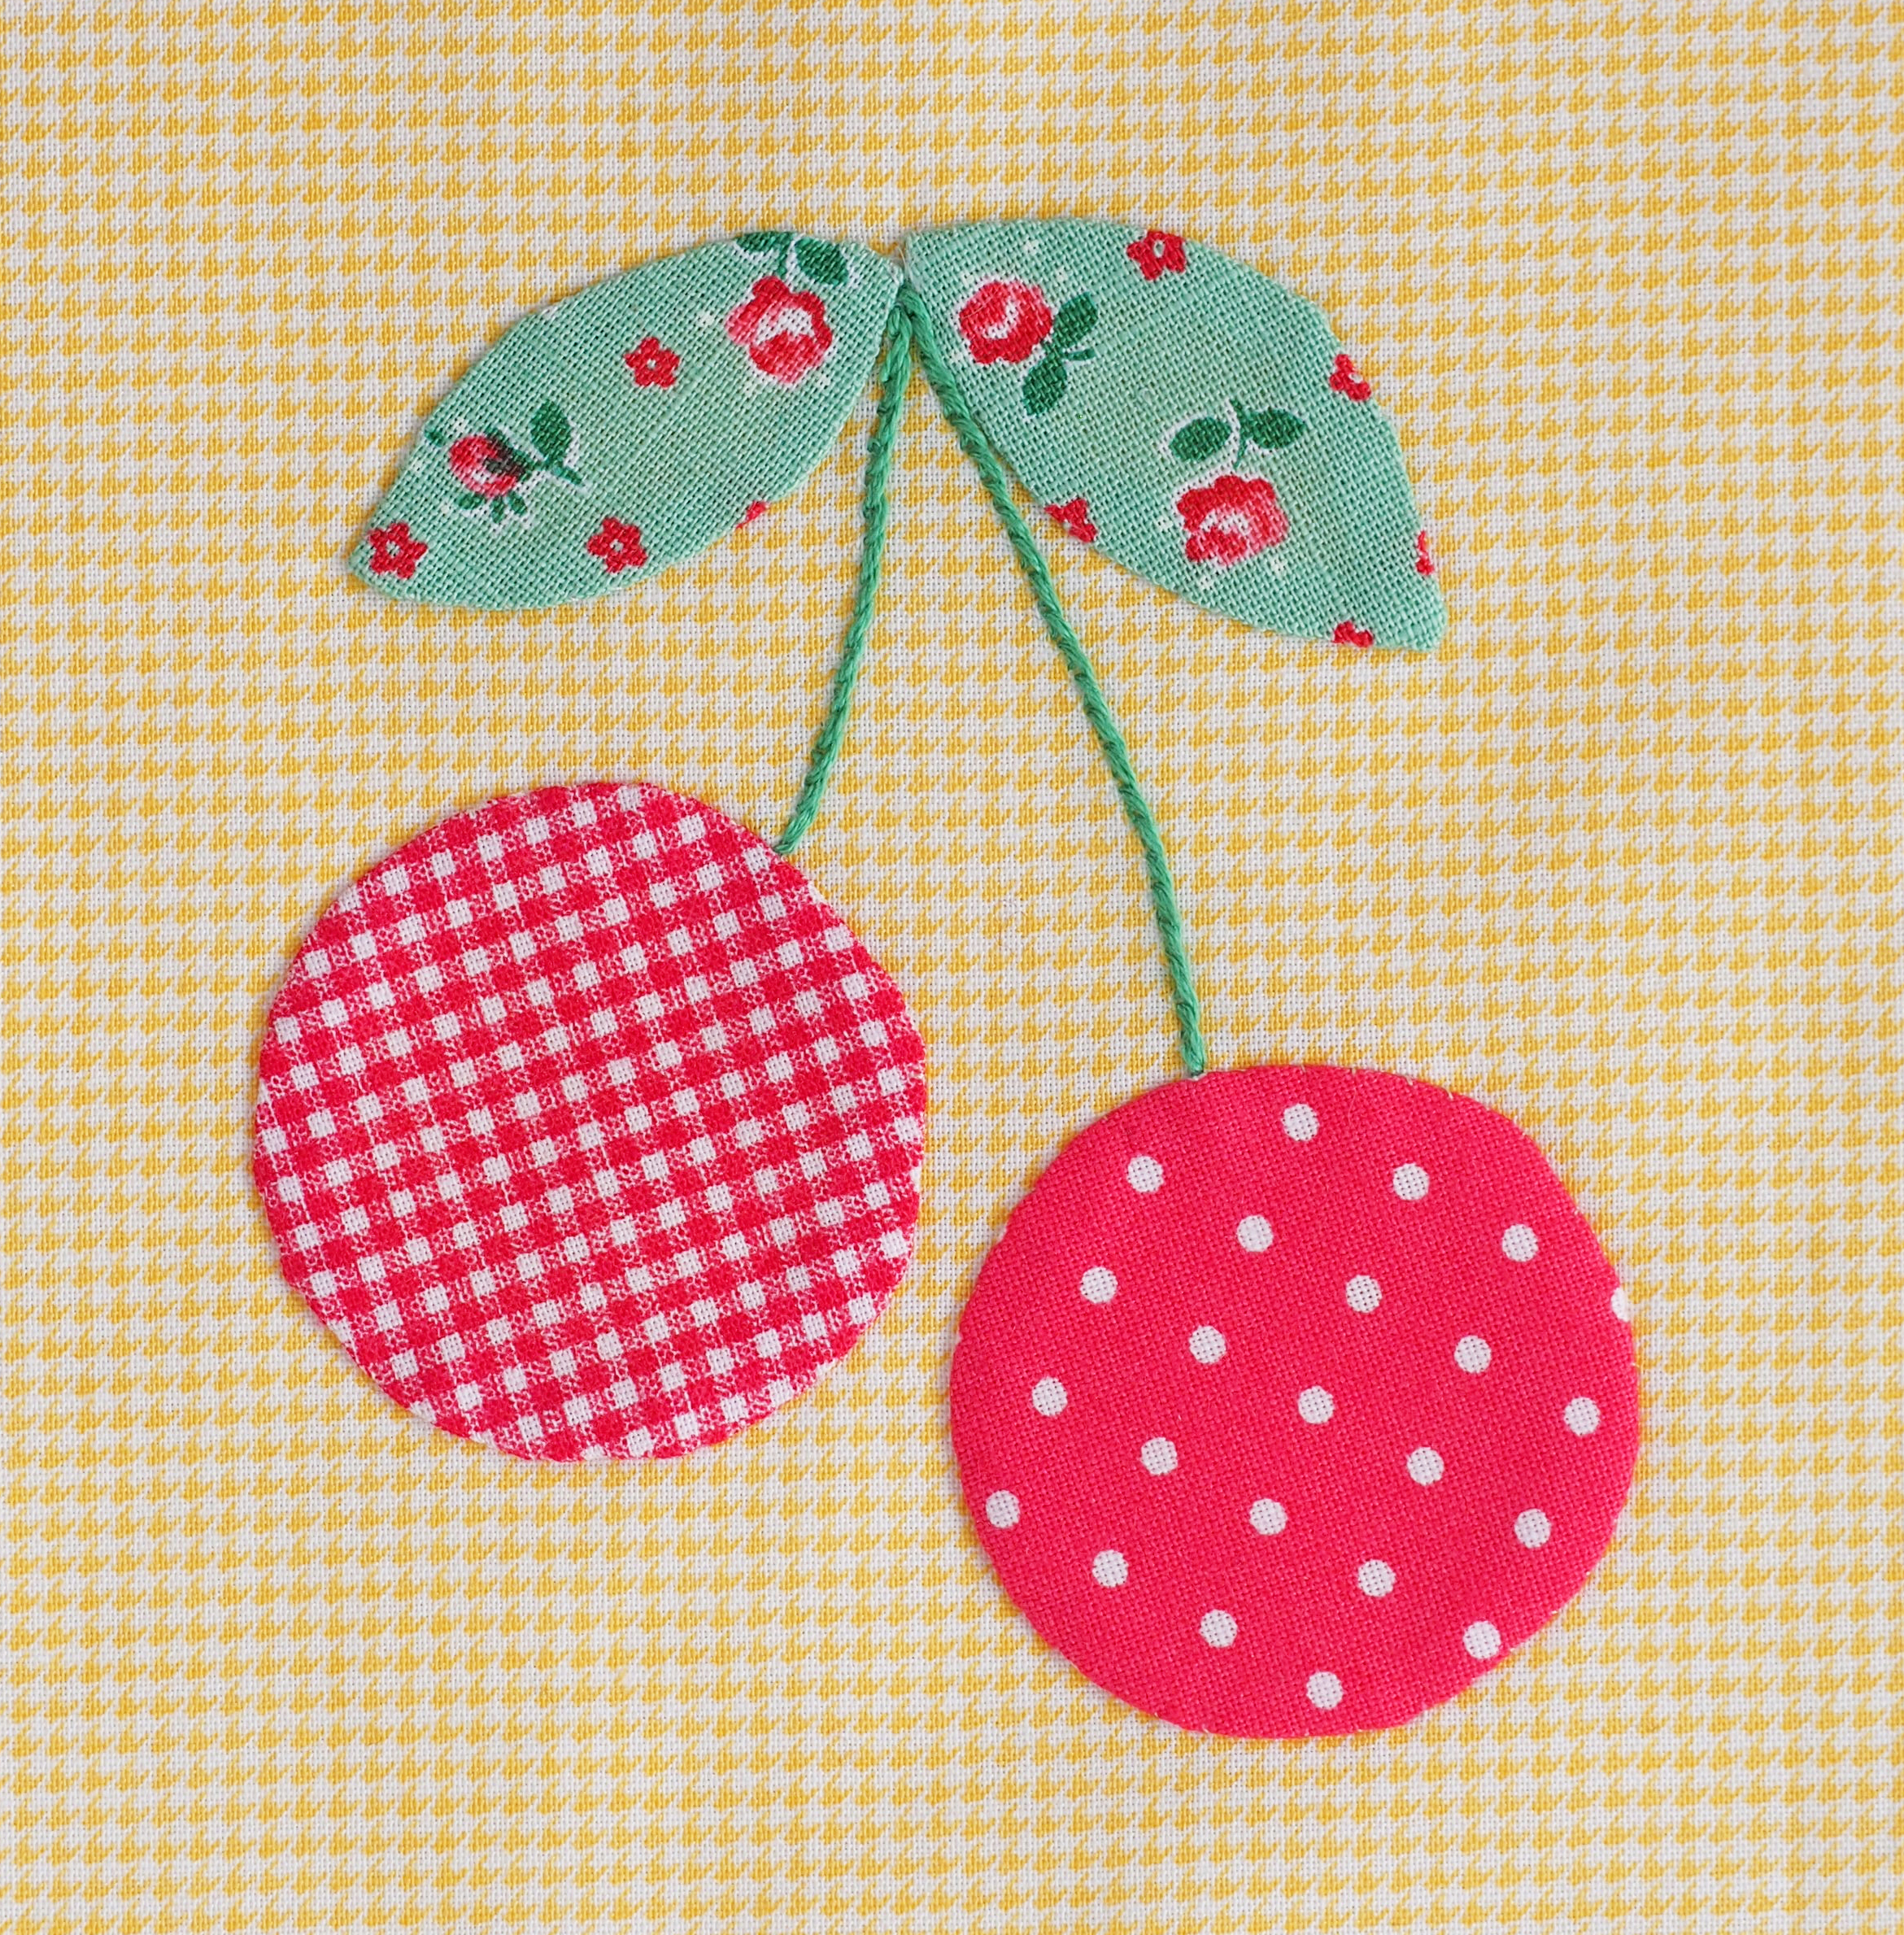
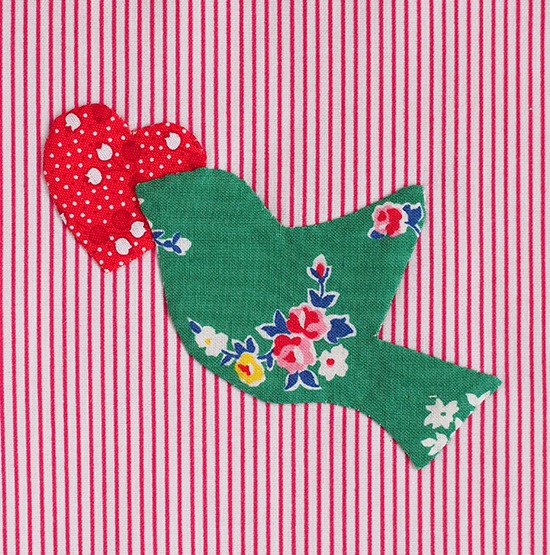
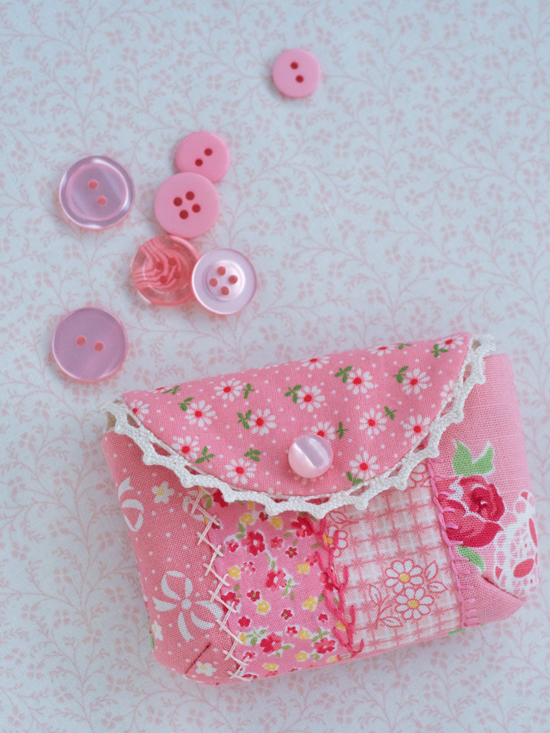
 These simple buttons are the result of a ridiculous number and combination of auditions. Lordy. I originally had a red heart button that ... ok, it was perfect. But then again, it just wasn't quite right for some reason. Can't explain why. No logic, just a feeling. So on the 147th dig through my button box, I came across this sweet little flower from my daughter's red cardie (circa kindergarten, sniff!) and that makes me so happy to have it here now.
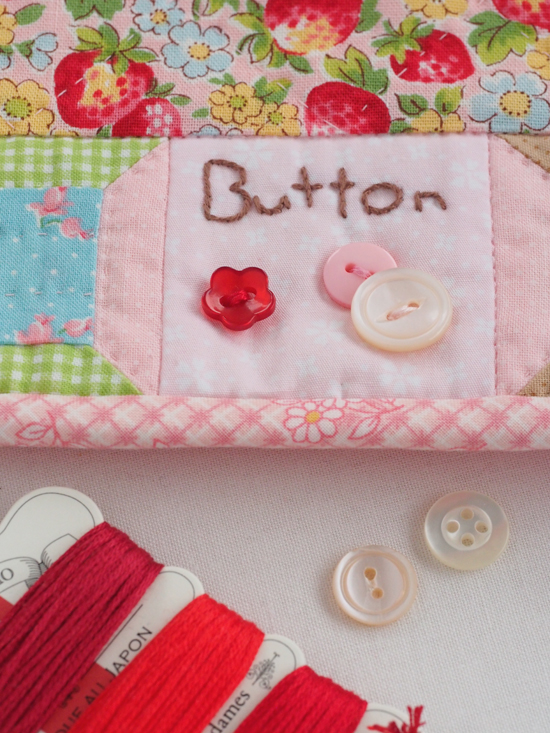
Another tip: Add the buttons after you've sewn the cover patchwork together. The buttons can make it difficult to sew perfect 1/4" seams. Just sayin'.
Oh, and one more thing, the little flower zipper pull you may be wondering about? Sorry, but if you ask me where to get one, I am of no help. I bought it at Quilt Market 6 or 7 years ago and I can't remember the name of the vendor. If you want to find something like it, I recommend looking for leather zipper pulls on Etsy or eBay. But it really is the sweetest little accessory, isn't it? If anything I've ever made deserves such a thing, it's definitely this kit!
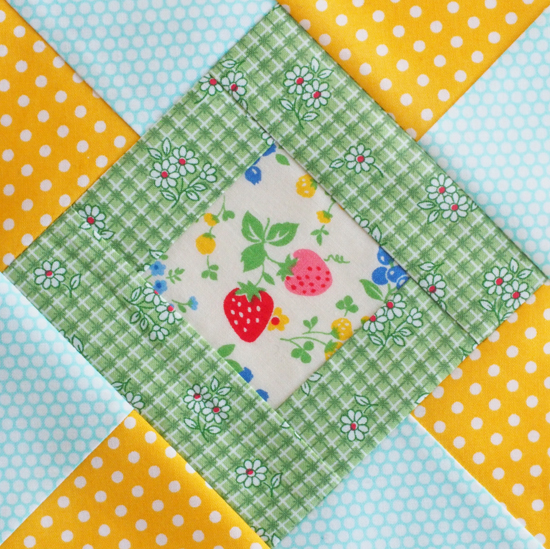
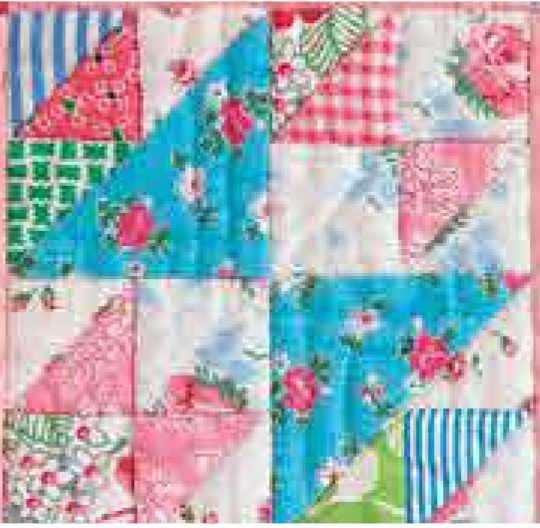
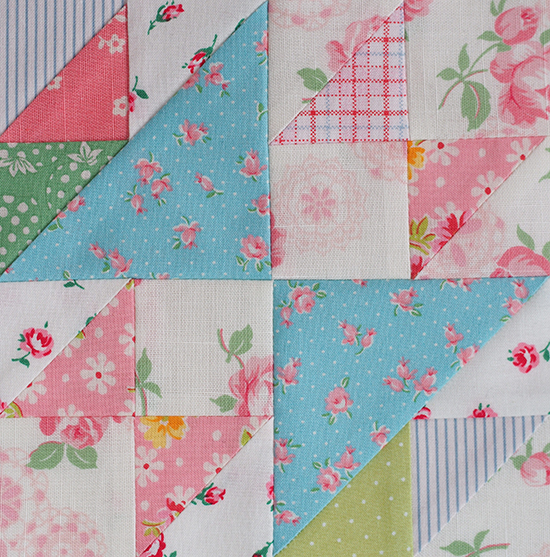
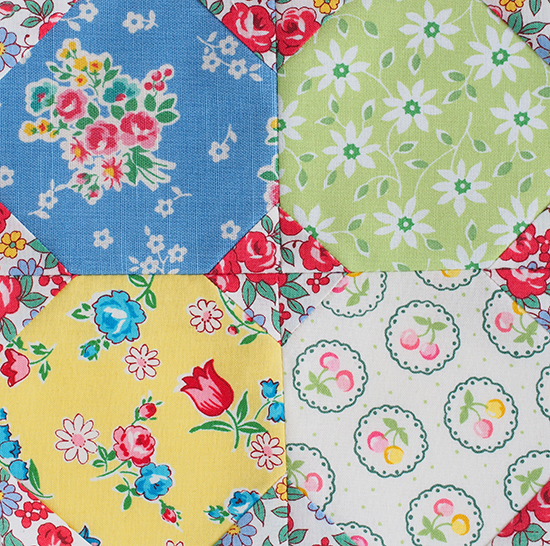
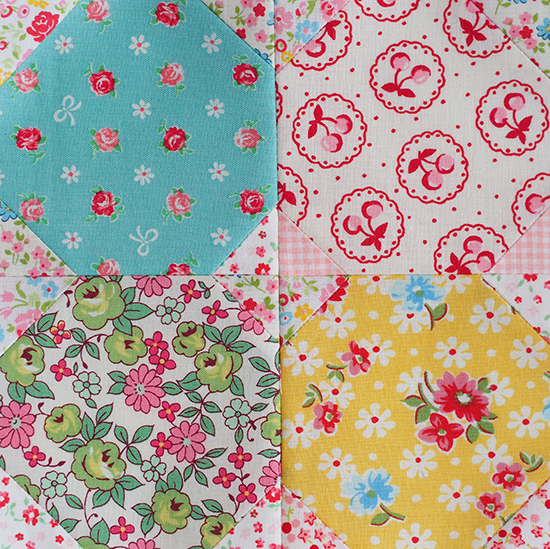
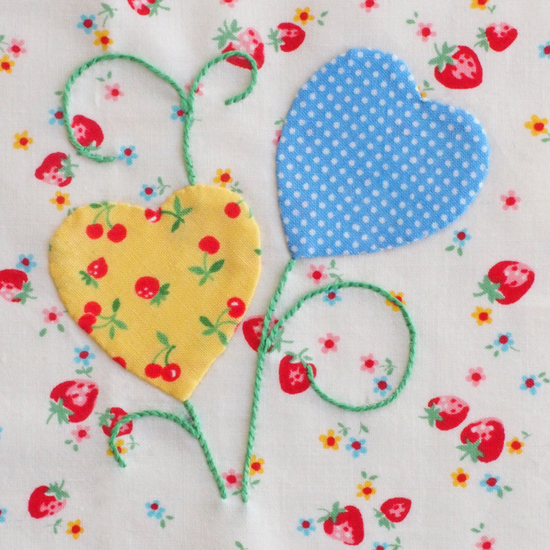
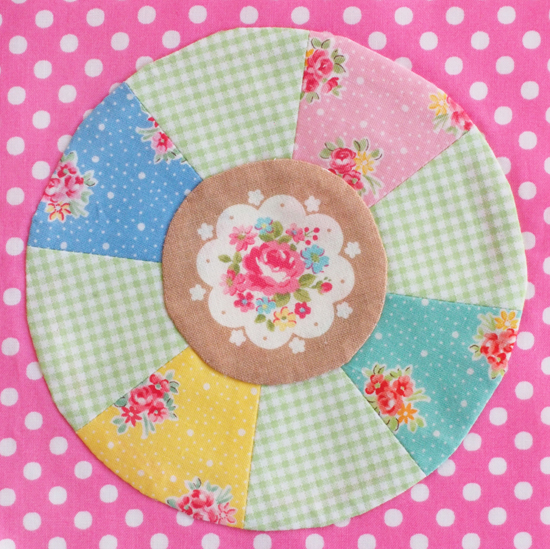
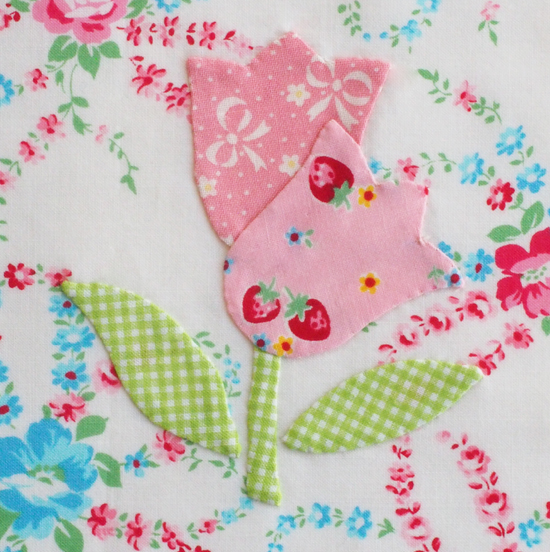
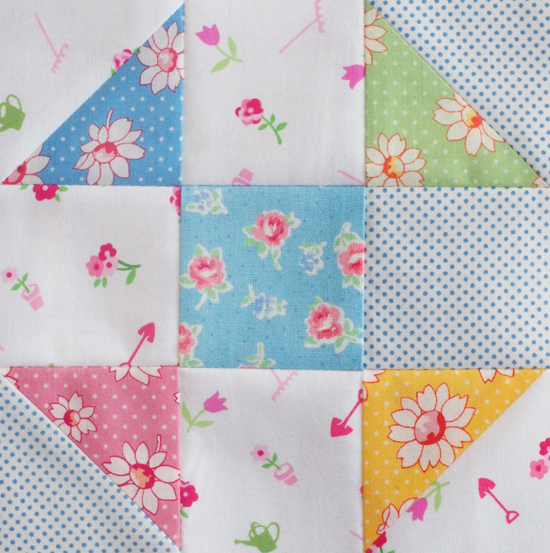
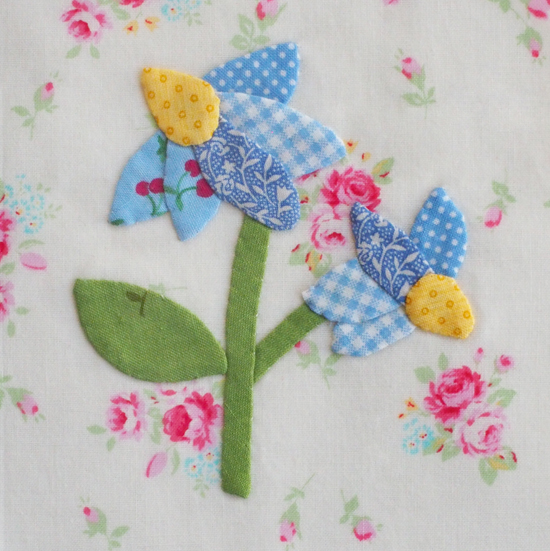
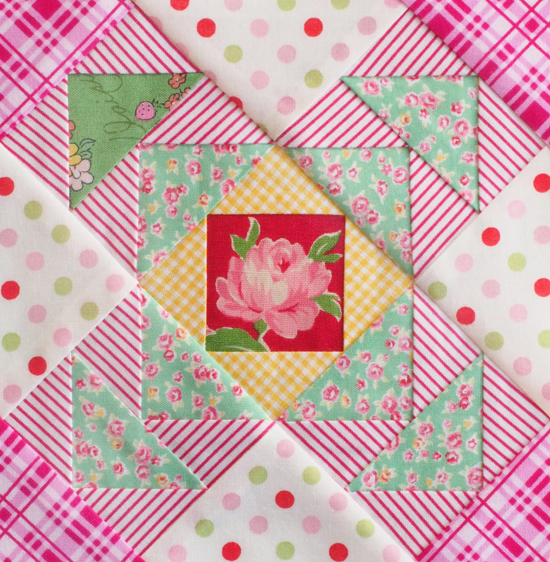
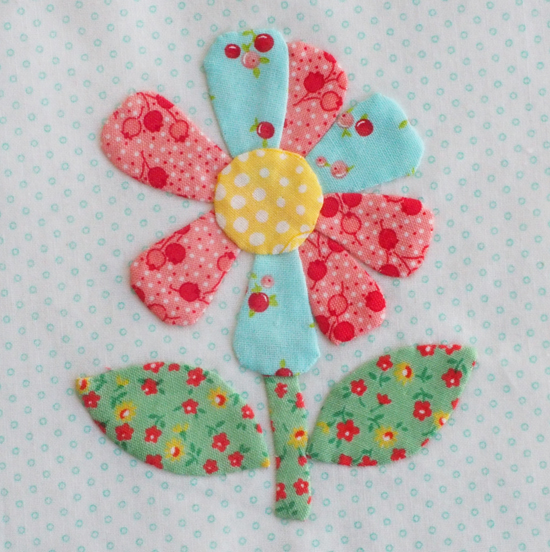
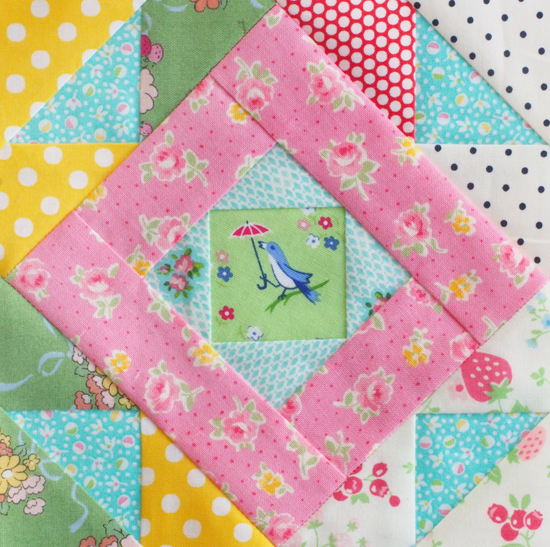
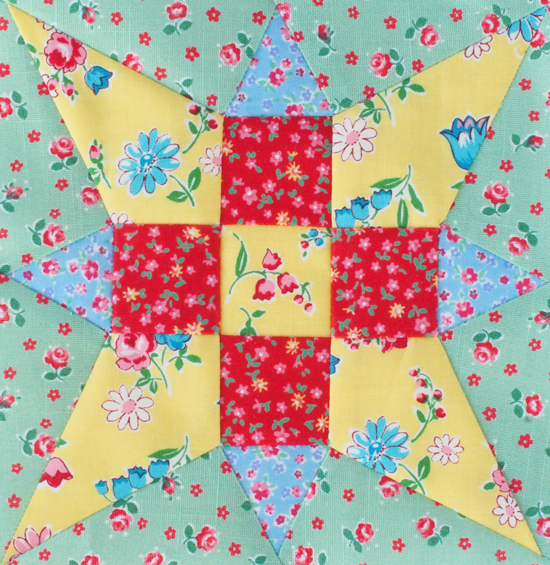
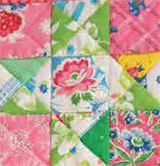
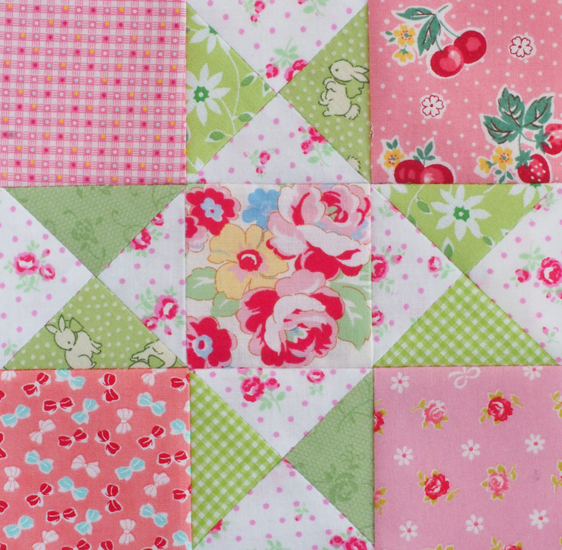
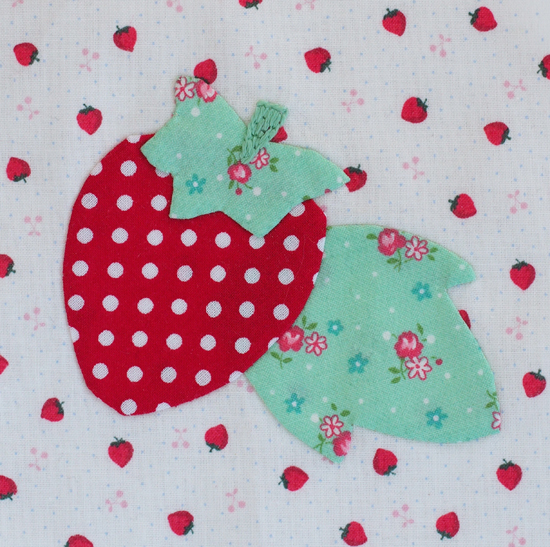
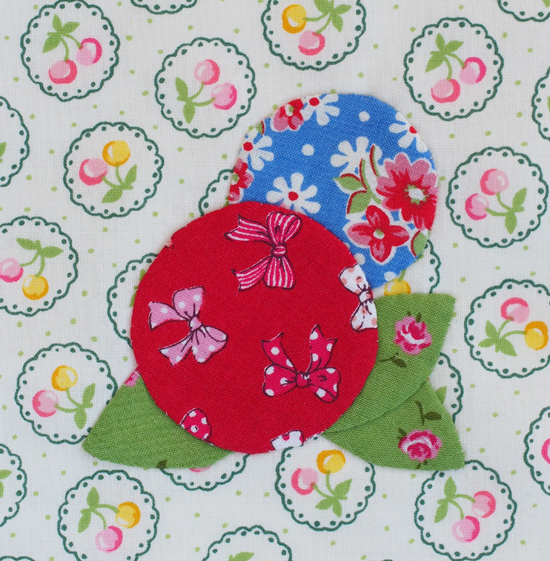
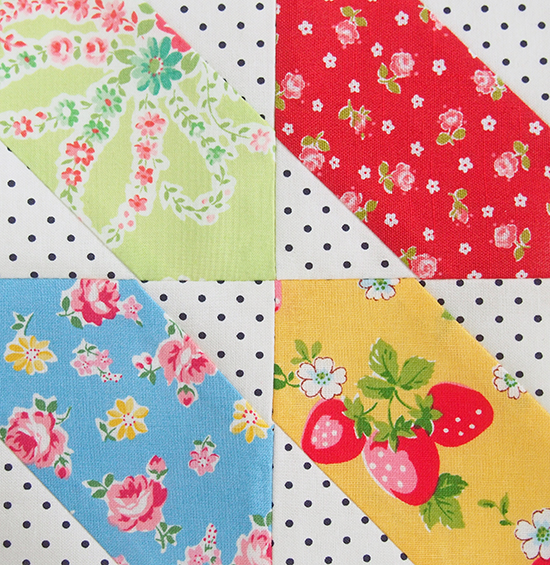
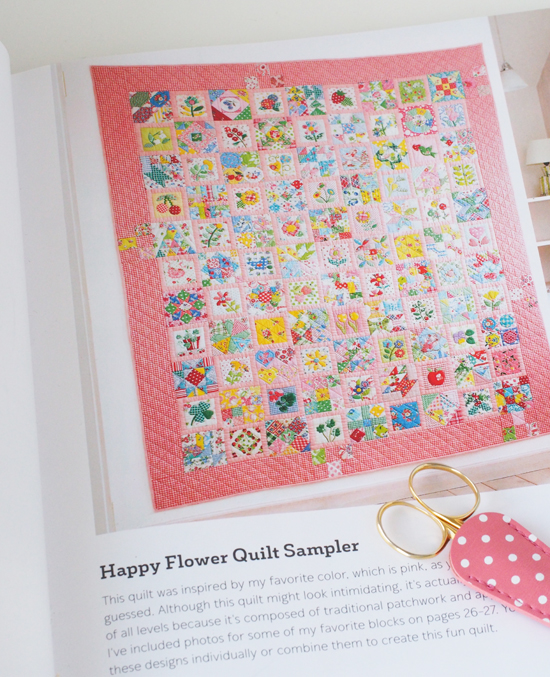
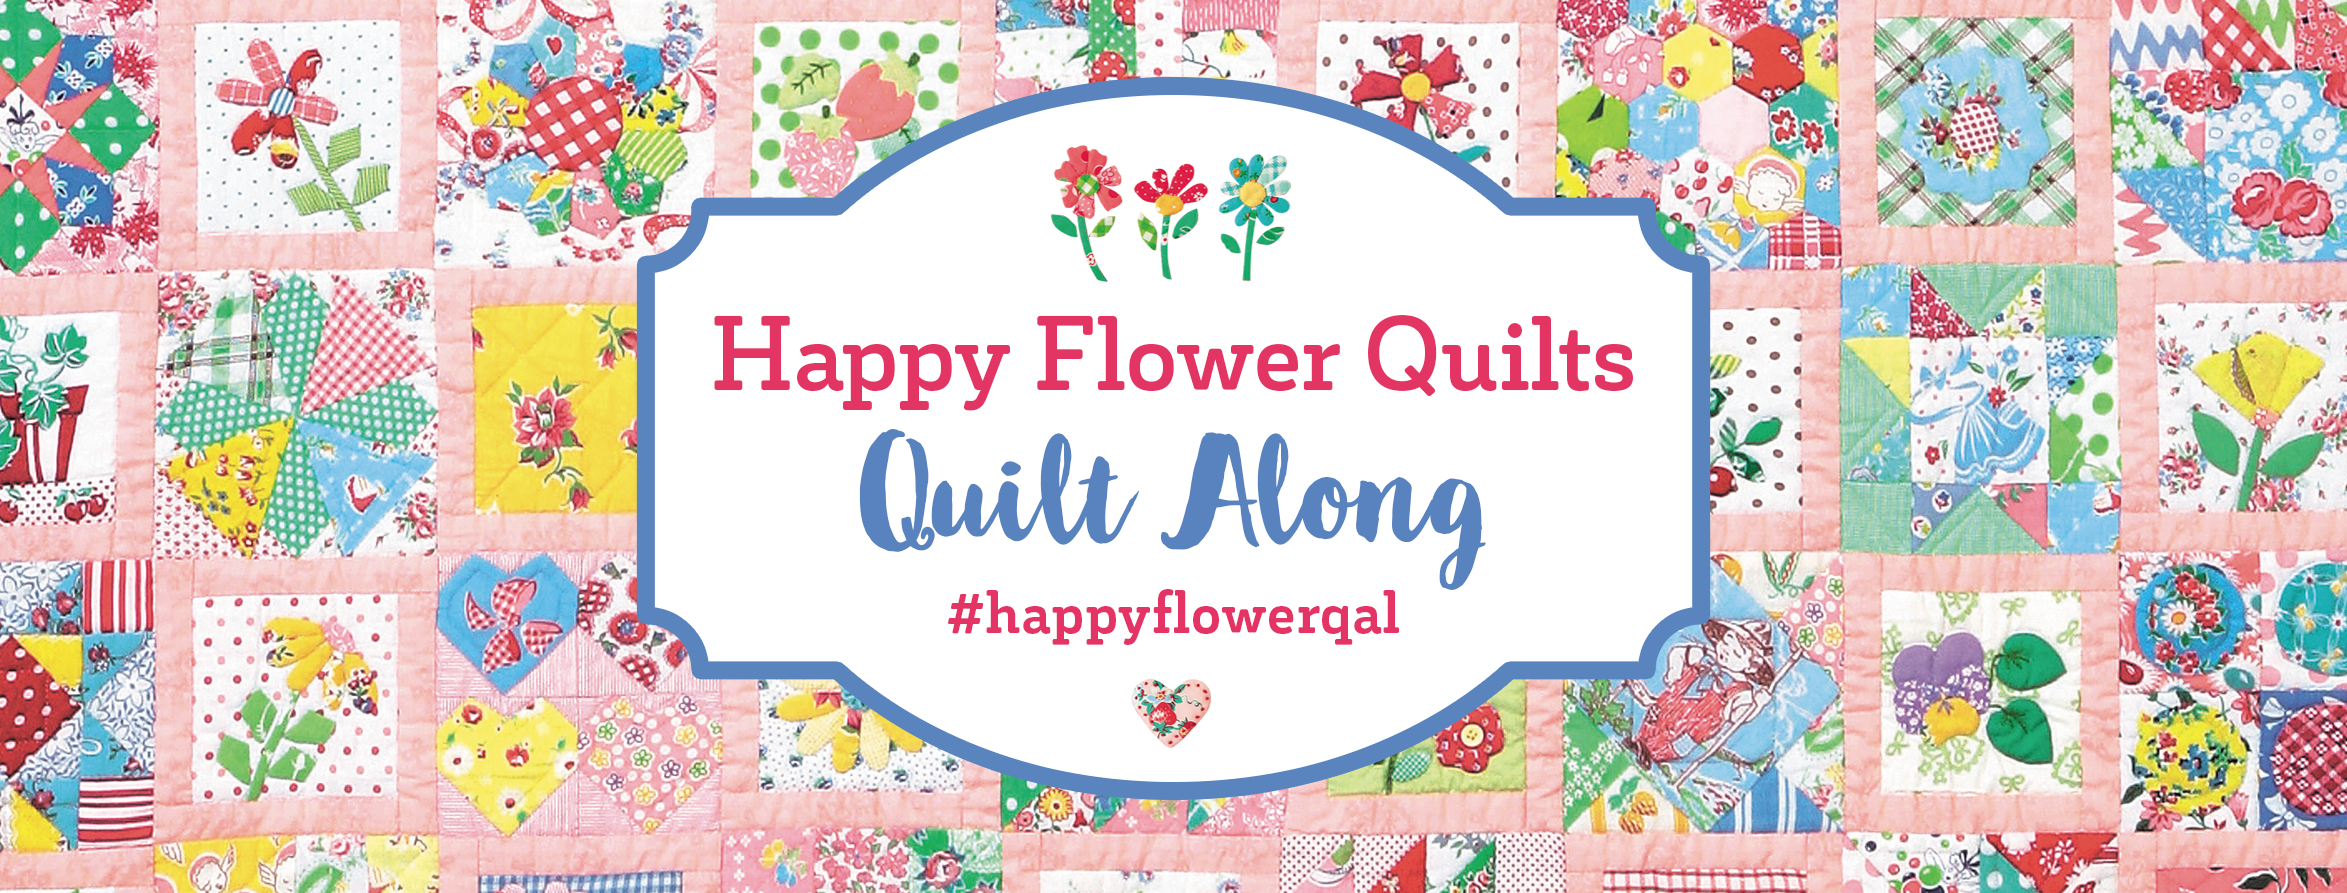
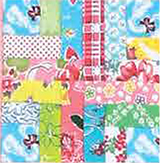
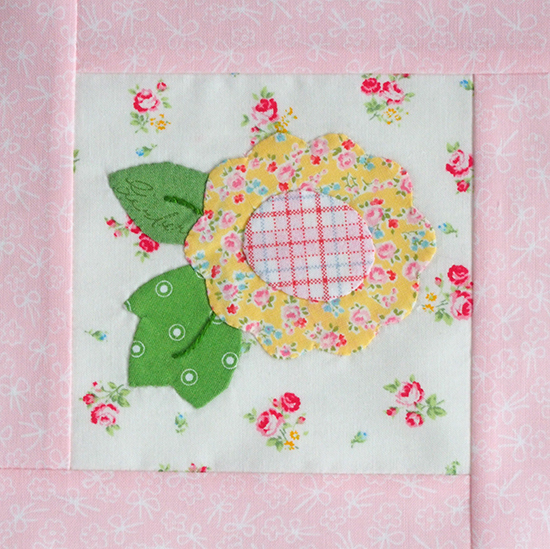
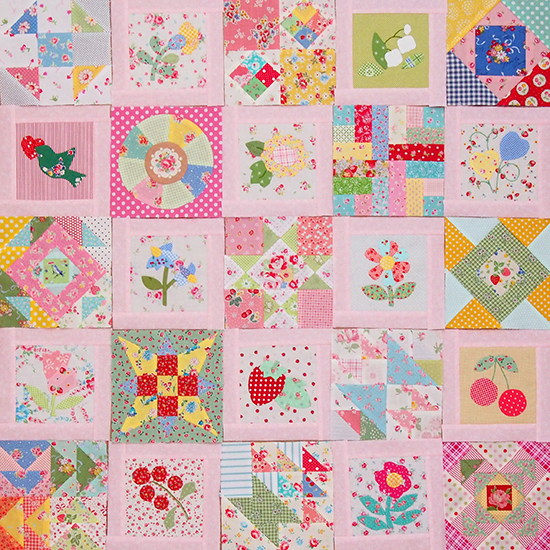
 And now - after all that, plus 6 years - I have THE perfect sewing kit for the Happy Flower QAL I'll be hosting with my friends and fellow Atsuko fans, Wynn and Melissa!
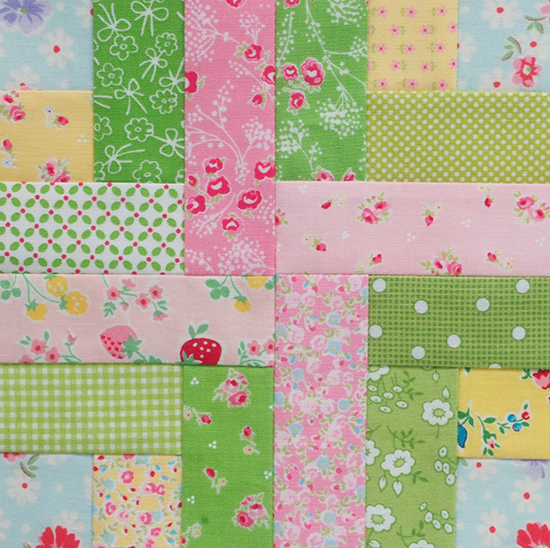
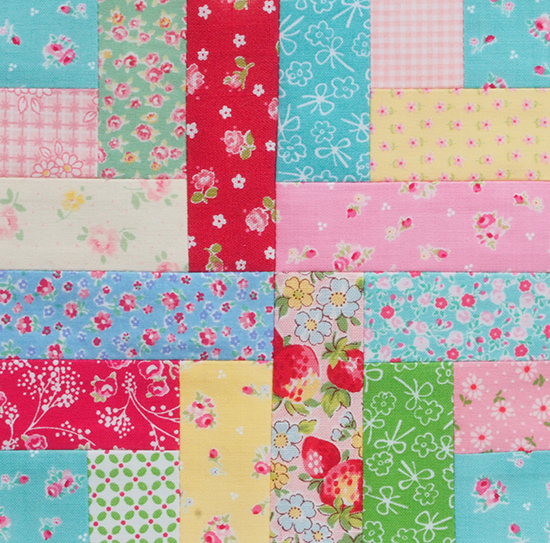
 (Yes, I've already make a few blocks ... shhh!)
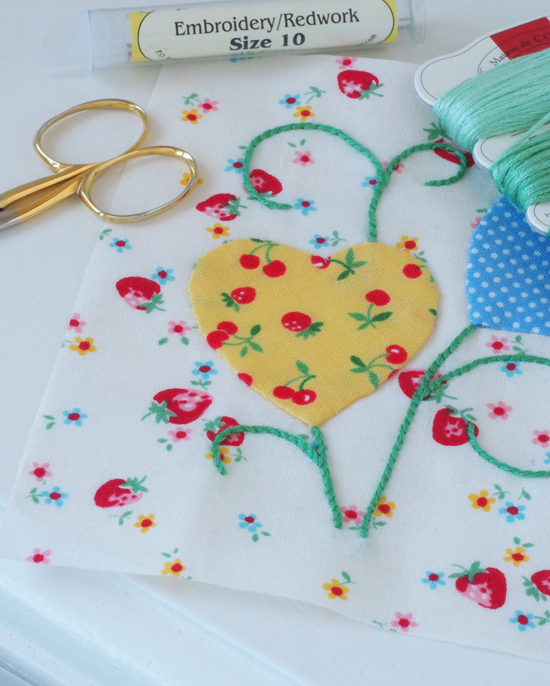
We're starting on March 6th, but I'll be sharing more details in an upcoming post soon. Hope you will join us!
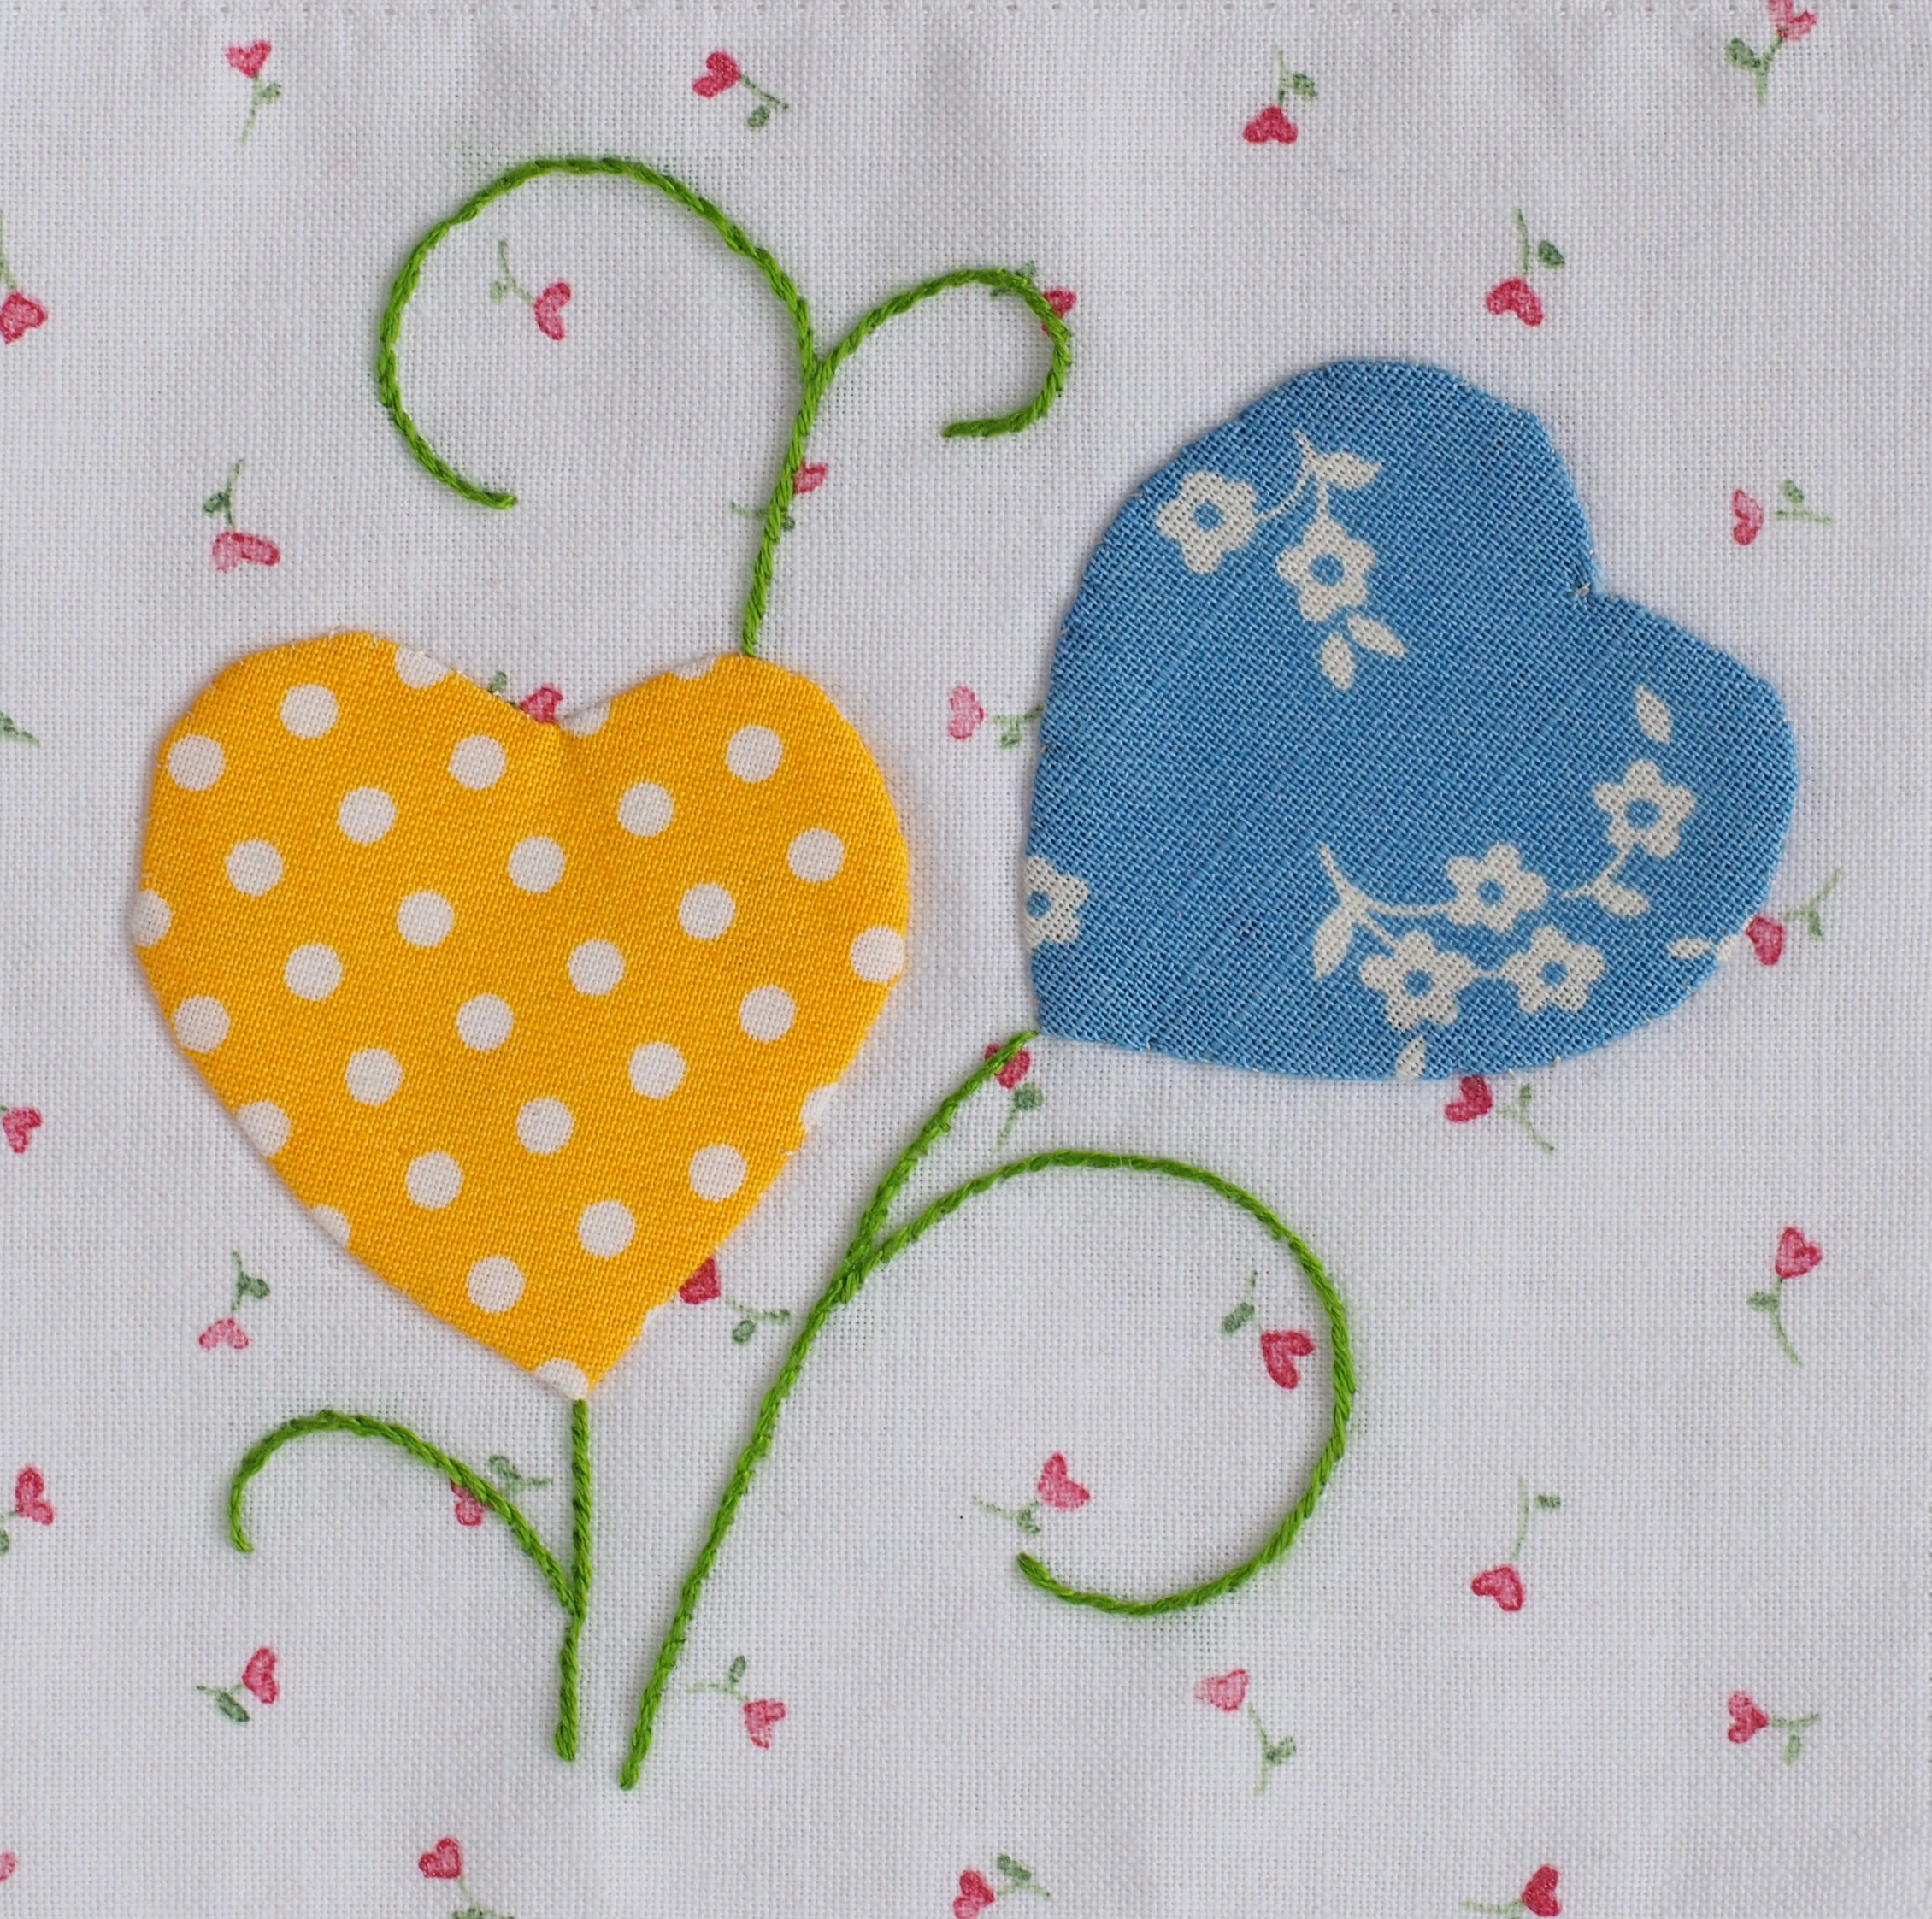
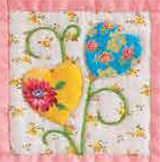
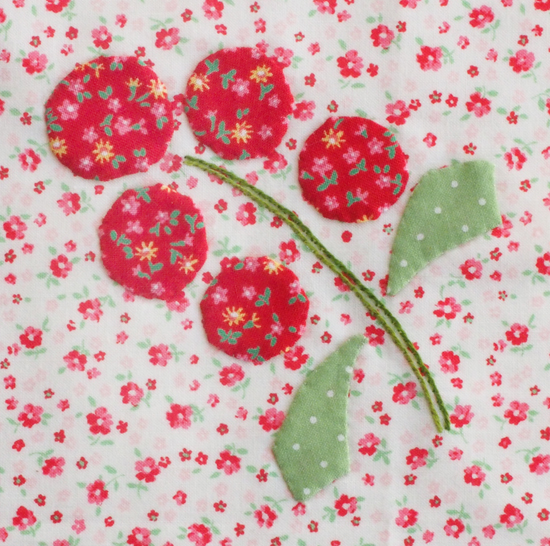
There's a lot of applique and little bit of embroidery required for the QAL so this kit will be my constant companion throughtout the QAL. Sorry not sorry if you see my kit a lot for the next year. ;)
 Ok. If I haven't convinced you to get this book for your library (and quite honestly for your creative soul), there are a lot more inspiring projects and delightful eye-candy coming up for you to enjoy throughout this blog hop. Here's the rockstar lineup of fabulously talented ladies, plus a fabulously talented gentleman, that you should follow on Instagram if you don't already. (Oh my goodness I can hardly wait to see what they make. I feel like a 7 year old on Christmas Eve!)
Ok.
I'm really serious about getting as many of you as possible to join our QAL to make the quilt on the cover of this book so how would you like to win one of 10 - yes, TEN - copies of this book?!!! Zakkaworkshop has generously agreed to give a free copy of Happy Flower Quilts to 10 Pretty by Hand readers. To enter, please leave a comment here telling me what sewing project you're working on right now. If you're between projects, tell me what you last finished or what is next on your list. OR any one of your WIPs will also do. That's it!
This givewaway closes Friday January 28 and is open to everyone internationally. I'll announce the winners next week.


 Kristyne