Across the Pond Pouch Tutorial
 October 14, 2011
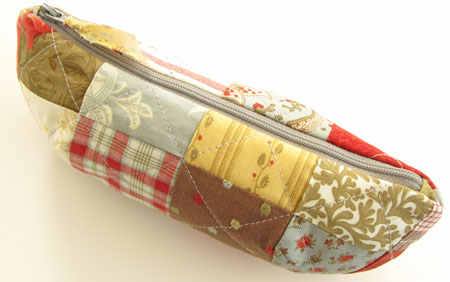
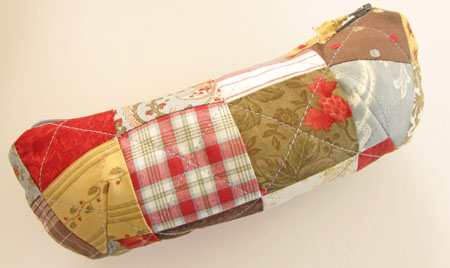
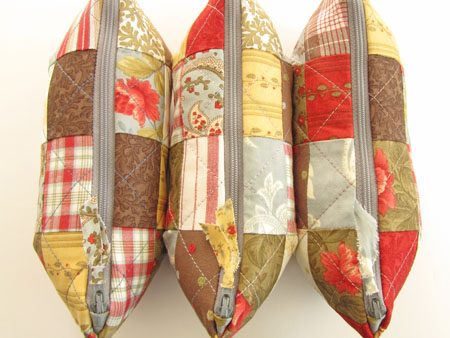
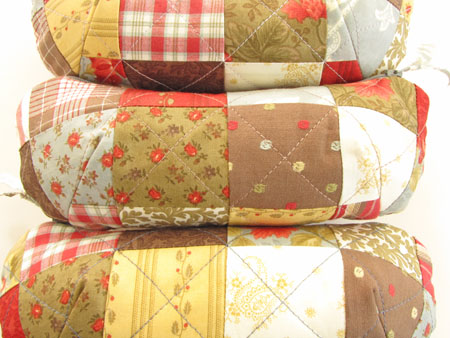
Here is my tutorial on how to make a cute zippered pouch from this free Moda pattern called "Across the Pond Pouch" by Cabbages & Roses.
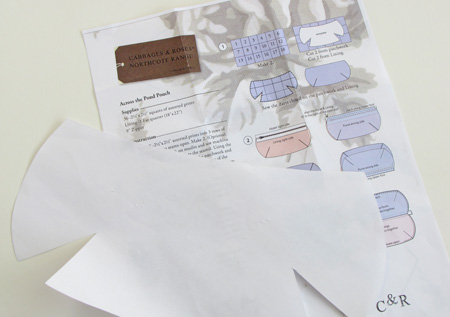
 You will need to download & print the pattern first (for the template).
SUPPLIES
- 36 squares, 2-1/2" x 2-1/2"
- 1 FQ (or 2 rectangles, at least 6" x 11")
- 1 zipper, 9" (dress weight, nonseparable)
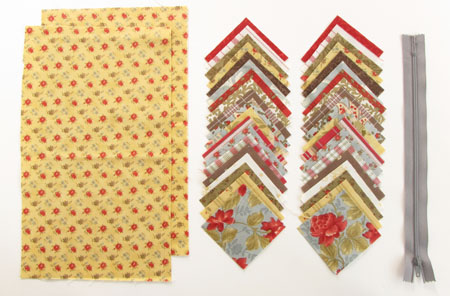
- **2 squares, 2" x 2" (for zipper tabs)
- **2 batting scraps, at least 6-1/2" x 12-12"
**These items are not part of the original pattern, but I used them for my pouch and this tutorial shows you how to add them.
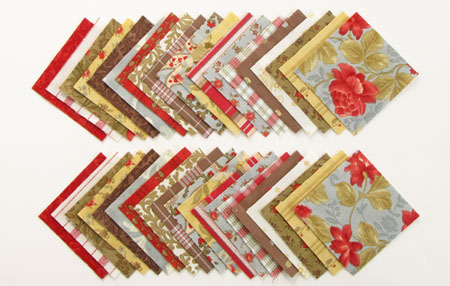
 36 Squares
Since Christmas is fast approaching, I thought I'd do a little multi-tasking here - write a tutorial AND get some Christmas sewing done. You don't mind, do you? So I dug into my "Roman Holiday" (3 Sisters Moda) leftovers and cut my 36 squares.
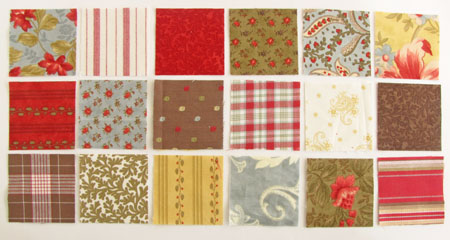
To make the cutting go faster, I selected 18 prints and cut 2 squares from each print. But you could just as easily cut all 36 squares from only 2 prints to make a true checkerboard or dive into your scrap bin and go crazy!
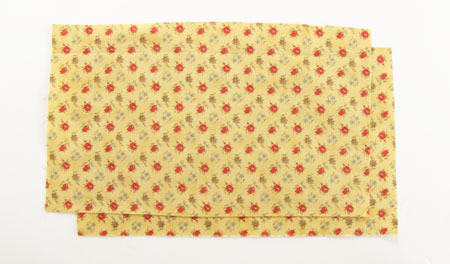
Fat Quarter
The pattern calls for a FQ for the lining, but you really only need 2 rectangles that are at least 6" x 11". They don't even have to match. I often 'scrap up' the inside of bags and cases.
 9" Zipper
I favor dressweight zippers for a few reasons:
- teeth can be stitched over without breaking a needle
- easily cut/trimmed with scissors
- best variety of colors for matching to your fabric
I also suggest a non-separable zipper (doesn't open at the bottom).
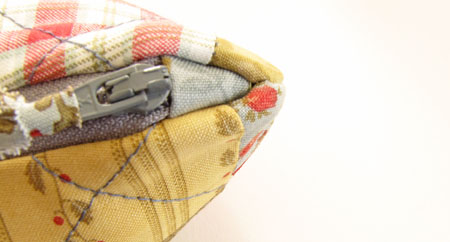
 **2 Squares, 2" x 2"
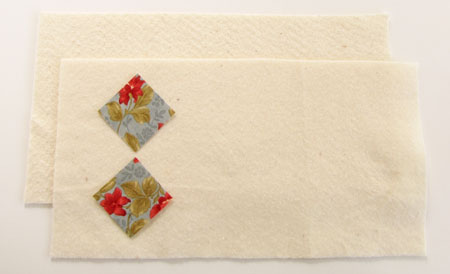
Here's a look at a zipper tab on my pouch - the little blue triangle patch of fabric.
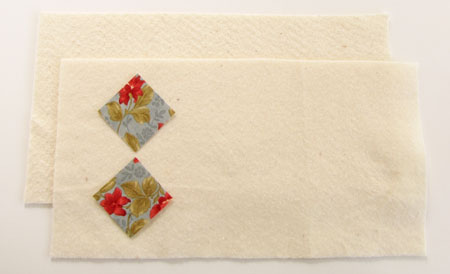
 **2 Batting Scraps, 6-1/2" x 12-1/2"
I wanted my pouch to have a more quilted look so I added batting. This is a great way to use up some of those trimmings from a quilt.
PATCHWORK ASSEMBLY
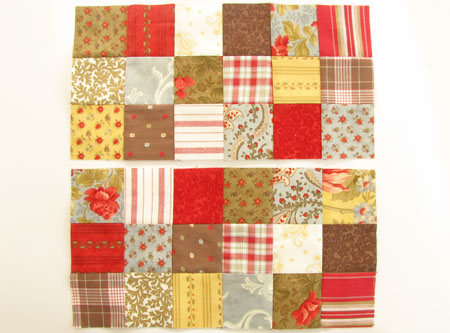
After you've cut your squares, lay 18 squares into 3 rows of 6 squares each.
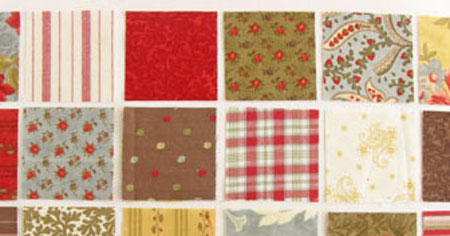
 If you have any favorite prints, put them in the middle 4 spots of the top row (will be along the zipper) and the middle 4 spots of the middle the row. The corner squares will all but disappear when the pouch is assembled.
 Once you have the squares arranged, sew them together into 6 columns of 3 squares each. I chain-pieced mine.
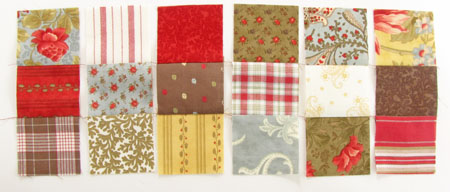
Press these seams in opposite directions to get nice nesting joints.
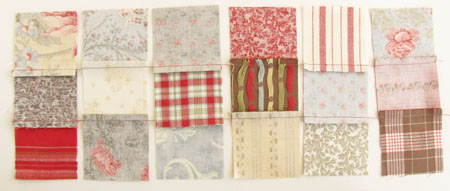
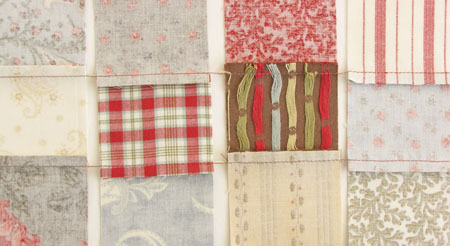
Now sew the 6 columns together.
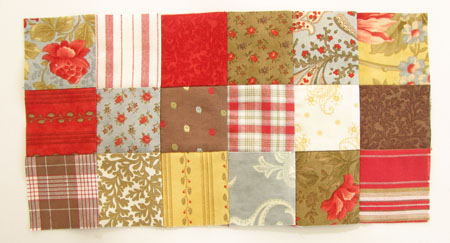 Press the seams to one side.
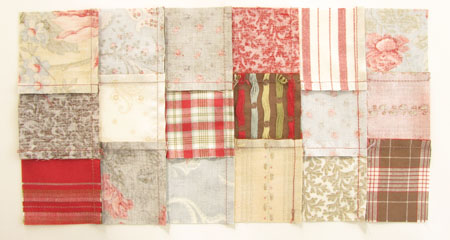
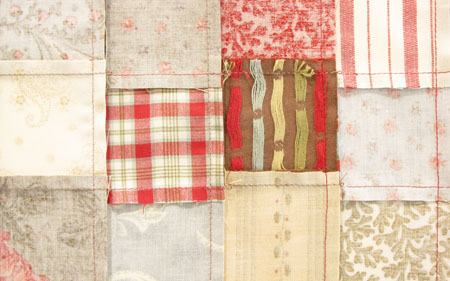 Repeat to make another patchwork panel. Your panels should measure 6-1/2" x 12-1/2" each.
**QUILTING THE PATCHWORK (Optional)
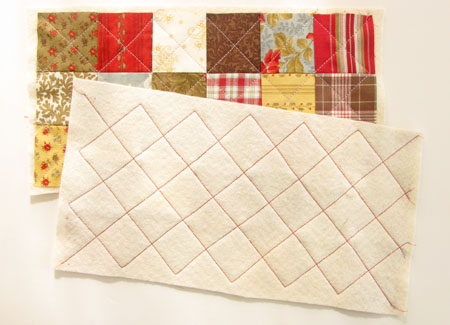
If you want to quilt your patchwork, now is the time to do it. Simply lay one patchwork panel on a batting piece, pin in place and quilt as desired. Repeat for the second panel.
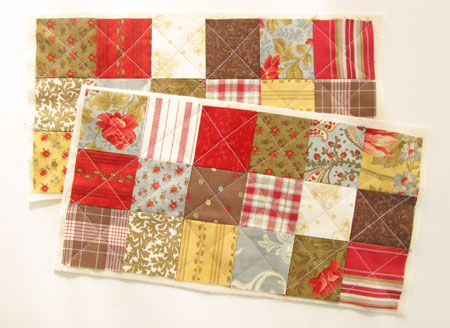 I did a cross-hatch - simple and effective. But really anything goes.
USING THE TEMPLATE
Trace the template onto a sheet of paper and cut it out. Lay it on a patchwork panel - centered - and pin in place.
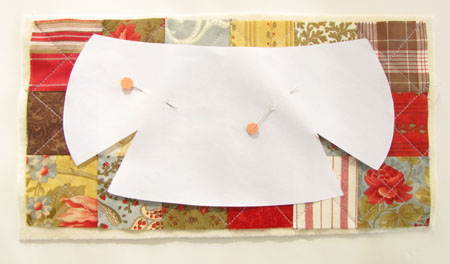 Cut it out and repeat for the other patchwork panel. The more accurate you are with centering the template, the easier it will be to line up your seams from one side of the pouch to the other.
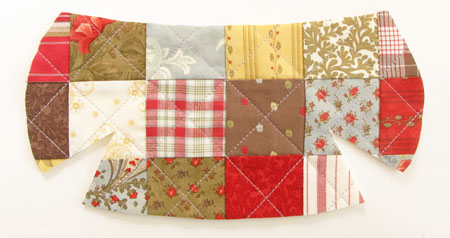 And see what I mean about the corner squares almost disappearing?
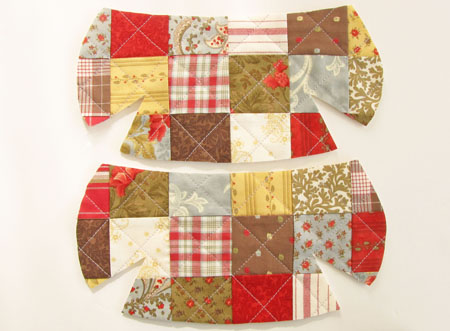
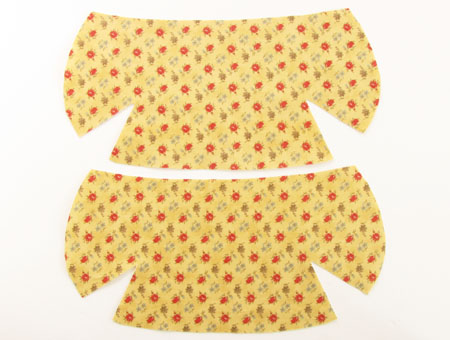
Cut out 2 lining pieces with the template. I layered mine and cut them both out at the same time.
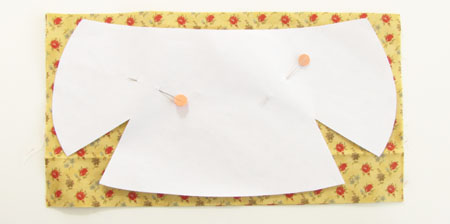
I used a rotary cutter, but you can use scissors, if you prefer.
MAKING THE DARTS
If you've never sewn a dart, don't panic - they're super easy. Trust me. ;)
Here's a dart cutout.
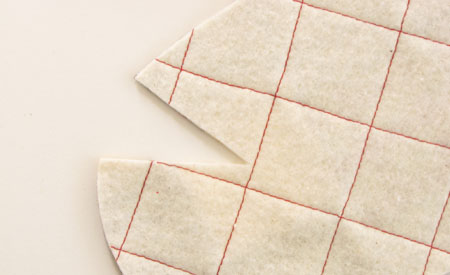 Take one patchwork piece and fold it - right sides together - so the two dart edges line up. Pin.
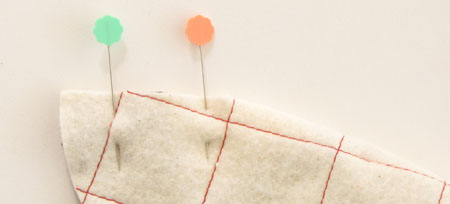
Starting at the outside edge, sew a 1/4" seam - keep sewing a straight line past the cut point of the dart until you get to the folded edge.
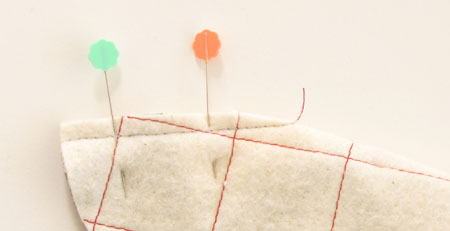
Press your dart seams towards the middle of the pouch.
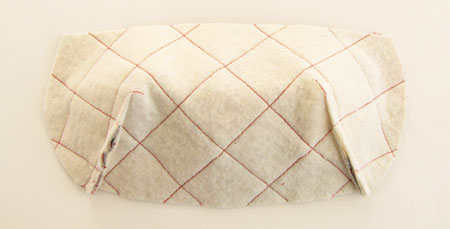
Repeat for the other patchwork piece.
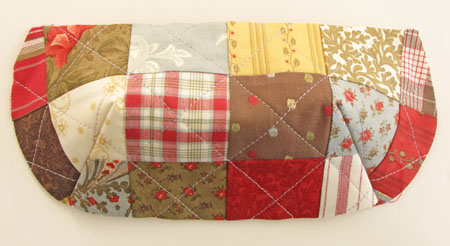 And both lining pieces.
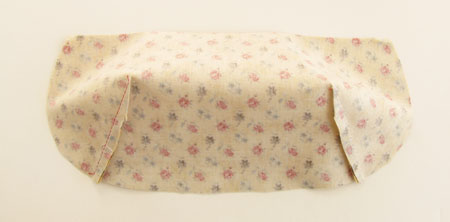
**ADDING ZIPPER TABS - Optional
This next bit here is not in the pattern. If you want to skip it, just scroll down to the ZIPPER INSTALLATION section. It's ok. We can still be friends. ;)
You need the 2 extra 2" squares.
Fold the squares in half and press. Fold in half again and press. This second fold is referred to as the "second folded edge". Brought to you by the Queen of the Obvious. ;)
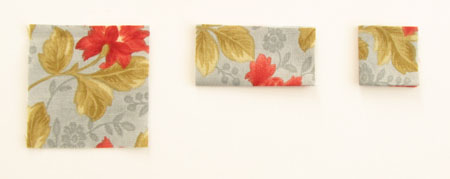
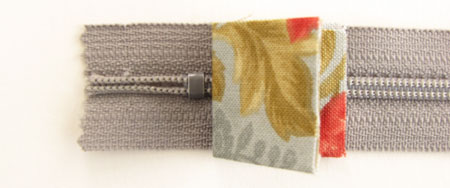
Lay the second folded edge to the inside of the metal tab on the bottom end of the zipper. (Right-side view)
Open the second folded edge and pin the fabric in place. (Right-side view)
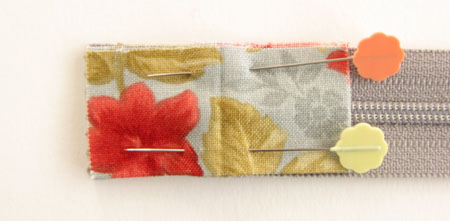
(Wrong-side view)
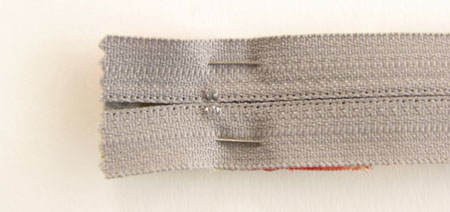 Sew along the fold mark. (Right-side view)
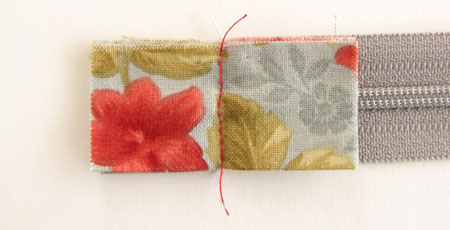 (Wrong-side view) MAKE SURE YOU DON'T HIT THE METAL THINGY ON THE ZIPPER WITH YOUR NEEDLE ... IT WILL BREAK. (Just sayin'.)
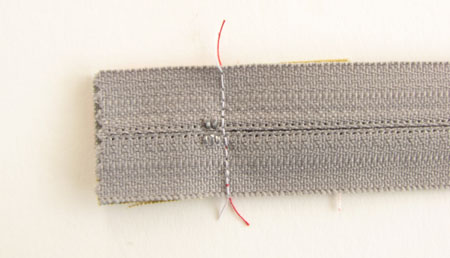
Refold the tab.
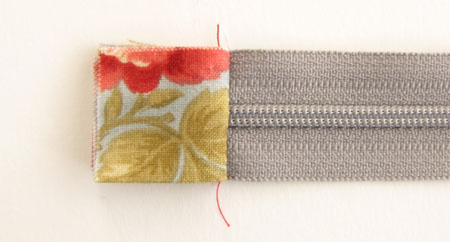
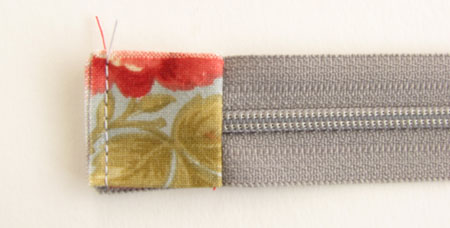
Baste the raw edges.
 To position the second tab, measure 7-1/2" from the fold of the first tab and mark that spot with a pin. This is where the fold of the second tab will be located.
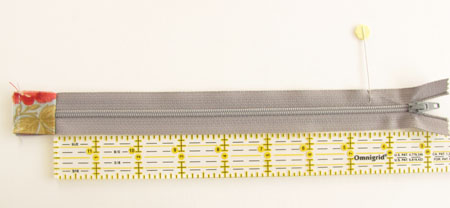
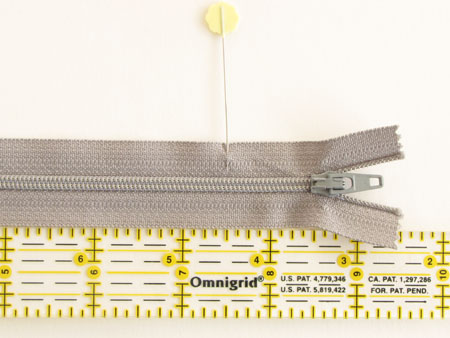 FIRST OPEN THE ZIPPER HALFWAY! And keep it open. Kay?
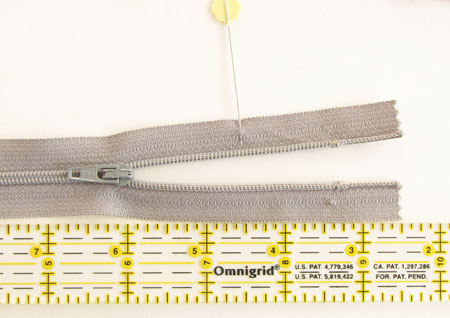 Attach the second tab the same way as the first.
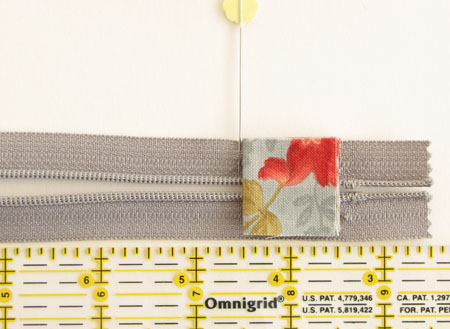 Trim away the excess zipper.
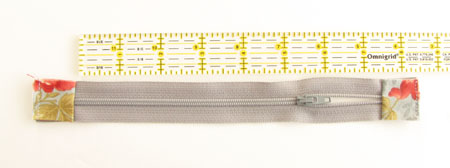
ZIPPER INSTALLATION
All right. Still with me? Ok. :)
First, attach your zipper foot to your sewing machine.
Fold the zipper in half and mark the center point with a pin. With right sides together, lay the zipper along the top edge of one body piece - matching the center points - and pin in place.
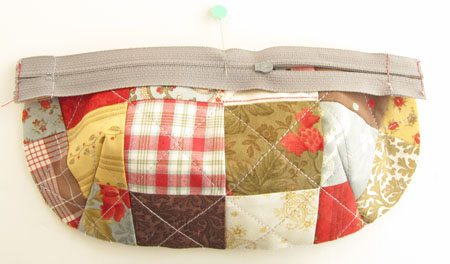
Pin the rest of the zipper to the body.
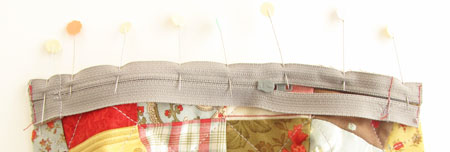 Sew the zipper to the body.

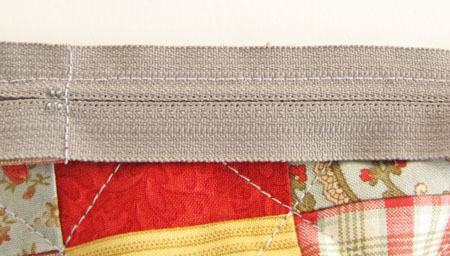
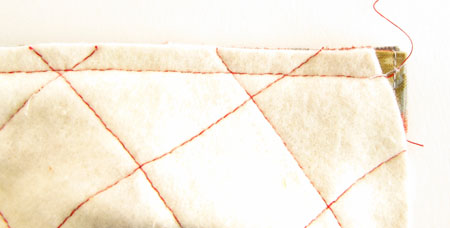
With right sides of the body (with the zipper) and lining together, center one lining piece and pin along the top edge.
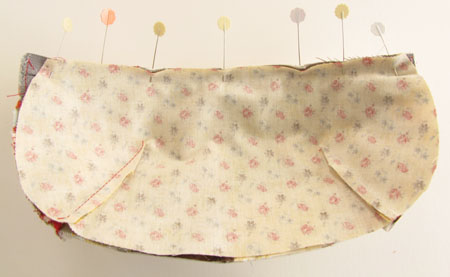
The zipper should be sandwiched between the patchwork and the lining.
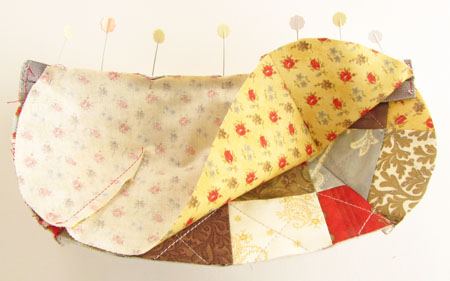
Do not sew directly on top of your previous seam (red thread shown below). Rather sew just a tiny bit towards the top edge (blue thread shown below).
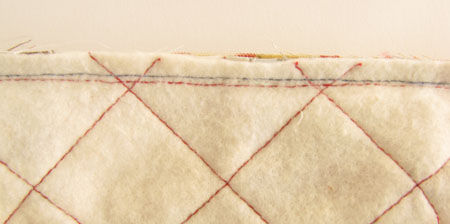
You should have something that looks like this ...
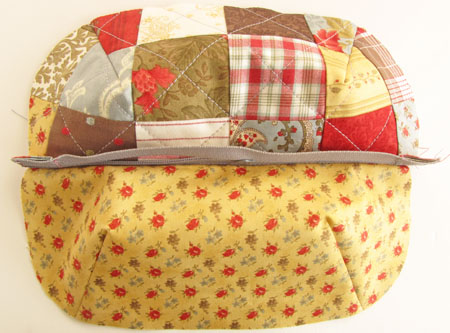 Repeat the above to add the second body and lining pieces to the other side of the zipper.
Center the second body piece onto the zipper - right sides together - and pin in place.
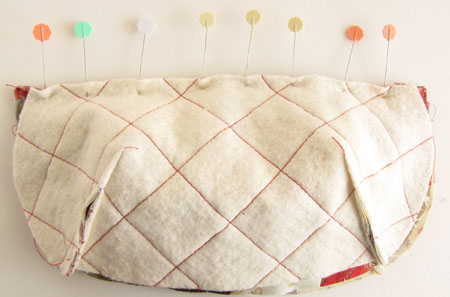
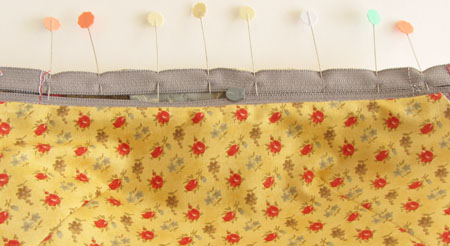 Sew the second body to the zipper.
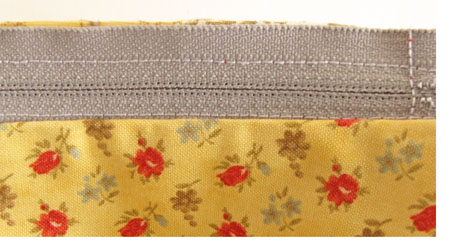 Next, center the second lining piece to the zipper - right sides together, and pin in place.
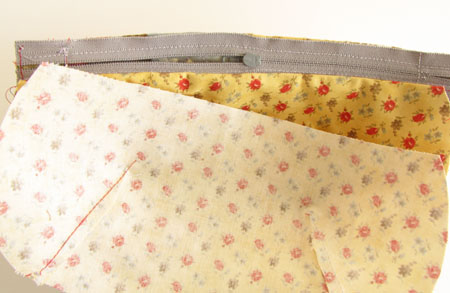
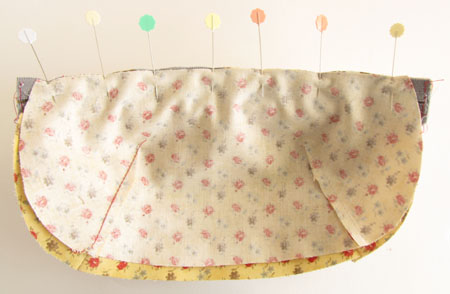 Sew the second lining to the zipper.
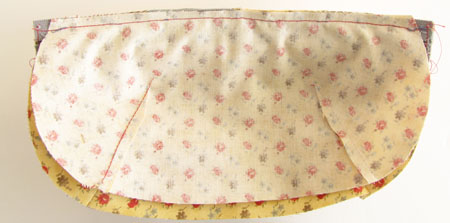
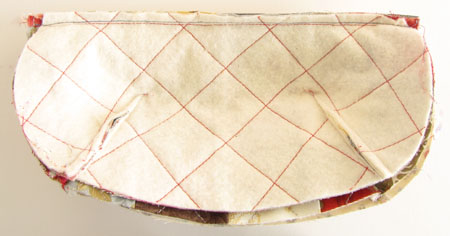 Now you should have something that looks like this ...
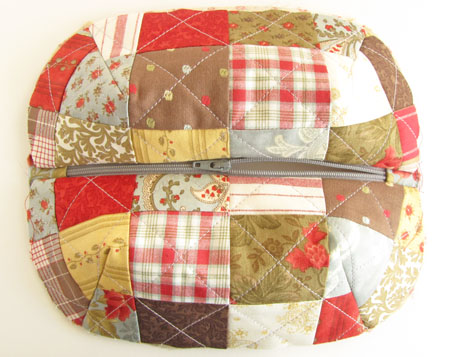 and this.
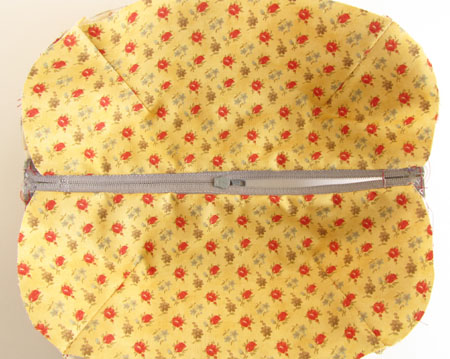
Press the body pieces and the lining pieces away from the zipper.
FORMING THE POUCH
Home stretch. :)
Now you're going to place the patchwork pieces right sides together,
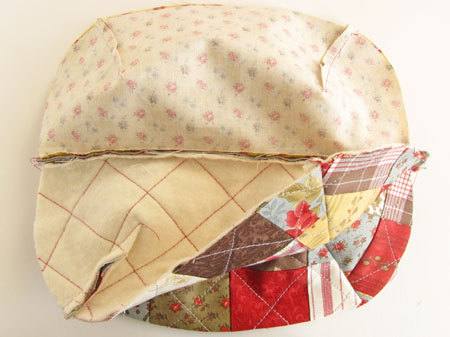 and the lining pieces right sides together.
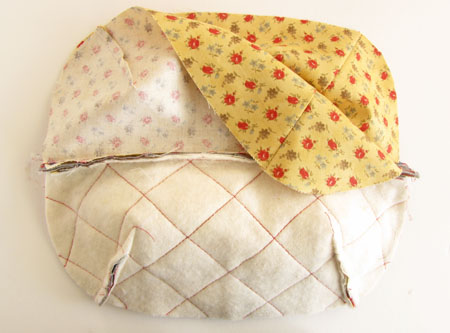 Pin all the way around, doing your best to line up the darts and patchwork seams.
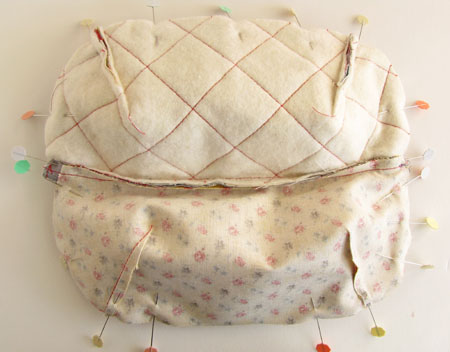 The zipper will be a little weird so try to make the teeth go towards the patchwork side and the seam allowances towards the lining side.
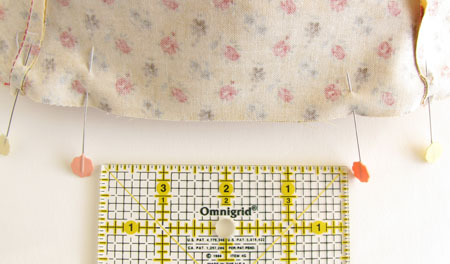 Leaving a 4" opening along the bottom of the lining, sew all the way around the entire pouch, lining and patchwork.
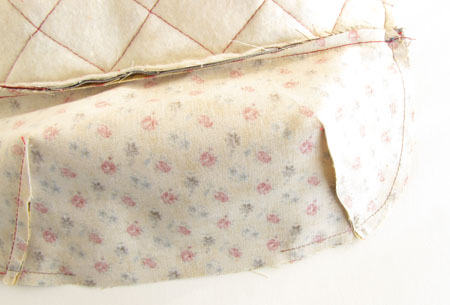 When you get to the zipper teeth, stop with your needle down and do a little pivot to make a "V".
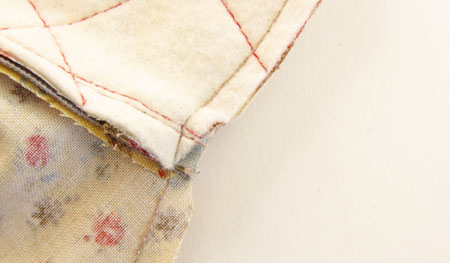
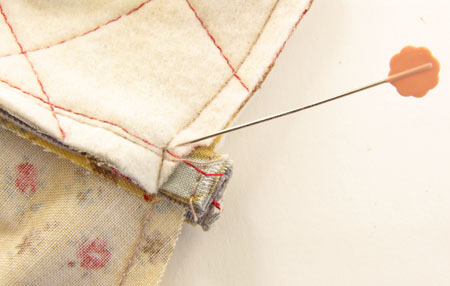 Trim the "V" point seam allowances.
 Turn the entire pouch right side out through the 4" opening.
Stitch the opening closed, either by hand or machine. (I'm lazy.)
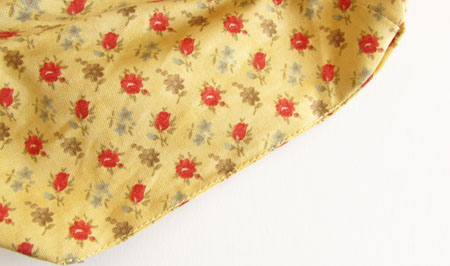 Turn the lining into the pouch.
Add a little scrap of fabric or a ribbon to the zipper pull.
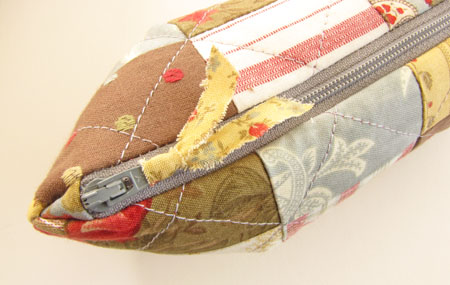 Tada!!!
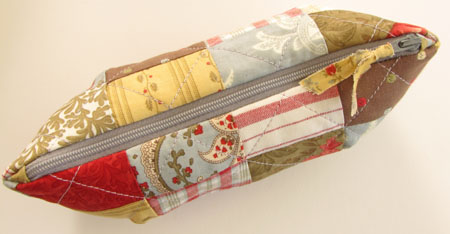
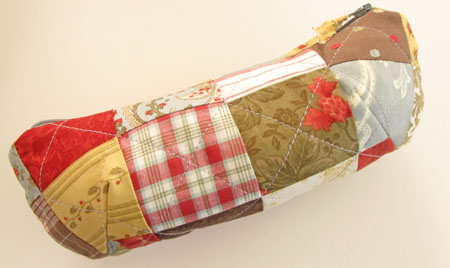 Now go make a few dozen.
 You will be fully stocked with lovely hostess/teacher/friend/neighbor/mother/daughter gifts for the entire Christmas season!
 Kristyne |
  39 Comments |
  tutorial




Reader Comments (39)
Thanks Kristyne for the tutorial, explains a few things when I've attempted bags , zippers and linings.
Wow, great tuorial, thank you so much!
Hildy
*insert "Hallelujah Chorus" here*
Woo! Hoo! Thank you, Kristyne!!! Love the pouch in Christmas fabrics!
They are beautiful!!! Can't wait to make one. Or two.... :)
O . . . M . . . G . . . You are my hero! That is by far the best tutorial I have ever seen in my life!
Thanks Kristyne!
Wow...it doesn't look easy peasy, but now it looks possible. Thanks for taking the time to do this tutorial. Look out world here comes 3 new bags.
You are the best...the angles are almost finished singing your praises, for today;-)
Take care and thanks again,
Carole Y.
Thanks Paula, I was worried that 77 pix for a little case was going overboard. But I just didn't know when to stop! I had a lot of fun writing it. The only thing that would make this tutorial better - in my opinion - is for someone to tell me it helped them actually make one of these cute little cases! :) Happy sewing everyone!
Amazing tutorial!!!! I'm adding it to my tutorials page!!!
LOVE this! Thanks so much for taking the time to write up the directions and provide such great pictures! I'm definitely going to use this as the gift wrapping for gift cards and ca$h during the holidays.
Great tutorial, so well written! I just love what you do with the zipper thing, very clever indeed!!!
Happy weekend Kristyne,
Vivienne x
Ok. You kicked this one out of the park! I have never seen such a detailed tutorial!
These little bags are wonderful but putting them together are very tricky and you made sure to cover each step. Thank you sooo much for taking the time to put this together!
Love the detail shots. Sometimes pictures really do the job better than words. They turned out so cute. Nice work!
Big thank you from me! I love it and I NEED one for my pencils! Hey, if little girls can have one then so can I. ;0
Instructional. Informative. Funny. Entertaining. Perfect!
Great tutorial and the pictures were perfect. Every single one of them.
I'm with Little Blue Dragonfly ~ insert "Hallelujah Chorus" right here! Well done! With the tutorial and the bags.
But now the looming question... which one is mine? :)
Thank you for the great tutorial! I'm lusting after the round pouch and cosmetic pouch as well. Should I keep watching on this channel? :-)
Whoooooooooo, one there is two days till monday and two that tutorial is fantastic. You need to write a book put thst fantasticmind into motion and run with it, i hear those cogs working ,
Even from over seas : p
Hugs and love
Vikki xxx
Fantastic tutorial - thank you!!
Wow, thanks so much for sharing. As soon as we get all th is work on the house done I am going to set down and make me a few. Great for Christmas gifts too.
This is awesome! I'm a visual learner so lots of photos are so helpful :) I can't wait to make my pouch this weekend! Thanks :)
You rock! Thanks so much for the visuals- totally need all of that. Can't wait to try this :).
THANK YOU!!! This was great.... and it helped explain some zipper phobia I have... can't wait to try it... you made it all look so easy!!! I really appreciate your attention to detail for sure! Thank you for sharing this tutorial!!! :O) Have a great weekend! xoxo Bari Jo
Oh my goodness, not only does she sew like a queen....she writes tutorials like one also!!!! The angels ARE singing!!!
I "SEW" wish that I had been able to see your tutorial when I did my first one (wait, 5) it would have saved me tons of time...and a needle or two. (AND HAND SEWING!!! Thank you for freeing me to use my machine).
If you get bombarded with new followers it's cause I'm putting your pic on Pintrest. :-)
I heart YOU!
Fantastic tutorial, so clear and easy to understand...now if I can just take the plunge and make some!!
Thanks so much for the best tutorial! So much detail and great photos - it will be just like having you standing right next to me when I make one. I'll let you know how it goes. Makes a wonderful gift! Really, have you thought of writing a book?????
Well, besides being a quilter extraordinaire, you are also a pro at tutorials....seriously, all the pictures and the explanations are so right on! Thank you, thank you, thank you!!
I hope you will do some more......like that tote bag you did last spring in the Japanese taupes and blues......pretty, please???
I had to come take a peek for my daily look at your pretties and OMG! a tutorial like no other! You have written jus the best one I have ever seen! NEVER too many pictures!!! The zipper little fabric end pieces and how you sew that"V" part was amazing and I also love that bias strip fpr the zipper pull, all of it was amazing! Your patchwork and fabric placement is perfect.I have one to the stage of putting in the zipper,now I know it will be wonderful!
This is embarassing,but I have sewn and quilted all my life and I have never cross hatched,and I have no idea where to begin. I would think find a 45 degree line and mark it out from there in both directions and use my walking foot....have to practice..I do free motion..but what a classic look! The people who are going to receive those precious little bags..wow!!! I know this for sure, your talent is just oozing out..I am so impressed! I love to makel ittle bags!!! You made my day! Thank you just isn't enough.
Kristyne, thank you so much, I would never have attempted to make one of these if your wonderful instructions and photos weren't so concise and clear. Now I'm looking forward to making one (or ten.......)
Fabulous tutorial...I am sitting here in a hotel and so wishing I were home with my fabrics and machine. I want to get some of these made for gifts. I could use some right now for organizing things in my luggage. You are so inspiring. Thanks!
Oh Thank you so much! This is just wonderful. Definitely making some of these for Christmas gifts. So good of you to share all your hard work. The tutorial makes it so easy. You're the best.
Thanks a huge lot. I will go to the fabric store and get my zip and give this a go on my next lot of holidays, and thanks for all of the time and effort that you went to for us, i really appreciate it.
xx
Fantastic instructions! Thank you for sharing, they look lovely!
This was so well done, what a great teacher. I am a visual learner and it was perfect. thanks Regina
Bonnie here again Kristyne. I decided to look at every entry in your blog,and I am just speechless! To think you have been here and I just now found you! I learned so much from all o your other posts! My thinking is, if you really want to de-stash, start an ETSY shop and sell kits or select fabric for your patterns and all...I would hire you to be my personal quilt fabric shopper! You have the best stuff!! I assume you are going to Houston and no blogs - posts, which makes me sad! I am also very interested in how you use all of your leftovers for backings,and they have so much personality!! I wish you lived next door!!
what a cute bag,thankyou for the tut
This is such a beautiful tutorial - and so helpful. Especially the zipper part. (I am still slightly terrified of zippers.) I'm sure this was a lot of work. THank you so much for putting it together!
You are the BEST! This is the most superb blog EVER!
Hi Kristyne, I used this post to make lovely pouches as Christmas gifts last year & have just found it again to freshen up on the zipper tab instructions to make one with my 11 as a gift for her BFF. So pleased it was easy to find again, thanks!
This is just great, thank you so much. I really do need a lot of advice as a beginner but this makes it all look possible.
I love this pouch!!! Wonderful tutorial!
Thanks so much for sharing!