Entries by Kristyne (860)

Friday
Sep302016

playground showcase

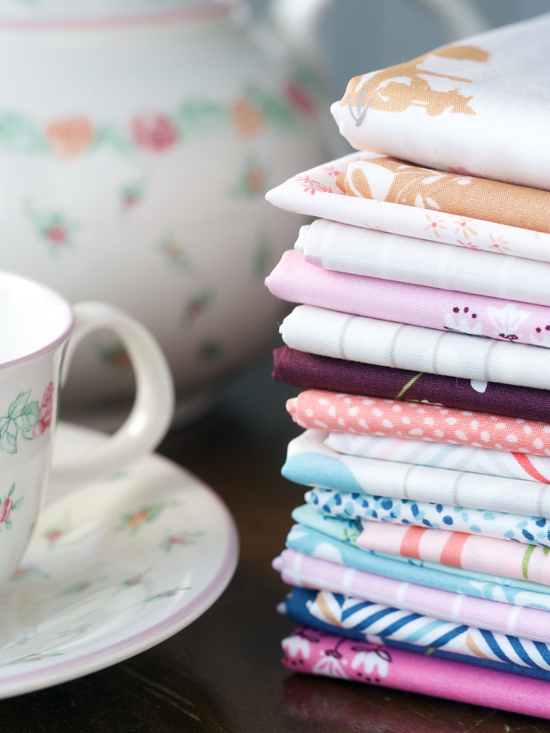
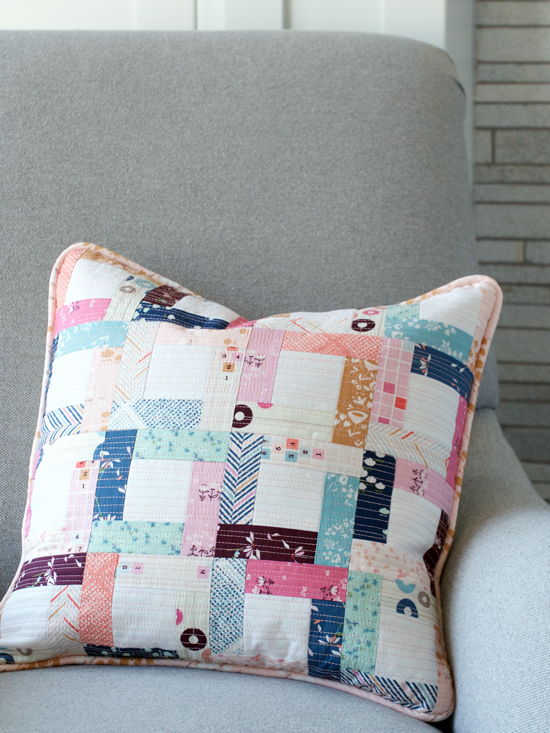
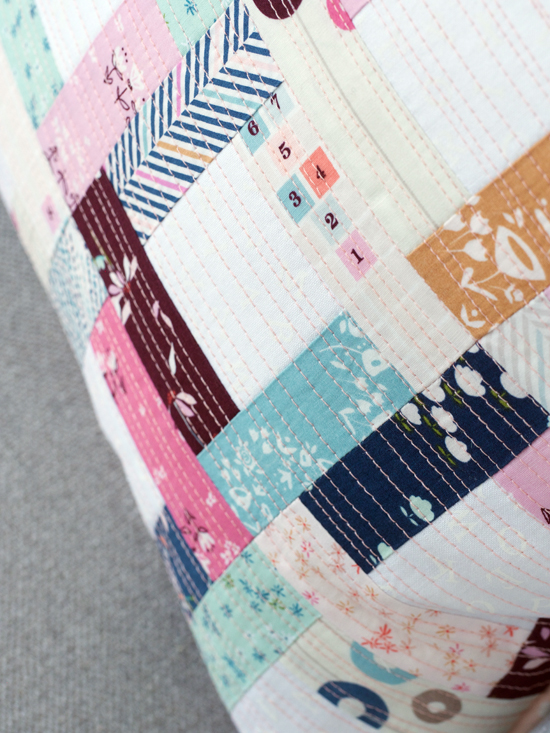
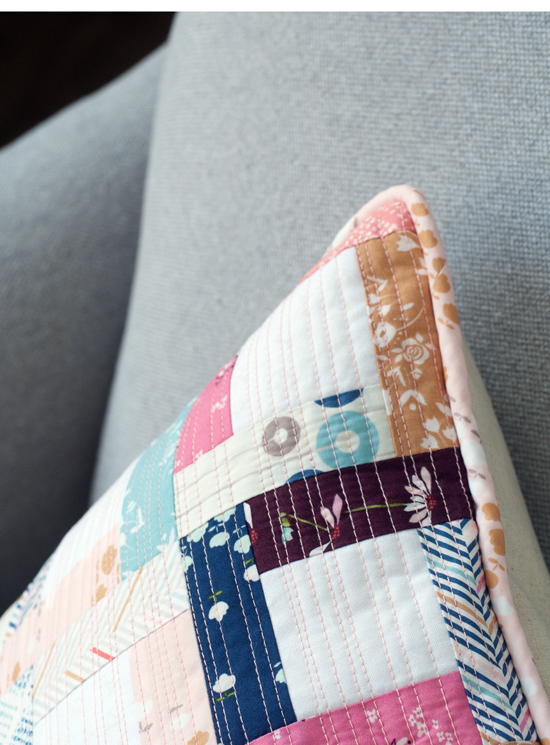
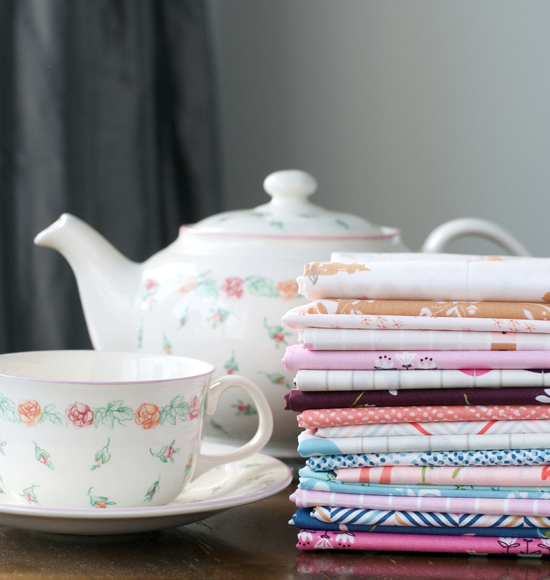
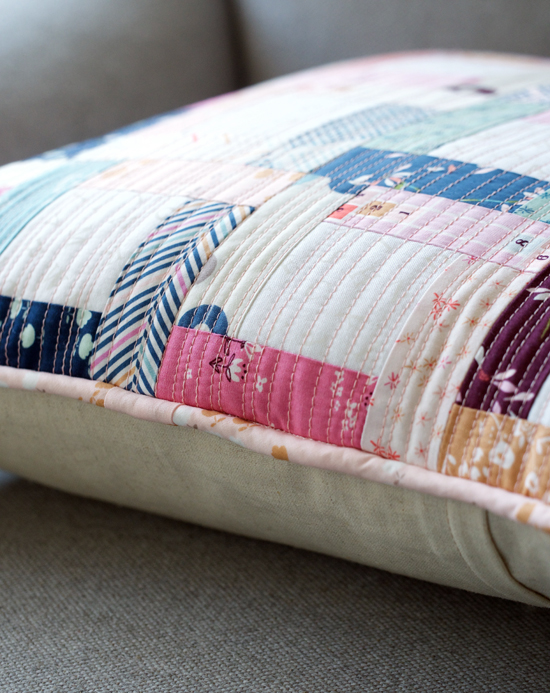
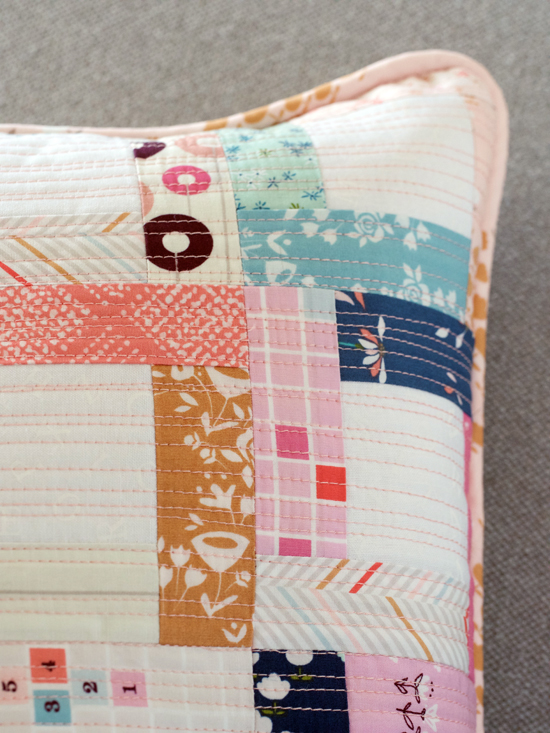
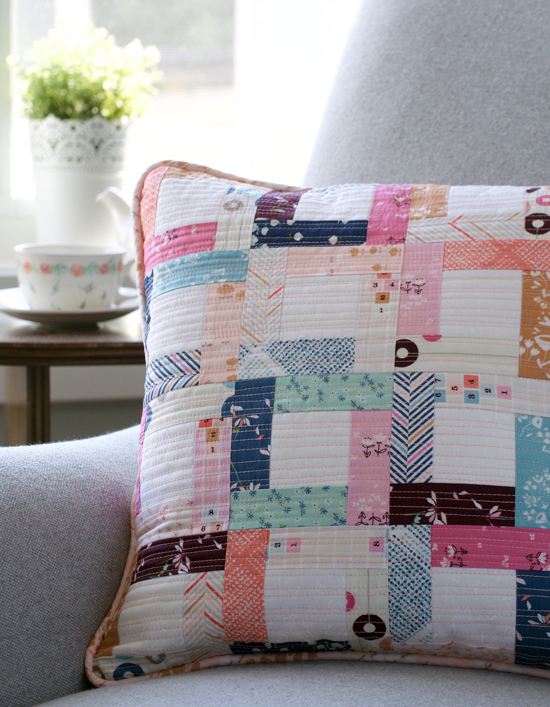
I don't need to say anything.  My pictures - and Amy's new fabric, Playground - pretty much sum it all up.

Well, maybe I do need to say something ... now I have a new favourite toss cushion for my favourite chair made with fabric by my favourite designer. :) 

Oh, and one other thing ... "Amy, I heart you girl!!!" xo

I'm the second last stop on this tour.  In case you missed all the other Playground inspiration, here's the roundup.  You seriously need to check them ALL out. You will not be disappointed!  Cross my heart.

SEPT    14: Katie Skoog ~ thesimplelifecompany.com/blog

              15: Michelle Curtis ~ chellesquilts.com

              16: Peta Peace ~ shequiltsalot.com

              17: Minki Kim ~ minkikim.com

              19: Jemima Flendt ~ tiedwitharibbon.com

              20: Tara J Curtis ~ tjaye.com

              21: Alexis Wright ~ mysweetsunshinestudio.com

              22: Melissa LeRay ~ ohhowsweet.com

              23: Ali Brorsen ~ becauseofbrennaclothing.com

              24: Angie Wilson ~ gnomeangel.com

              26: Rachel McCormack ~ woodenspoonquilts.blogspot.com

              27: Stacy Olson ~ stacyolsondesign.com

              28: Shannon Fraser ~ shannonfraserdesigns.ca

              29: Cristi Cooper ~ whimsyquilts.blogspot.com

              30: Guiseppe Ribaudo ~ instagram.com/Giucy_Giuce

OCT        3: Amy Sinibaldi ~ nanaCompany.typepad.com

Wednesday
Aug312016

sew illustrated book tour

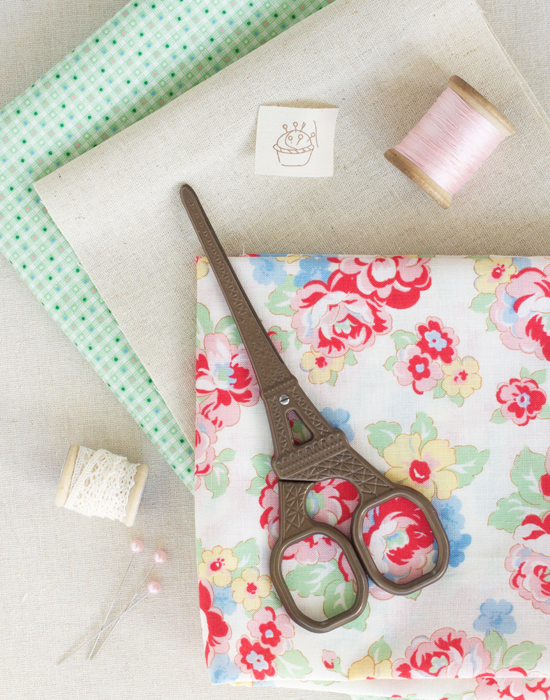
Fabric: 

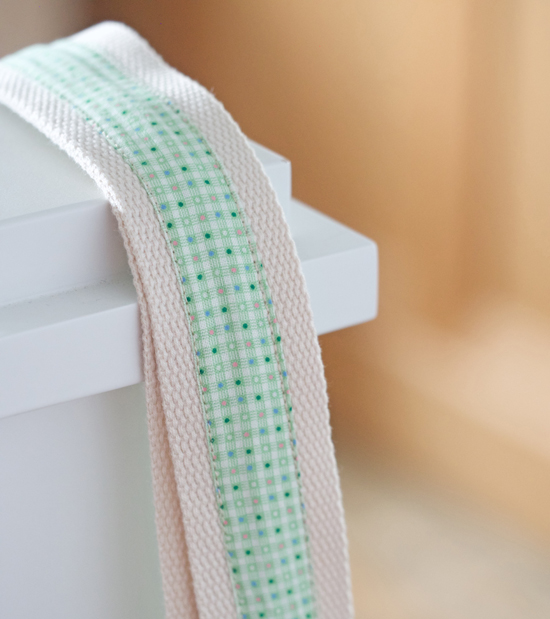
  • Floral is Lecien Child Smile Fall 2016 (available soon!)
  • Green is Lecien Child Smile from a few years ago
  • Linen is Kaufman Essex Natural.

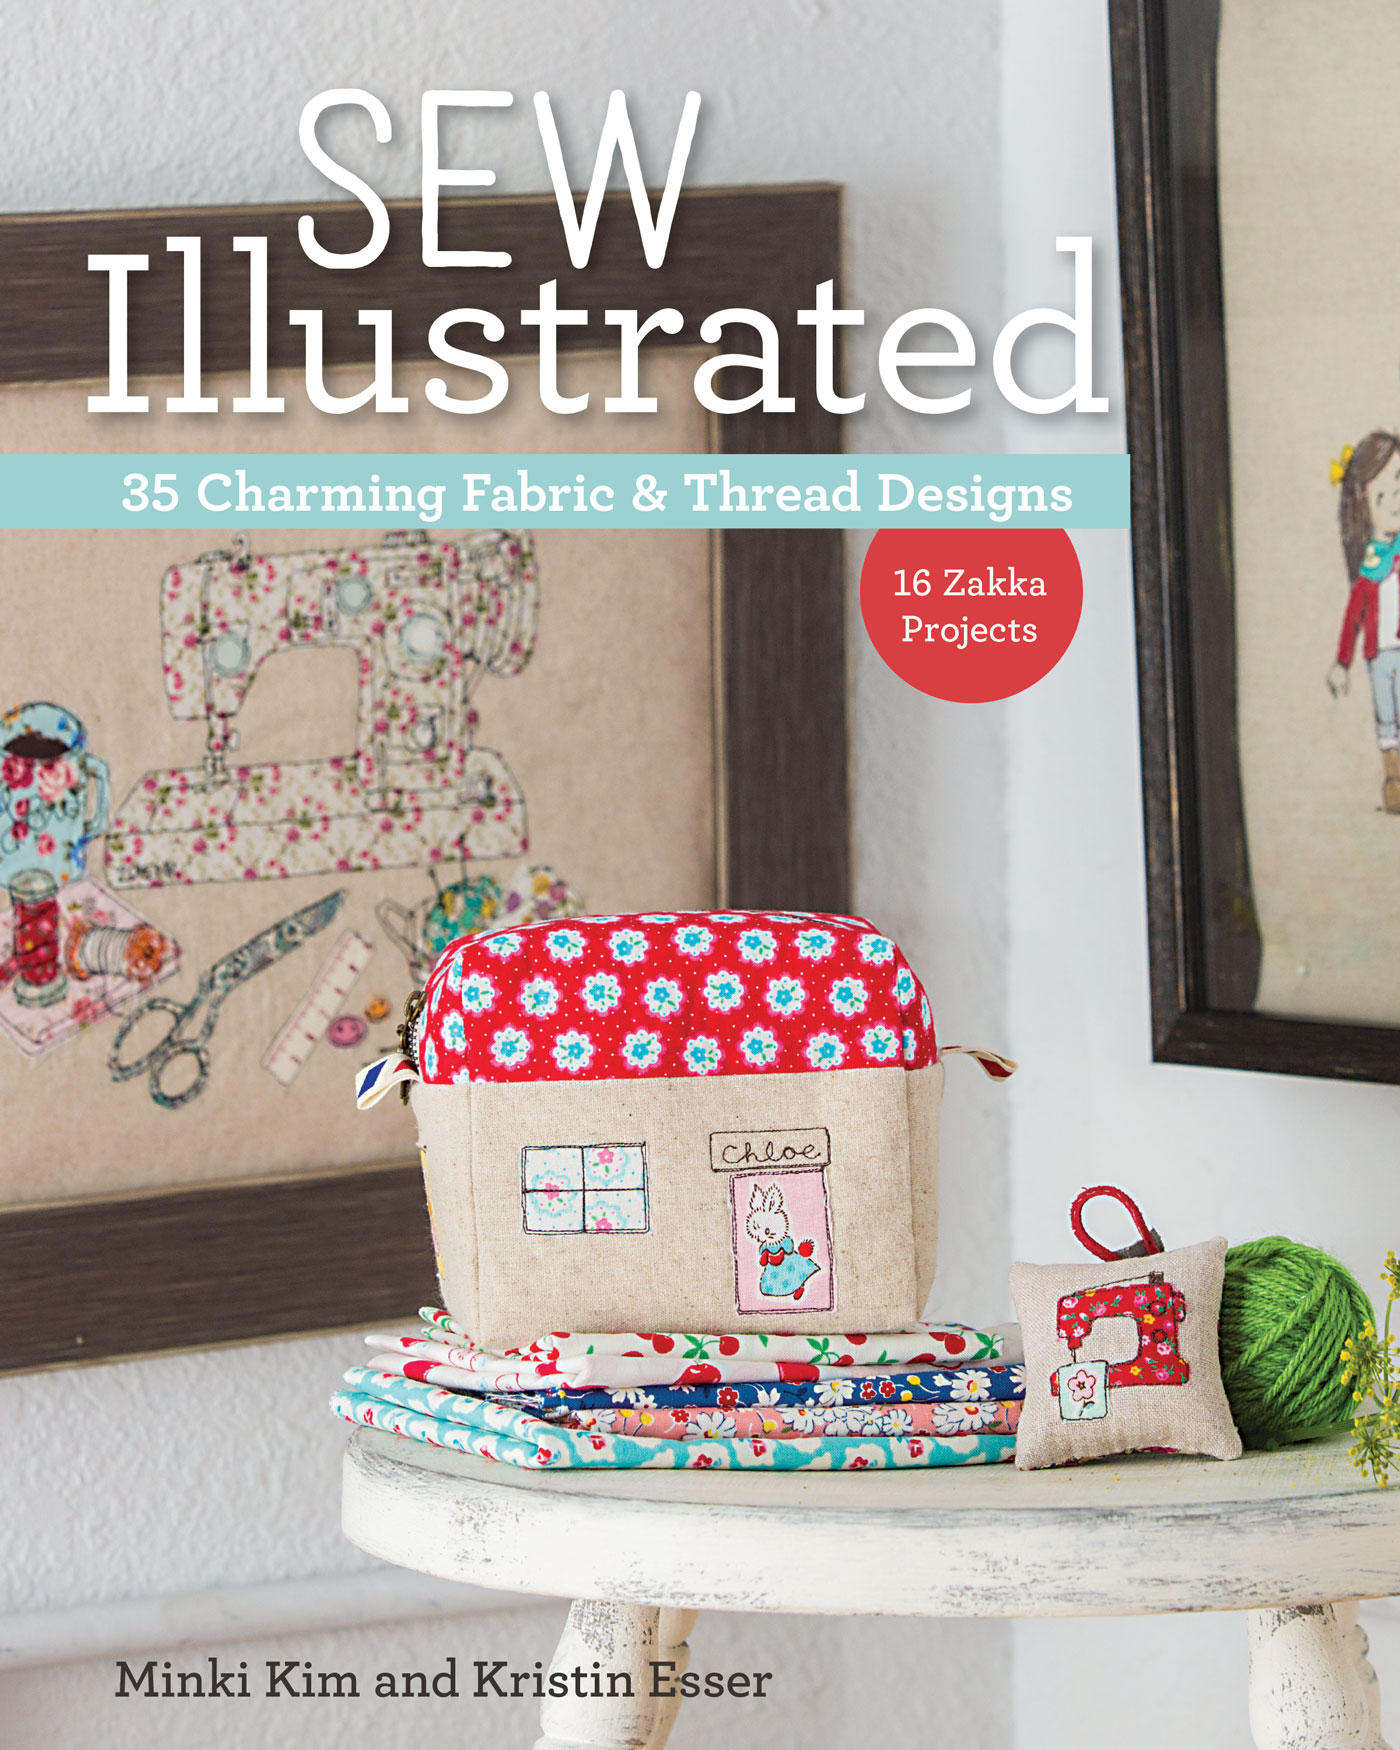
I've long admired Minki Kim's unique talent and love everything she makes.  I am in total and utter amazement at her creativity and skill.  But doing thread illustration myself?  Uh.  The thought of it scared me and - quite frankly - stressed me out!  LOL!

When Minki and Kristin Esser invited me to be part of this tour, I kinda sorta accidentally said yes because Minki has become a good friend of mine and I hate disappointing people.  But then I had many MANY moments of panic when I realized that now I was commited to MAKING something.  I stalled, procrastinated, cleaned the house, went on a holiday, and did almost everything else on my to-do list.  Seeing all the cute and adorable things that people were making from this book and got even more scared.

Sigh.

But even though it's been a while since I put myself this far outside of my comfort zone, I wasn't going to back out.  Not without at least trying.  So I pulled up my big girl pants and got down to it. 

Now I'm not usually one to practice things.  Never really have.  Ask my piano teacher. ;)  If I want to make something, I just do.  If it turns out, great.  If it doesn't, I'll pout for a few minutes and then move on.  It has to be something really special (or a commitment) that inspires me to learn a new skill.  (That sounds dreadfully immature as I read that back to myself ... )

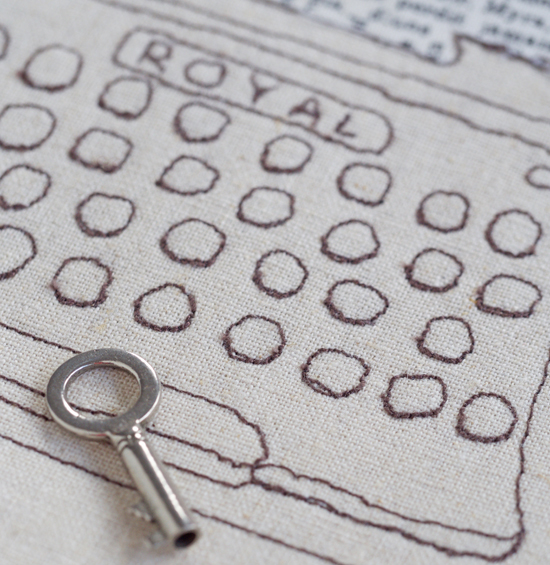
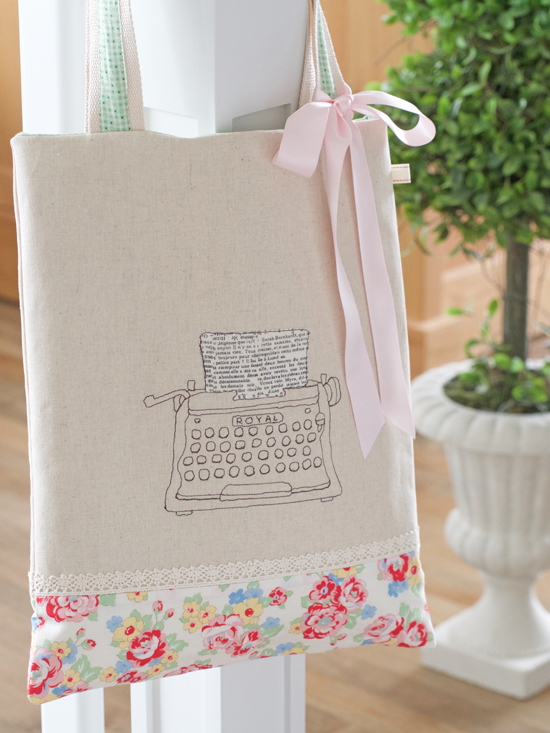
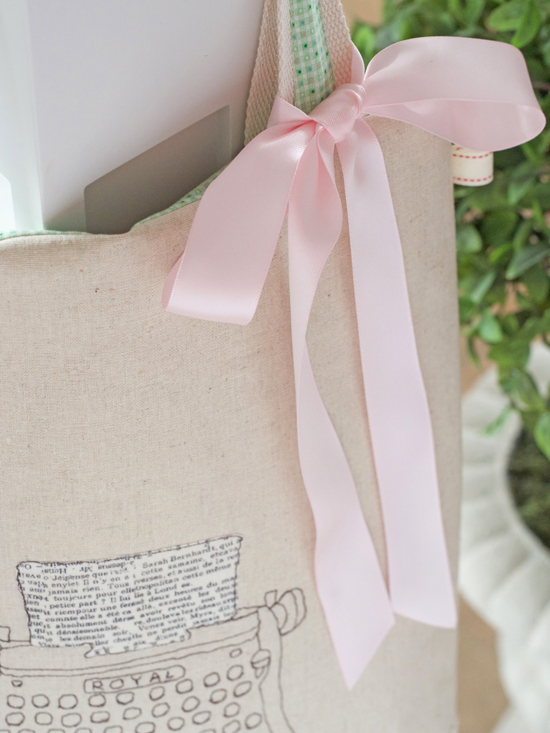
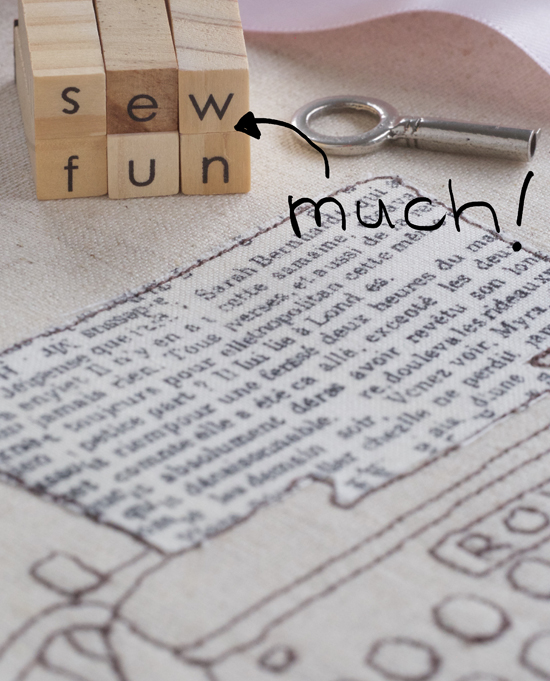
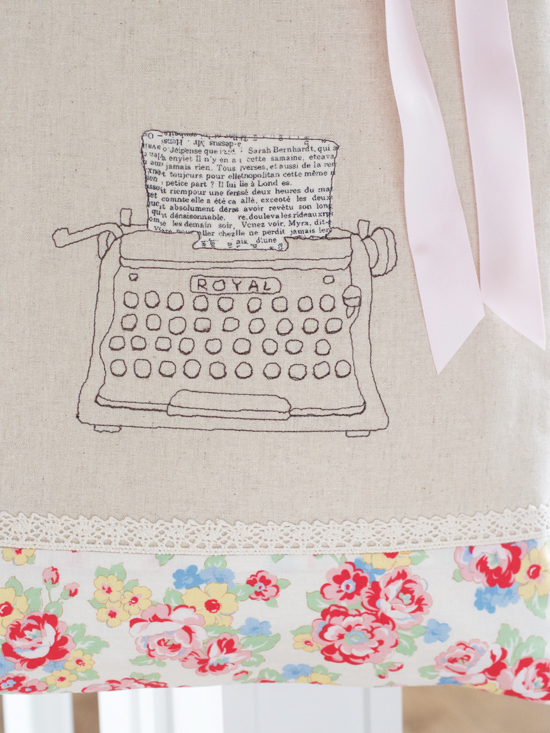
The first task was to choose a project from the book.  Every.single.design in this book is adorable and I love ALL of them!  But I eventually settled on the typewriter tote for a few reasons.  One, I'm a technical writer and I like that it's an (old-fashioned) tool of my trade.  Two, I have an English degree so I'm fond of most things "writing" related.  Three, my mom had a typewriter very much like this one and I used to play with it as a kid.  (Does anyone else remember how heavy the "shift" key was?!) 

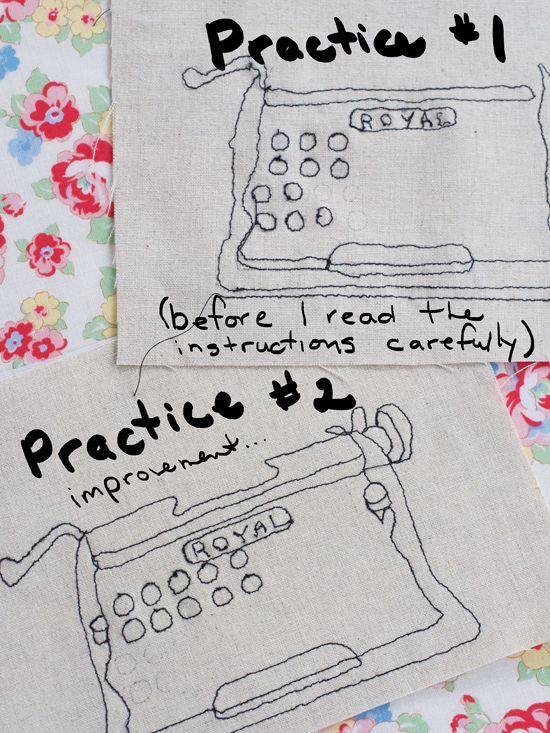
My practice consisted of two partial executions of this pattern.  First time I didn't use interfacing ('cause I'm terrible about reading instructions, I'm embarrassed to confess).  And I tried out a few different feet on my machine that were recommended in the book to see which one worked better for me.  And then I just worked on getting used to the rhythm of free-motion drawing.  Not gonna lie ... as you can see in the photo above, I wasn't 100% confident that I was going to get the hang of it.  But I went on to the second practice, which was noticeably better.  Interfacing on the back really helped make my lines neater, and my confidence was growing.

After maybe about 20 minutes of practice I got impatient, as I tend to do when I just want to get on with something.  So I cut a large chunk of linen, drew the complete design, and went to work.

And that's it.  Honestly.  No smoke and mirrors required.  That's all it took to make my very first thread-illustrated design.  And I could not be prouder of myself or more grateful to Minki and Kristin for teaching me something new.

Thank you Ladies! xoxo

Now I need to go somewhere with my pretty, new tote.  I was thinking maybe the Apple store ... LOL!  Wouldn't it be fun to pull your laptop or iPad out of this bag?

If you're even remotely thinking about trying your hand at thread illustration, do yourself a favour and give it a whirl.  In no time you'll be wanting to replicate ... I dunno ... the Sistine Chapel ceiling or the Mona Lisa.  Or even American Gothic!  LOL!  Dive into your stash and start having fun.  (This book is available as an ebook from C&T Publishing so you can download it in a matter of minutes and be drawing within the hour.) Whatcha waitin' for! :) xo

Thursday
Aug252016

sweet orchard tour

(I deliberately fussy cut the flap so the strawberry would be right where the snap goes.  And then I absolutely HAD to make a special trip to the fabric store just to get a package of white "O" snaps so I could frame the little strawberry on the print rather than covering it up.)

Hello!  So glad you stopped by to see what I made with Sweet Orchard by Sedef (of Down Grapevine Lane fame) for Riley Blake.

This is her first (of hopefully many more) fabric collection and it features soft and pretty shades of pink and blue, brighter colours of green and yellow, and then a few kisses of red and gray.  And it has THE sweetest motifs!

As soon as this fabric arrived in my mailbox, I was flooded with inspiration.  Soooo many cute things I want to make with it!  But I had to start somewhere so I went to this sweet little pouch - definitely one of my favourites.  (You can find the pattern on my Pinterest board here.) I think it shows of a few off the prints so well.

You can find all the other stops on this tour below ... believe me, you want to check them ALL out!

Congratulations Sedef!  xo k

15 August Nadra ellisandhiggs.com
15 August Sarah alittlehappyplace.blogspot.co.uk
16 August Jemima tiedwitharibbon.com
16 August Anorina sameliasmum.com
17 August Lisa aspoonfulofsugardesigns.com
17 August Minki minkikim.com
18 August Kimberly fatquartershop.blogspot.com/
18 August Keera livelovesew.com.au
19 August Cassie cassandramadge.com
19 August Liz & Elizabeth simplesimonandco.com
22 August Samantha aquapaisleystudio.com
22 August Xanthe wife-made.com
23 August Peta shequiltsalot.com
23 August Stacy stacyolsondesign.com
24 August Sharon lilabellelane.blogspot.com
24 August Amy diaryofaquilter.com
25 August Sarah piccolostudio.com.au
25 August Kristyne prettybyhand.com
26 August Jennie cloverandviolet.com
26 August Megan quiltstory.blogspot.com
Tuesday
Aug162016

apple farm tour

Oh Elea, you did it again.  Seriously.  Your sweet retro/vintage/child-themed fabric collections are truly amazing in all their adorable-ness!

The colours are vintage 30s style so anything made with it instantly has that warm, nostalgic feel.  And all the super cute motifs?  Agh!  Can't hardly stand it!  LOL!

Apple Farm.  Love it.  Get it.  Make something adorable with it.  You, and that sweet little child in your life, will be very happy. :)

Melissa at Oh How Sweet is up tomorrow so remember to check her out! 

xo k

Thursday
Aug042016

posy garden tour

Hello again! (I know, twice in one week?! LOL!)

I was pretty excited when Carina Gardner invited me to be part of her tour to show you her beautiful new fabric collection "Posy Garden" with Riley Blake.

This collection is bright, fun, and pretty - a lovely style combination of traditional and modern. Navy, aqua, claret, and pink.  It was the pinks that stole my heart. :)

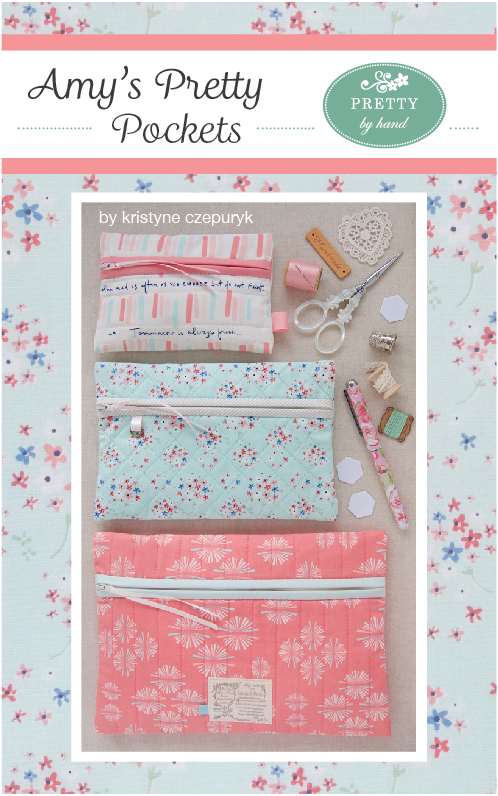
I needed to make a little "because you are special" gift for a friend and decided to use the pinks for a quick and practical gift.  I used my own Amy's Pretty Pockets pattern to make this coordinating set of zippered pouches.

Now I want to make a set in every colourway! (One can never have too many handmade gifts in the closet for those last-minute emergency gift-giving situations ...)

Here are all the stops on this tour.

Monday, August 1st: My Sewing Haven with Carla Peicheff
Tuesday, August 2nd Happy Little Cottage with Debbie Homick
Tuesday, August 2nd The Family Hearth with Bridgette McNay
Wednesday, August 3rd Fort Worth Fabric Studio with Lindsey Weight
Wednesday, August 3rd Happy Quilting Melissa with Melissa Corry
Thursday, August 4th Pretty By Hand with Kristyne Czepuryk
Thursday, August 4th Out of the Blue with Sondra Davison
Friday, August 5th Samelia’s Mom with Anorina Morris
Friday, August 5th Free Time Frolics with Adrienne Woods
Monday, August 8th Flamingo Toes with Bev McCullough 
Monday, August 8th Silly Mama Quilts with Brooke Sellmann
Tuesday, August 9th Snickerdoodle Stew with Jessica Stewart
Tuesday, August 9th A Little Patchwork with Ange Hamilton
Wednesday, August 10th Ameroonie Designs with Amy Chappell
Thursday, August 11th One Little Pooh with Tina
Thursday, August 11th Jedi Craft Girl with Amanda Neiderhauser
Friday, August 12th Stitching Revival with Christine Cook
Monday
Aug012016

pretty playtime blog tour

Hi there!  Welcome to my stop on the Pretty Playtime Quilt Along with Fat Quarter Shop.  I'm so excited about this book.  It's the first - of hopefully many more - by Elea Lutz.  She designs the CUTEST fabrics for Riley Blake and this collection called Strawberry Biscuit is no exception.  And to see an entire book of quilts filled with designs custom made for this fabric?!  Do.die.for.

I literally whipped up this Basket Block in about an hour because the instructions are so easy to follow (especially if you have a package of Alphabitties!)

Here are all the other lovely ladies on this tour.  So many pretty things to see!

Week 2 - Erin from Why Not Sew?
Week 3 - Wynn from Zakka Art
Week 4 - Anorian from Samelia's Mum
Week 5 - Amy from Diary of a Quilter
Week 6 - Renee from Sewn with Grace
Week 7 - Jemima from Tied with a Ribbon
Week 8 - Amanda from Jedi Craft Girl
Week 9 - Debbie from Happy Little Cottage
Week 10 - Tina from Emily Ann's Kloset
Week 11 - Erica from Kitchen Table Quilting
Week 12 - Me
Week 13 - Heidi from Fabric Mutt
Week 14 - Brigitte from The Family Hearth
Week 15 - Lorrie from Sew Mod Designs
Week 16 - Kristin from They Grow Up Too Fast

Congratulations my dear sweet Elea! Looking forward to your next book. :)

Sunday
Jun122016

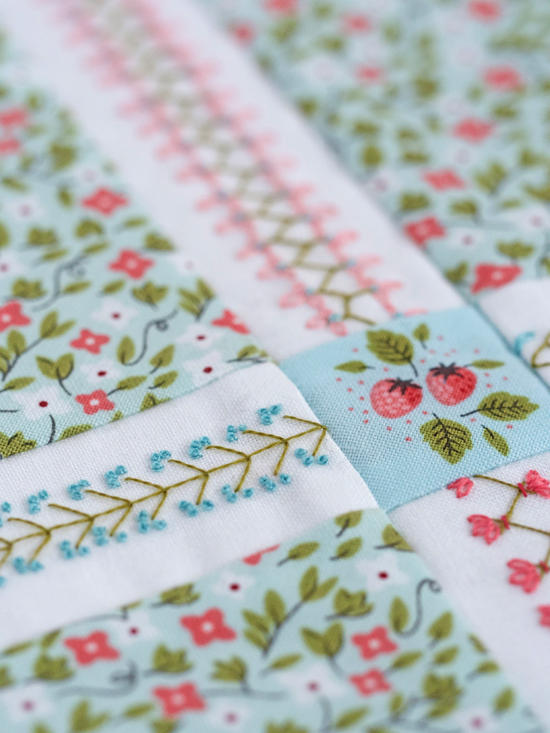
splendid sampler ~ block 35

Have you been following this amazing Splendid Sampler quilt-a-long? There's something for everyone, that's for sure.  I still shrug my shoulders when I try to figure out how I was lucky enough to be invited to design a block for this epic venture by Pat Sloan and Jane Davidson.  Well done, ladies!  My hat is off to you.

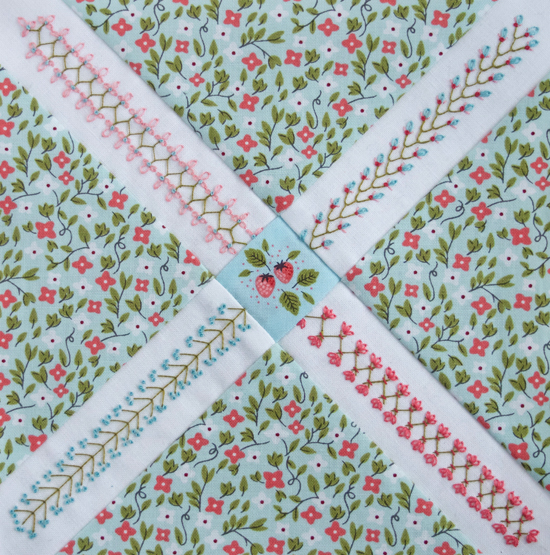
I was asked to design a block for the "embroidery" category.  Perfect.  I love any excuse to pull out my boxes of floss.  But I was mindful that not everyone will be embroidering their blocks.  So I came up with something that would look equally nice with or without stitchery.  (How about using an interesting stripe to replace the embroidery?)

My "splendid" thing is a wishful garden.  If you've followed me for a while, you'll know that the few times I've mentioned gardening are usually to lament over my disappointing failures in the horticulture department.  I live in Zone 3.  If you're not familiar with climate zones, 0 is the arctic circle, so I'm not very far south from that!  LOL!  Anyhow, my beloved English cottage garden is pretty much impossible here.  I was getting sorta good at growing things for a little while, but then I became a mom and ... well ... gardening will forever take a back seat to my family and sewing ;).

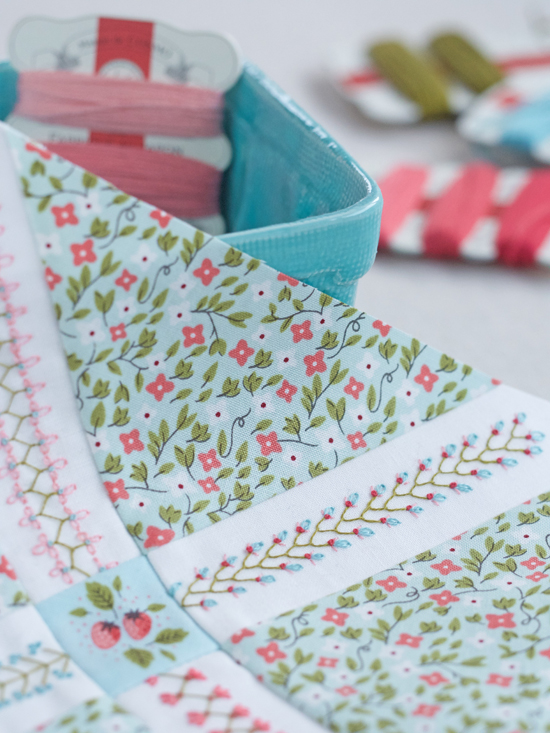
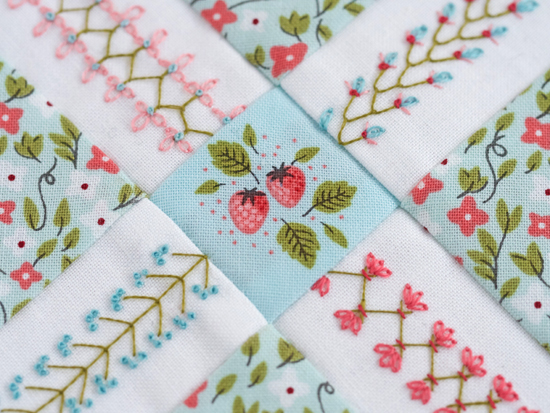
However, I can stitch up rows of flowers in no time that will forever be in bloom (and will never need to be weeded)!  I went a little old school here with some traditional crazy quilt stitching, but I like how they look less crazy, more orderly in four straight rows.  And what a lovely thought to have a strawberry patch at the end of every garden path.

I hope you enjoy making this block, with or without embroidery.

You can find the free pattern for this and all Splendid Sampler blocks here. Also, find both piecing and embroidery tutorials on YouTube by Penguin and Fish here!  xo k

Tuesday
Jun072016

garden path slim case ~ a little summer project

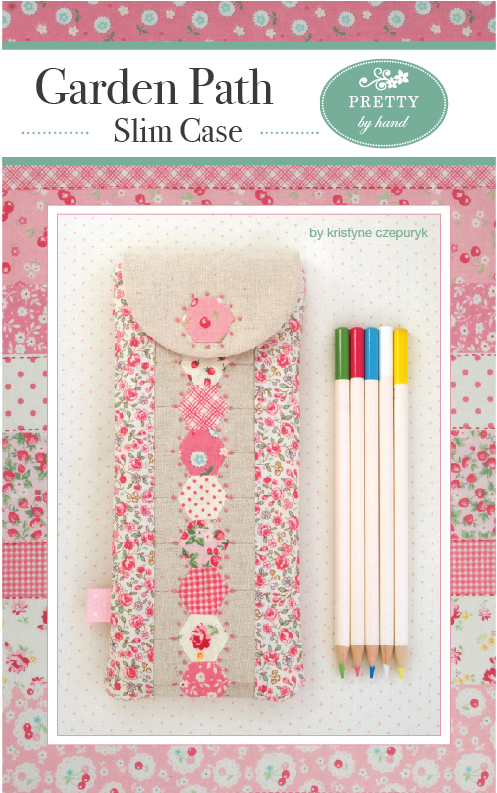
Hexagons. 

They just never get old, do they.  Especially when they're Engish paper pieced. ;)  Here's my latest pattern featuring a mere 33 hexagons and measuring in at just 1/2" each. 

If you're intimidated by little, please don't be!  I hear that comment so often from quilters.  For some reason, many very skilled sewists and quilters shy away from smaller sizes because ... well, I'm not exactly sure why.  I suppose for cutting and machine piecing, accuracy is more important - or rather - smaller pieces are less forgiving.  I understand that. 

But when it comes to EPP, the technique is indential to larget pieces.  And as far as I'm concerned, smaller seams are faster!  LOL!  (Although yes you have more of them in a larger project she said speaking from experience. ;)

Anyhow, I made this case last summer when I was on a holiday in Palm Springs.  It was published in Love Patchwork & Quilting (Issue 28) last December and now it's finally available in my shop here. (PDF only)

I designed it to fit pencils, but I deliberately didn't call it the "Garden Path Pencil Case" because it can be used for so much more ... makeup brushes, sewing notions like scissors, rulers, etc., lunch utensils for the office ...

When I was deciding on prints for the feature hexagon path, I found the prettiest FQ cheater panel in my stash by Atsuko Matsuyama.  It was the easiest thing to cut out a few hexagons that looked scrappy by coordinated perfectly.  Love that.

I couldn't NOT add a few embroidered knots, but you don't have to if you don't want to.  Totally optional.

The closure? Easy peasy lemon squeezy - a simple snap.  No zippers, no magnets, no button holes ... just the most basic, utilitarian snap. 

Oh, and by the way, this little case would make a great teacher gift. ;)

Sunday
Jun052016

quilted bags & gifts ~ a giveaway

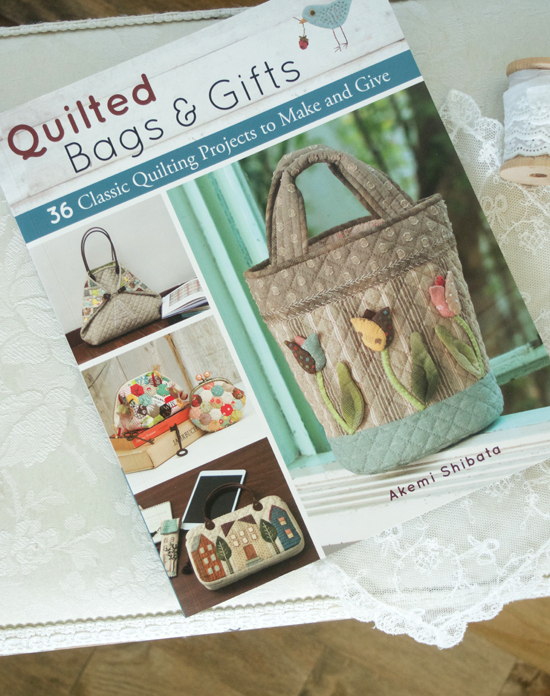
I'm really happy about this news.  Akemi Shibata's book is finally available in English and I happen to have a spare copy to give away.  Zakkaworkshop kindly asked me to help as one of the English editors and I'm really proud to have been involved in bringing this lovely book to the English-speaking part of the world.  It has so many beautiful and fun projects.  I've already made two (including the coolest bag I've ever made ;) and I plan to make more cute things.

Ok.  To enter this giveaway, just leave a comment here stating your favourite season. That's it!

Happy Sunday, all!

xo k

PS:  Zakkaworkshop - along with selling the book in their online shop - will also be selling all the cool hardware that is used in this book.  I'll let you know when!

Saturday
May142016

arguably the coolest bag i've ever made

From the second I laid eyes on this quilted bag in a Japanese book I was editing, I KNEW I was going to make it.  My curiosity demanded it.  I'd never seen anything quite like it and I loved everything about it ... the shape, size, handles, patchwork, colours, monogram with embroidered outline, and of course the super cool swivel hook clasp.

At a glance, it looks pretty straight forward.  The patchwork is made from simple sashed squares set on point.  The body is mostly just top-stitching (also should have been done by hand).  Add a quick appliqued letter and throw on some handles and boom! there you have it.

However, like many clever Japanese designs, this one requires a little more attention than you think.  The squares are an odd size, and the patchwork pieces are cut with templates.  So when you're cutting/piecing them together, if your seam allowances aren't precise, the wheels fall off. 

About the appliqued letter - the book only comes with a template for "A", I'm assuming after the author Akemi Shibata.  So I had to find a font on my computer, get the correct size, and make my own template from there.  The gorgeous fabric I was given by Lecien is just so lovely to work with, but it's a thicker woven that isn't usually used for applique.  It took a little more attention to get the corners right.  Not gonna lie, the embroidered outline hides a little of my .. er ... less then perfect points. ;)

About the colours.  I know, I know, NOT something you'd think I'd like, right?  But I was kinda mesmerized by the interesting mix of black, brown, blue, green, and yellow.  So I dove into my stash and found it surprisingly easy to come up with these prints - 3 of each colour - and (almost) all from Lecien.  The original bag also used a fun book/letter print for the sashing so when I found this one in amongst all my "script" fabrics (of which I have several, so it turns out), I knew it would be perfect.  Don't be surprised if I end up making an entire quilt with these colours.  I won't be. LOL!

And then the hardware.  Love it.  Love it, love it, love it.  But here's the thing.  I needed to use dark thread to go with the leather, but the lining of the bag is very light.  I didn't want the stitches to show through and I didn't want to applique a "bandaid-cover-up patch" over the stitches on the inside afterwards.  Soooooo, I just took my time and stitched the handles and swivel hook - which have pre-punched holes - very slowly and carefully by only catching the top layer of fabric and batting with my needle.  Somewhat tedious, but well worth the results.  For me.

I got several questions about the red handles from my last post.  All the hardware from both of these bags will be available very soon from ZakkaWorkshop, the company that is publishing the English version of Akemi's book, "Quilted Bags & Gifts".

Happy weekend to you! xo k

Monday
May092016

they call me "the bag lady" ...

For a time, I worked at a quilt shop sewing shop samples, teaching classes, designing projects, and writing patterns.  My favourite thing was to make and teach bag classes - especially Japanese designs from books and magazines.  For me, they provide the perfect balance of design and interesting bag construction.  I learned something new from every project and was always eager to start the next one.  It didn't take long for me to earn the nickname "the bag lady".  So many times I'd be introduced to a customer and they'd say, oh YOU'RE the bag lady!  LOL!  It was fun, and I enjoyed it.

Ironically, I don't like carrying a purse.  Never have.  I'm good with just a wallet.  And for evenings out, my husband's suit pockets work great. ;)  I reluctantly carried around a tote of sorts when my girls were babies.  But now?  Not so much.  I've been going to a fitness place 3x/week now for almost 4 months and I carry my sneakers in a plastic shopping bag!  LOL!  I'm totally not kidding you.  My girls make fun of me saying that for someone who makes/owns so many bags, I have no excuse to NOT use a cute bag.  Excuse?  I don't even have an explanation.

I finally replaced the plastic bag with a cloth one last week, but it was a gift with purchase, not even one I made.  I know.  Again, no explanation.

That was my lead-in to this latest project ... a Japanese bag from Akemi Shibata's book, "Quilted Bags & Gifts" that will be available very soon in English!  I had the pleasure of working as a technical editor on the book, and was also asked to make a few bags for quilt market.

This little beauty is called "Two Way Hexagon Bag" - two way because it has both hand handles and a shoulder strap.  Oh how I love this bag!  Among the more obvious and charming features, it has a hidden pocket in the front, a zipper installed by hand, and I love the little finger tab on the end of the zipper.  And then there's the lovely red leather handles and strap!  I used Lecien's Mrs. March scraps from my stash that I've collected (hoarded) over the years. 

To me, this is not a 100% true rendition of a Japanese bag ~ I had to cheat a little with this one because of time.  I made the hexagons slightly larger so I had less EPP hand-stitching, and I wish I had time to hand quilt the hexagons too, but I had to settle for machine.  In fact, ALL the quilting should have been done by hand.  (Sigh.)  I machine-stitched the zipper bindings down rather than hand stitched them.  And the zipper tab was supposed to be two covered buttons, but the store was out of the correct size so I used a technique I'd learned from other patterns and that didn't require anything special.  And in the interest of FULL disclosure, the little loops to hold the D-rings for the shoulder strap also should have been hand-stitched in place.  I just caught them under the top zipper binding.  Ok, those are all of my sins confessed for this project.

I made another bag from Akemi's book that I'll show you soon.  It has a fighting chance of becoming my official "work-out" bag ... when I get it back after Quilt Market. :)

xo k

Friday
May062016

a spoonful of sugar ~ book tour

Lisa Cox has been a fixture in our blog community for many years and she never fails to delight us with beautiful photographs, pretty fabrics, and inspiring projects/tutorials.  I was over-the-moon happy when I heard she was writing a book!

It's finally here and I have great pleasure of showing you one of the projects from "A Spoonful of Sugar".

You know, I've been meaning to make a sewing portfolio for ... a really long time.  My sister even asked me to make one when her store-bought one was falling apart (back in the 90s or early 2000s ... I wasn't kidding when I said a really long time!).  I just never got around to it, I guess.  So when I saw Lisa's verison, I simply needed to make it.

I used all "Flower Sugar" fabrics by Lecien.  The main fabrics on the cover and the inside are from the newest collection that's coming out later this year.  But the handle fabric is about four years old and the binding fabric is from five years ago!  That's one of the things I love about Flower Sugar - it mixes so well from year to year.

Oh, and the solid pink is a Lecien Flower Sugar basic.

My first fabric pull for this project was pink for the main fabrics and yellow for contrast.  But at the last minute, I remembered my recent apology to yellow and a promise to myself to use it more often, so I did a last minute switcheroo.  I love how sunny and happy it looks.  Yellow is just cheerful.  Period.

A few "full-disclosure" items:

One - the original pattern in the book has a delightful hourglass patchwork cover, but sadly I didn't have enough time so the cover of this one is just something I made up on the fly, it's not in the book. 

Two - I'm really naughty about reading instructions carefully.  I'm embarrassed about that, but it's true.  It's quite ironic too, because if you've ever bought one of my patterns, you may have read the "Please Read Carefully" clause on the first page!  LOL!  Gotta love karma ... I got caught with this pattern.  One of the photos of the finished project shows what I thought was a decorative measuring tape ribbon stitched to the inside.  I thought it was a sweet and clever design detail, and I just so happened to have such a thing it my ribbon box.  I realized later that it is an actual measuring tape that's supposed to be functional!  (I'm such a donut sometimes, honestly.)

Three - I fussy cut a pretty rose for the tab closure and decided to use a magnetic clasp rather than a snap that would hide some of the rose.  That's just the way I roll.

I hope you are inspired to make one of these super handy portfolios for yourself, or even for a gift for a sewist you know.  If you've never sewn with plastic before, don't be scared!  The sewing machine goes through it like butter. 

I'm only one of many stops on this book tour.  Here's a list of all the blogs you can visit to find out more about Lisa's book that I think belongs in every sewist's library. :)

April 26 – Jodie Carlton from Ric Rac

April 28 – Melissa LeRay from Oh How Sweet

April 29 – Jemima Flendt from Tied With a Ribbon

April 30 – Beverley McCullough from Flamingo Toes

May 2 – Sedef Imer from Down Grapevine Lane

May 3 – Nadra Ridgeway from Ellis and Higgs

May 4 – Amy Morinaka from Chick Chick Sewing

May 5 – Caroline Critchfield from Sew Can She

May 6 – Me ;)

May 7 – Bronwyn Hayes from Red Brolly

May 9 –  Anorina Morris from Samelia’s Mum

May 10 – Peta Peace from She Quilts A Lot

May 11 – Faith Essenburg from Sarana Ave

May 12 – Angie Wilson from Gnome Angel

May 13 – Sharon Burgess from Lilabelle Lane Creations

May 14 – Stacy Olson from Stacy Olson

May 16 – Ayda Algin from Cafenohut

May 17 – Jennie Pickett from Clover and Violet

May 18 – Wynn Tan from Zakka Art

May 19 – Lisa Cox from A Spoonful of Sugar

Lisa, thanks a million for inviting me to participate in this book tour.  Your work delights and inspires me always.  Congratulations on a lovely book.  Looking forward to your encore publication! ;)  xo k

Friday
Apr222016

strawberry biscuit blog hop

Hello and welcome to my stop on the Strawberry Biscuit blog hop.  The designer of this fabric - Elea Lutz - has become such a delightful friend of mine and I'm completely honoured that she asked me to share with you some things I was inspired to make with her adorable fabric collection.  I'm pretty sure that you'll be inspired too.  The designs are bright, happy, sweet, adorable, cute, with lots of pink and bows and flowers ... what's not to like?

I've had so much fun sewing with these pretty fabrics.  First up is a cosmetic bag that's pink with lace and strawberries and a little "handmade" label.  It's basically everything my "grey/skull pouch" daughter didn't want. ;)

These pouches are just so darned fast and easy and PRACTICAL, I thought it'd be fun to make another one in the blues from Strawberry Biscuit.  I threw in a little yummy citrus lime solid (also Riley Blake) for a little contrast.

Next up is a tote from a Japanese book by Atsuko Matsuyama.  The original pattern has a cute little patchwork pocket on the front.  I immediately thought the patchwork print in this fabric collection would substitute perfectly - as well as save me some piecing time.

Last, but not least, I found another perfect project for the patchwork print (so cute!) ... one of my own patterns called "Thank Heaven for Little Girls".  (Click here to find the pattern in my shop.)  I've literally made dozens of these sweet little purses over the years for my daughters and all their friends.  I've never met a little girl that didn't like to put all her tiny treasures in a purse to carry around, whether it's just in the house, to a play date, running errands with mom, or to church.

This "cameo" charm was fussy cut from one of the prints ... sooooo vintagy-retro-y cute!

Well, that's it for me, for now. ;)  Hope you enjoyed my Strawberry Biscuit makes.  Click here for a list of all the blogs to visit and the dates of this tour.  There are so many talented sewists and beautiful projects ... I promise you won't want to miss a single day of it!

xo k

Friday
Apr012016

flower sugar christmas

I don't need to SAY anything about this new Christmas Edition of Flower Sugar by Lecien.  You know how I feel about it. :) 

I made this pouch last nite instead of going to the gym.  (It's hard to feel guilty when I'm sewing with pretty fabric!  LOL!)

xo k

Wednesday
Mar302016

iPad mini + epp = :)

Issue 33 of Love Patchwork & Quilting is out in the UK (and online) today and will hit America next month.  I'm a little excited because I've got a project published in it that I hope you'll enjoy. :)

It's always fun to see your work in a magazine.  It seems surreal that something you design and plan and make with your own hands and then pop in the mail miraculously appears four months later on the other side of the world ... all ... I don't know ... like something someone else did ... in the pages of a fabulous, glossy, trade publication.  I would love to be a fly on the wall of readers when they turn the page and see my thing.  Where are they when they read this magazine?  Are they in a favourite comfy chair in a corner near a window?  In bed?  On a train commuting to work?  On a coffee break?  Do they like it?  Do they linger on the page, or perhaps even read about it?  Does it inspire them?  Are they drawn to the fabric, or the technique, or the finished project itself?  Will they actually make it?  Will it be kept or gifted?  Will a recipient love it and use it?  I'll never know the answer to any of these questions, but it's fun to imagine that I might - in some small way - make someone happy.

I made two versions of this project - one traditional and one a little modern.  (I'm stretching myself and it feels good!)  The editors at LPQ chose the modern version (above) with Lecien's Minny Muu collection and a touch of grey (not my usual white).  Here's the other one.

(Skeleton keys?  Really?  LOL!  They have absolutely nothing to do with the subject matter.  I'm just getting a little bored with my go-to scissors and spools of thread, but I needed something to fill that blank space and I thought you'd appreciate something new ... plus I kinda like the juxtaposition of the old-world tool with the high-tech gadget.)

As you might have guessed, it's "girly" with a mix of my beloved PamKitty prints from Lakehouse, as well as a handful of assorted Japanese prints of little flowers in bright colours that I never tire of (and at this rate will also never run out of, either!) 

(That PamKitty bird with a parasol ... how could I NOT?!)

Lace, of course lace.

And I fussy cut a bit of fabric to make a rose fabric tab on the side.

By the way, if you're looking for English paper-piecing templates, please check out my sweet friend Jessie's shop here.  In addition to a great online source for templates, she has lovely Liberty fabrics and a super adorable Block of the Month club ... check it out!

That's all for today.  Hope you're having a great week and that your Easter chocolate tooth was satisfied.  Mine sure was! xo k

Monday
Mar212016

COSMO painted embroidery hoops

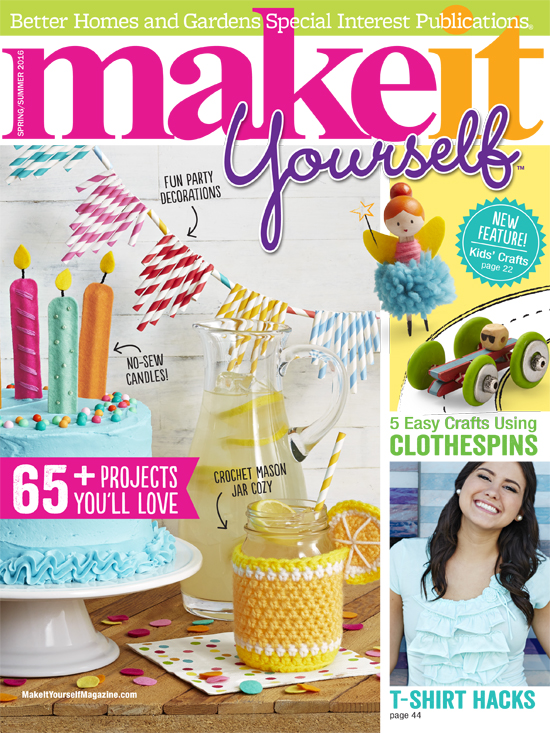
It's no secret that I love COSMO embroidery floss.  But today I want to share with you a new product by COSMO - these beautiful painted cypress wood embroidery hoops.  They're so pretty!  Make It Yourself magazine features them in the Wish List of their Spring/Summer 2016 issue (on newstands today).

The purple hoop inspired me to stitch up a sweet sprig of lavender.  Funny thing, though.  When I was finished the embroidery, I suddenly remembered a conversation I had - literally a week ago - with a friend about how much I love the colour combination of aqua and lavender.  So I switched the hoop and ... voila!

(The beautiful lace print fabric is from "Centenary Collection 21" by Yoko Saito for Lecien.)

I wanted to add a bow somewhere to my embroiderey piece in the.worst.way.  I auditioned both aqua AND purple ones.  Tried many positions, too ... above the word, below the word, on the flower, on the metal closure of the hoop ... but my daughters are doing their best to "modernize" me and convinced me that simple is better.  So I settled for having a bow in the photo instead.  A happy compromise. ;)

Happy Easter! xo k

Sunday
Mar062016

dear yellow, i am so very sorry

Dear Yellow,

I am so very sorry that I've never given you due consideration or credit.  You know how much I like using you as an accent for things like flower centers, or other smaller details.  But I never really appreciated your full sparkly potential, and especially how wonderfully you play with my beloved pinks and aquas.

I am always quick to admit when I've been wrong.  I was wrong about you.  You are not just an extra.  You are a star!

I wish I could take credit for having this revelation on my own, but I must thank Stacy for putting you in my sights.  Now that I've seen how wonderful you truly are, and how much personality you can add to my projects, I promise that from now on, I will look to you when I do fabric pulls for future designs.

I hope you will forgive me.

Yours truly, Kristyne

(same print touching ... grrr)

Although I quite enjoyed the skull pouch challenge, this ... this is like coming home from being away for a while and crawling into your own bed with fresh sheets.  Soooo comfortable. 

This is my comfort zone.  Pretty much everything I was NOT allowed to use for my daughter is in this round pencil case (pattern here!).  And I love it.  I will even get over the touching fabric - which is more irritating when you know that I made the pink ends with two different prints specifically to avoid that problem.  But apparently when it's after 10:00 pm and my daughter is on an airplane somewhere half way across the continent, my concentration is dodgy at best.

Hope you have a sunny, yellow week!

Saturday
Mar052016

a mother's love has no end ~ and a winner

Ok, winner first.

I deeply apologize for not announcing to all the winner sooner for the Paperie Blog Tour.  But I did contact the winner already.  Congratulations to Tricia C! You have an "Amy's Pockets" kit coming your way. :)  Thank you so much to all who participated.

*     *     *     *     *

Your child is like a box of chocolates - you never know what you're going to get.

I think most people assume/hope(?) their kids will be a lot like themselves. I did. As it turns out, not so much. My first daughter is lovely.  She's 14.  She's kind, sweet, gentle, sensitive. (In those ways, she is like me, I think.)  However, her style is about as opposite from mine as one could possibly get. And don't get me started on the whole music thing.  I don't get it.

But I love her and I respect her individually. She is teaching me a lot and I am a willing student.

So.

She is going on her first trip away from home alone and I wanted to make her a little something special to remind her that I am always thinking about her while she's gone. 

This is how my research went.

Me: Can I make you a cosmetic bag for your trip? 

Her:  Can you make it big enough to fit my hairbrush?

Me:  Of course!  I can do anything. ;)

Her: Ok, but not pink.

Me: What colour would you like?

Her: Black.  Or grey.

Me:  Can I use an accent colour?

Her:  Navy.  But only if you have to. And nothing with flowers, stripes, polkadots, words, animals ... just p.l.a.i.n.  But if you have fabric with skulls on it that would be awesome.  (She said that as a joke knowing full well I have no such thing in my stash LOL!)

Me:  Can I at least add a label or something?

Her:  I'd rather you didn't (trying not to hurt my feelings too badly).

Me:  And how about some top-stitching.

Her:  No.

Me:  Ok.  Let me see what I can do.

I pulled some fabrics and got her final approval.  She's fine with the lining.  But I kept the applique a secret.  When she came into my sewing room to check on my progress, I had to quickly hide the evidence!

Two hours later I presented her with this.  I'm happy to say I surprised her a LOT.  She didn't know I had it in me to do skulls.  And she is cool with the red tab, thank goodness.  I took a risk there.

Sigh.  I love her so much.

And I'm going to be a weepy mess for the next 7 days.  How did mother's survive such things before texting? I salute you!!!

Saturday
Feb132016

a blog tour, a new pattern, and a giveaway (oh my!)

Hello hello!  And welcome!

Have you been following this tour? Every day I gasp with amazement at all the lovely creations being made with Paperie.  Love them.  And the fabric.  And my dear sweet Amy.  We've been pals since we were both newbie bloggers.  (Hey Amy, can you believe it's been almost 5 years now?!) She was the first blogger friend that I met in person.  I was an instant fan of her work and style, and an instant fan of her as a super nice person.  I'm honoured to call her friend (sorry for being so corny, but it's true).  And I know how hard she worked to realize her dream of designing fabric for all of us to be inspired to make pretty little things.  So I'm super excited that today is my turn to show off Amy's debut fabric collection, and the pattern I wrote specially for it.

Back Story ... because, you know me ... what's a blog post without a back story? ;)

Some 25 years ago (wait, what? seriously? that can't possibly be right! and yet, it is ...) when I started working at a Laura Ashley shop, it was at the beginning of the Christmas shopping season.  And like most stores, Laura Ashley shelves were stocked with specialty holiday items designed for easy and affordable gift-giving.  One of my favourite such gifts was a little set of 3 cosmetic pouches made in coordinating fabrics and tied with a ribbon.  It was always popular with husbands and boyfriends because they didn't have to worry about it fitting. ;)

I gave and owned many of these sets and have been meaning to make them all these years because they are the perfect combination of pretty and practical.  In fact, I still have a few surviving pouches that I use for travelling.  So this finish feels pretty darned awesome because A) it's finally DONE, B) I got to use Paperie, C) it turned out super cute, and D) now I have my new favourite quick gift to make for daughters, sisters, moms, friends, teachers, hostesses ... ... ... ME!

Sometimes these pouches were made with coordinating zipper binding (as I've made mine) and sometimes they just had plain, exposed zips.  Of course the binding takes a little more time and attention, but I think it look so much prettier, and it's more fun for me to play with more fabric. 

Consider adding a layer of clear plastic to the lining if yours are going to see some heavy-duty makeup use.

And as with anything handmade, finishing details are the icing on the cake and can be whatever you want them to be.  I've shown a few simple ideas here, but you can satisfy your inner muse with patchwork, applique, and embroidery to name a few more ideas.

Pattern is available here. (PDF download only.)

Now I also have a little giveaway today.  I had enough leftover fabric and notions to make up a complete kit for someone to make exactly these three pockets. Everything is included - fabric, ribbons, label, d-ring, zippers, and pattern.  All you need to add is batting and thread.

Here's the deal. (I was going to make this exclusive to Instagram, but I think some of you don't use it.)  So.  If you ARE on IG, like my Paperie post and leave a comment tagging a friend.  Just one friend.  If your name is chosen, you will win the kit and your friend will win a Paperie charm pack from Amy. :) If you are NOT on IG, then just leave a comment here saying so and you will be entered to win the kit.  Anyone can enter, no matter where you live, and entries close Feb 15th.

Good luck! xo k

Wednesday
Jan272016

true love pinnie

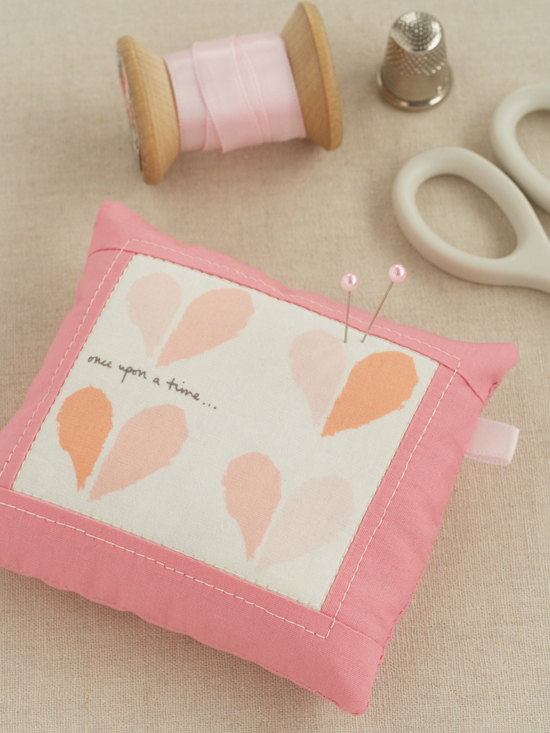
Hey!  Just popping in real quick to show you this sweet little pincushion I whipped up in less than an hour this morning.  Seriously.  Cheri made it for Amy's Paperie blog hop and I just couldn't help myself.  I needed to make it more than I needed a cup of tea. ;)  True story.  Find the tutorial here.