Entries in 2012 Holiday Tag-a-Long (8)

Monday
Dec232013

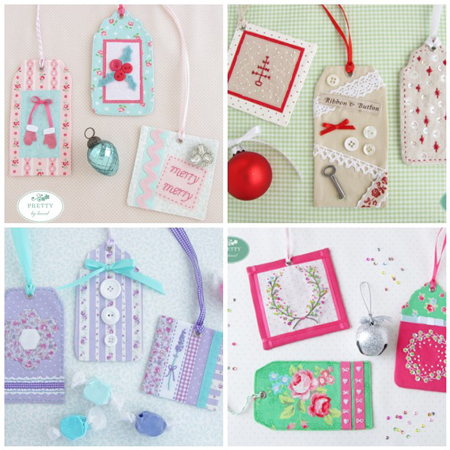
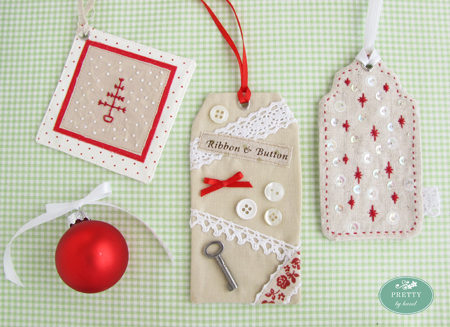
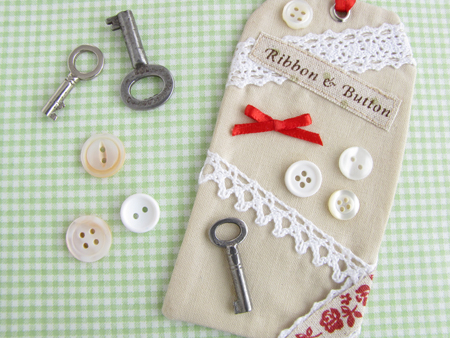
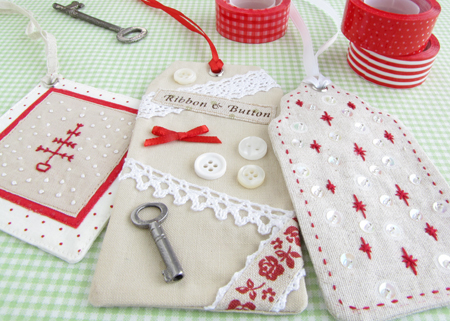
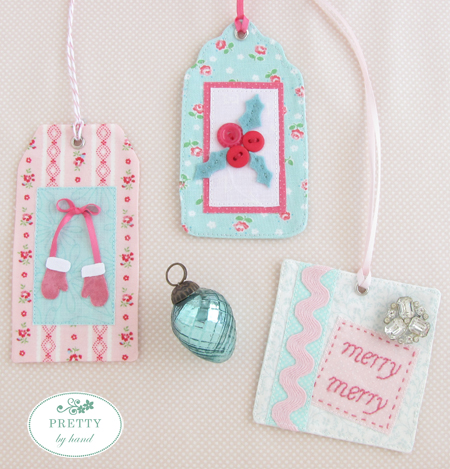
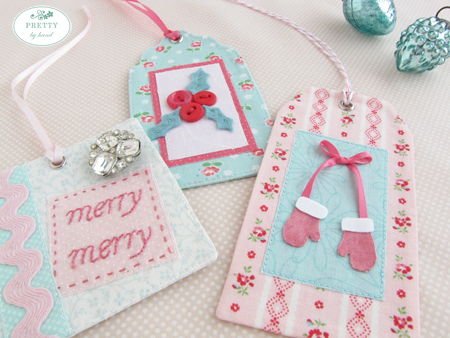
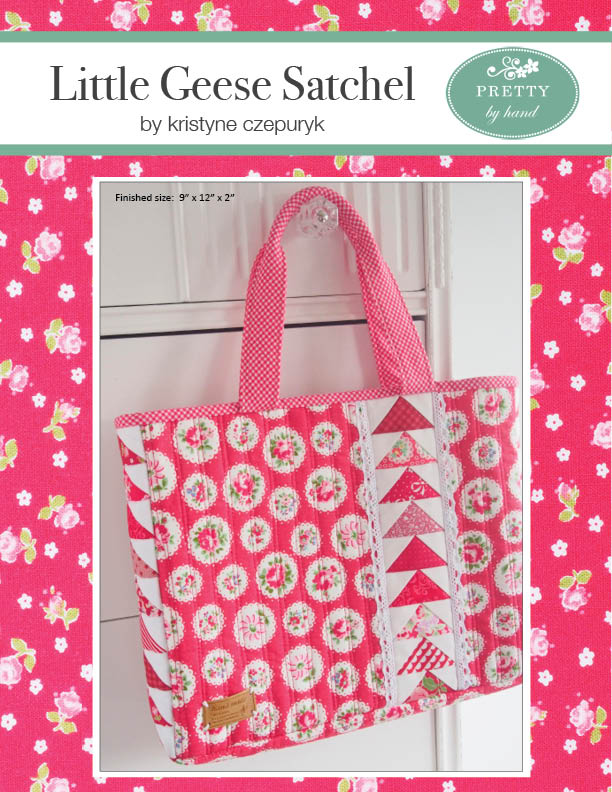
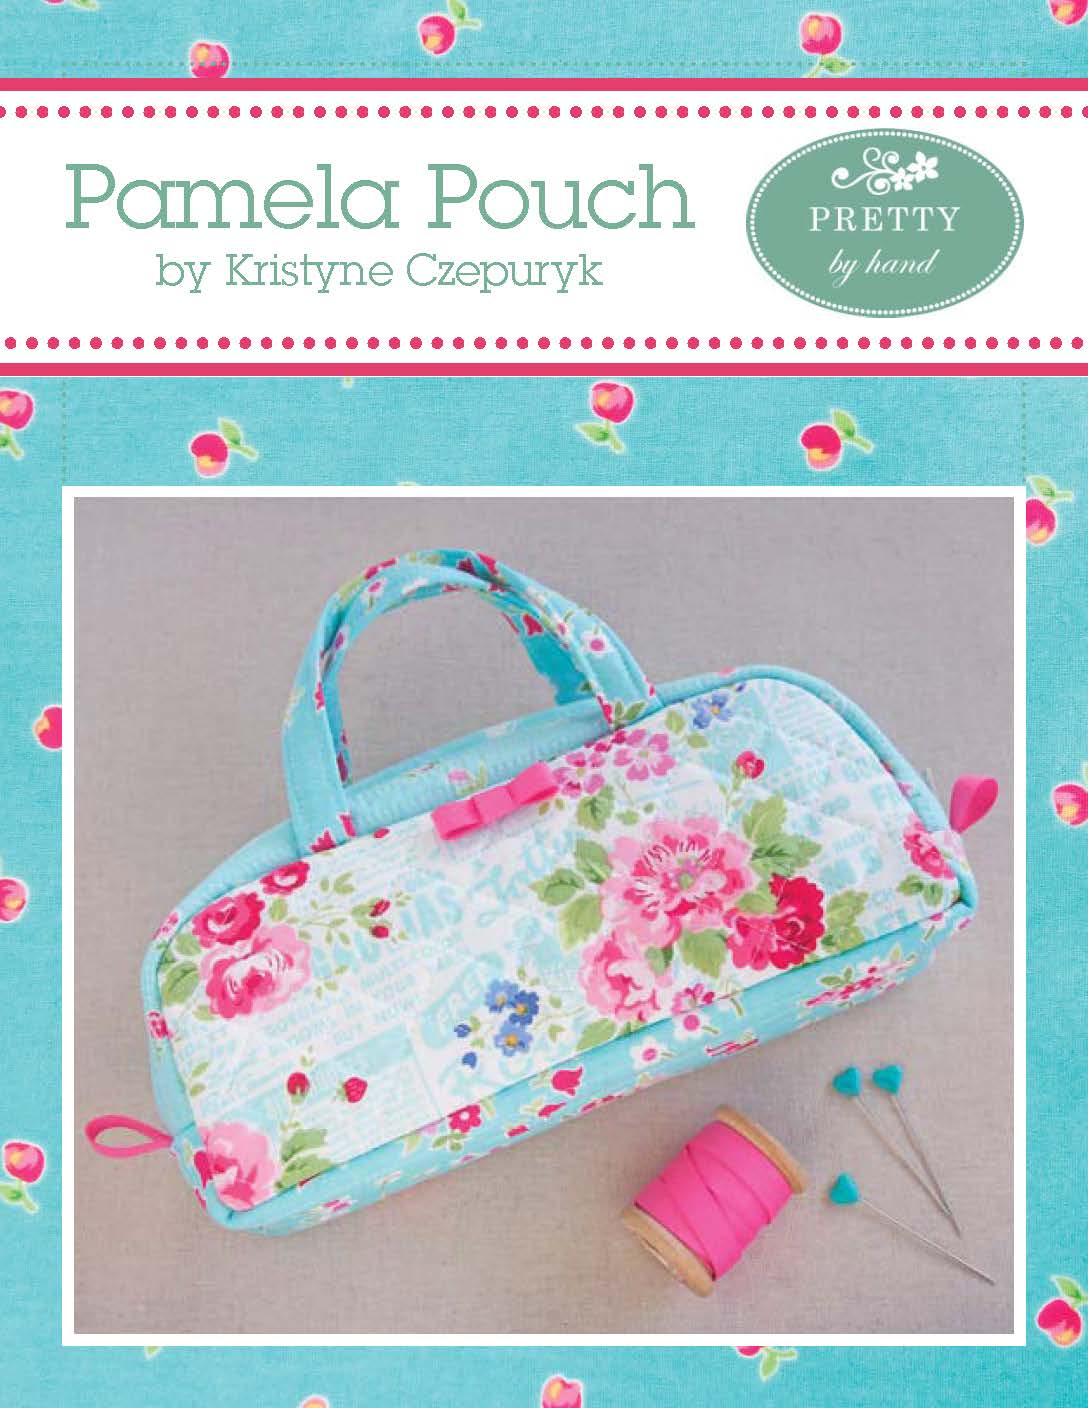
2013 holiday tag-a-long: week 3

This week my tags were inspired by dreams of world travel.

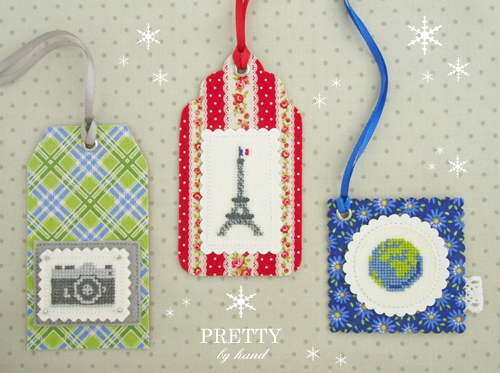
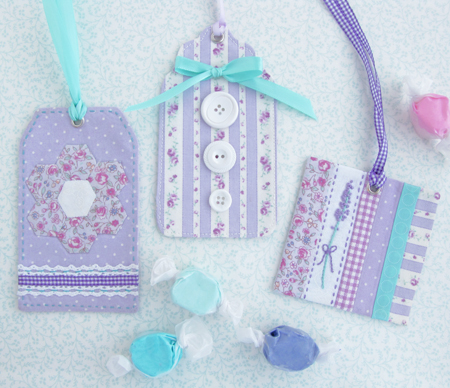
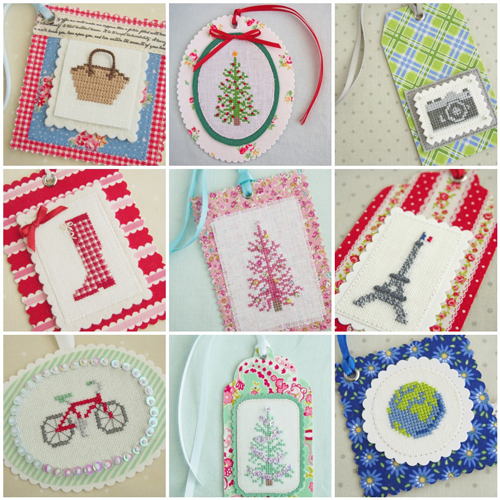
It all started with the camera.  To be honest, that pattern was the main reason I bought this book - which ended up inspiring ALL my tags this season. 

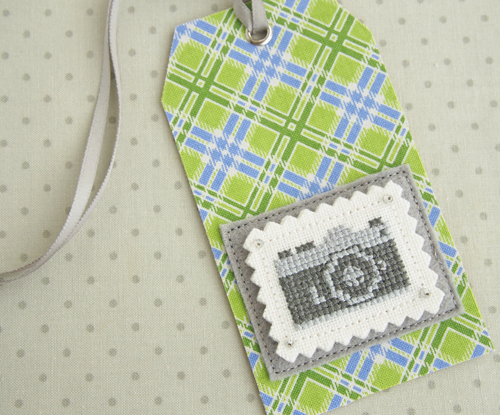
I.love.this.camera.  Love it.  It's just so gosh darned little and cute!  Plus, as a blogger I use my camera a LOT so there's a sentimental connection too.

When I was flipping through the book looking for a few other designs to go with the camera, the Eiffel Tower grabbed my attention right away.  I like how the lacy ironwork texture is created with one strand of dark gray floss and one strand of light.  And those knots?  Whee!  Sooo so very simple and yet crazy effective. 

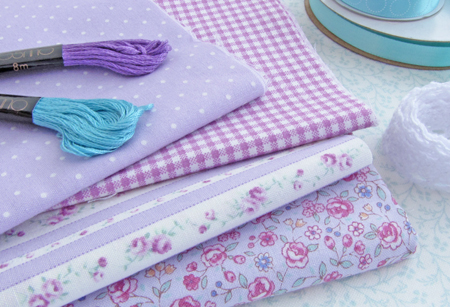
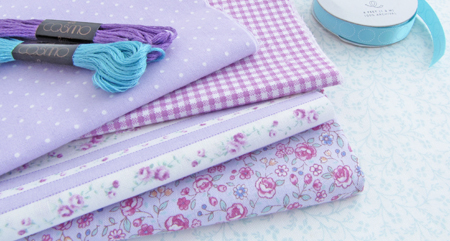
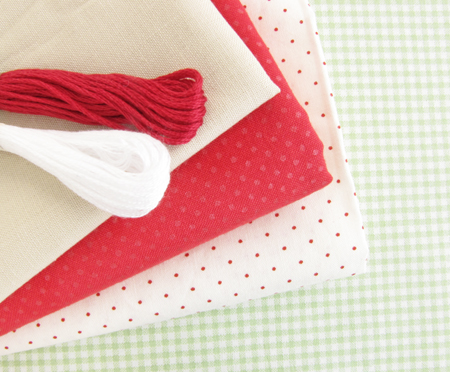
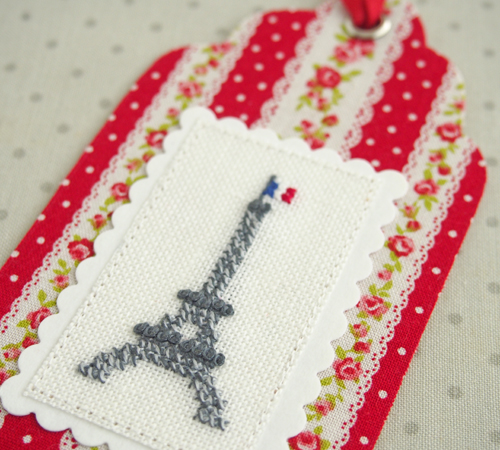
Sigh.  I've never been to Paris but it's definitely on my bucket list.  The super sweet ticking stripe is a new addition to my stash from here.

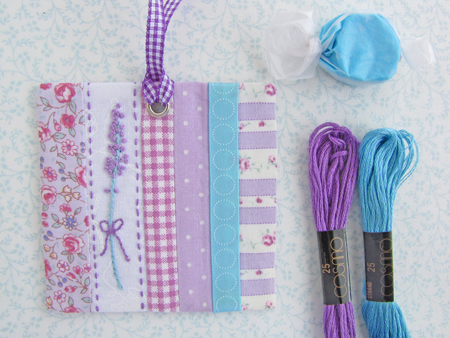
And then this clever little globe ... I simply couldn't not make it. 

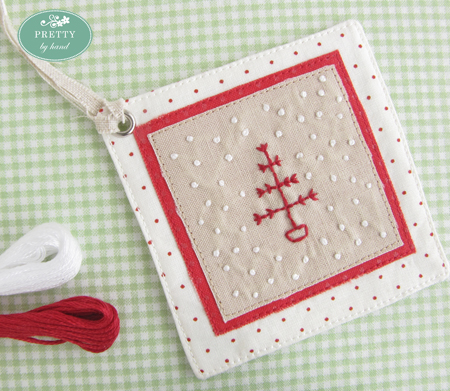
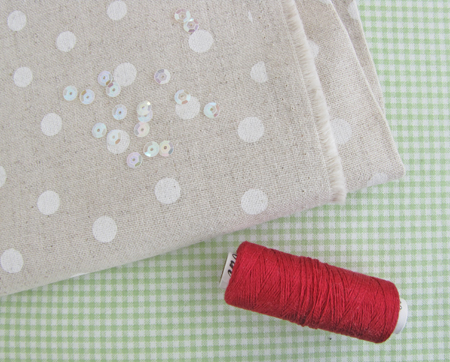
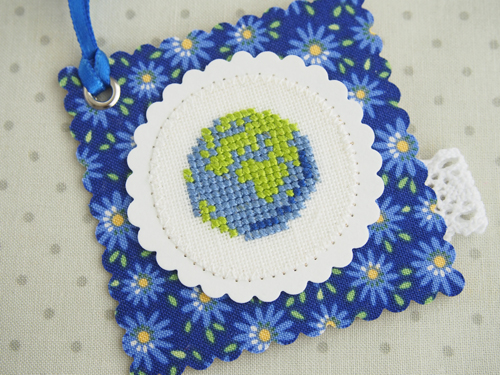
In case you can't quite make it out, it's a view of the earth looking at Europe and Africa.  This blue floral - and the green plaid with the camera - are from the Pam Kitty Picnic collection.

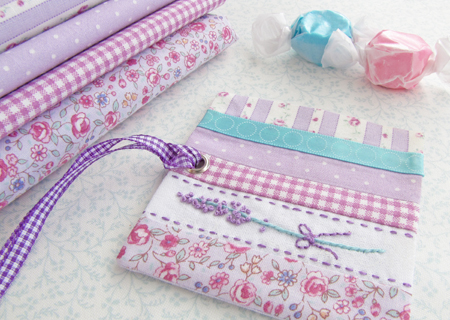
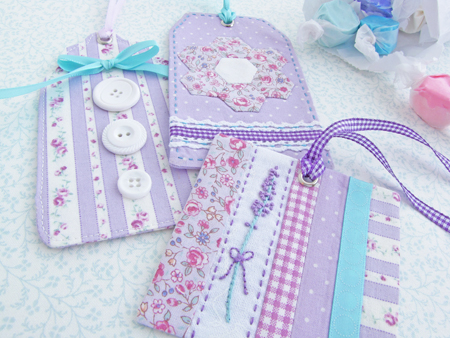
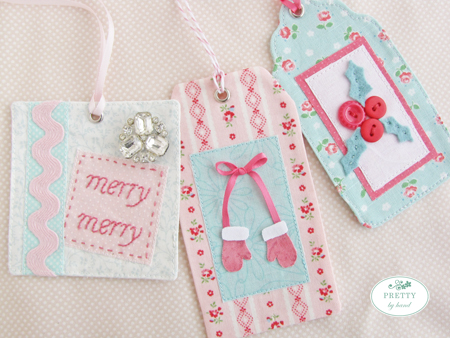
Together I thought these tags would make the perfect present toppings for someone going on a trip - especially if they don't know it yet.  Imagine putting the Eiffel Tower tag on a pair of surprise tickets to Paris ... (sweet darling husband, are you reading this?  Hint hint!), the globe on a piece of luggage and the camera on a ... uh ... I think you get the "picture" ... hardee-har-har.

Now all that's left of this year's Tag-a-Long is to see dear Amy's last set, and then that's it!  I don't know about you but I think it went by too fast.  It's been nothing short of delightful getting in touch with my cross stitching roots these past few weeks. 

As I look at my collection of tags here, it's easy to pick a favourite.  I won't say which one it is but I will say that I've already gifted it to a very sweet friend.  So now I get to make another one for myself. :)

Thanks Amy, this was fun!  (How many sleeps until the next Tag-a-Long?)

Monday
Dec162013

2013 Holiday Tag-a-Long Week 2

"O Tannenbaum, o tannenbaum, how lovely are your branches."

I started this week's tags with a simple, traditional green tree.  Easy enough, right?  Yes, I thought so too.

Until I decorated it with little red colonial knots ... looks more like a bad case of chicken pox, doesn't it?  LOL!

Oh well.  I think the pretty floral Victorian scalloped oval setting takes your mind off the poxes.  And I'm so happy to have found an opportunity to stick another bow on something. 

But then I developed a pink itch that I really needed to scratch ... so why not a pink tree?

I dug out my pretty crystal sequins and clear beads to decorate and then just fringed the linen edges a bit for some texture.  I picked the aqua ribbon because of the few tiny aqua flowers in the fabric.

And then I went all aqua with the last tree.

I had a harder time coming up with a good-looking garland.  I tried a few different things before settling on these flower sequins.  Ooooooh, do I ever love how they turned out!

Oh, and I backed all three tags with the Kraft-Tex I mentioned last week.

So that's that.  One tree, three interpretations.

How are your tags coming along?  Are you getting inspired?  Remember to visit Amy over at nanaCompany to see her batch of the week!

Amy and I are going to try to put together one more set of tags for next week.  Keep your fingers crossed ... unless you're busy making tags ... then never mind. ;)

Monday
Dec092013

2013 Holiday Tag-a-Long

That's right, it's back!  My homegirl Amy (of the beautiful and always inspiring blog nanaCompany) and I had so much fun with our 2012 Holiday Tag-a-Long that neither of us needed any arm twisting to do it again.  So we're kicking off this year's holiday season with another installment of gift tag inspiration. 

As with last year, our goal is to:

  • have a good excuse to make stuff (like we really need one, but hey ...)
  • satisfy our creativity with things we have lying around
  • inspire you to have some crafty holiday fun too

Last year we came up with a starter plan of templates and a tutorial for you to use (which are always available both here and over at Amy's blog). 

But when Amy and I were making plans for this round, we both wanted to branch out with different materials and tag shapes.  Remember, this is a "no rules" thing we're doing ... it's all about having fun and making things your way.

So that's all the business up front.  Now lets get to the party in the back. :)  (Yes, yes I did just make a mullet joke.  And no, Billy Ray Cyrus did not once cross my mind. tee hee)

This year, my tags started as "just because" cross stitching with the book I bought a few weeks ago.  I made a bunch of these little things for fun with no plan in mind.  Only after I'd made a few did it occur to me that I could make them into tags.

First up, the basket. 

Stitching this one up was all kinds of crazy fun.  The basket part is done with an offset "X" in alternating rows and result is this really neat basket weave effect.  And the handle?  Don't get me started.  (Too late.)  It's made with a loose loop of floss that's wrapped with a bunch of little knots.  Oh man it was fun to make. 

I was intrigued with how Amy used felt for her tags last year so I decided to give it a try myself.  And I think I was channeling my long-dormant scrapbooker self because I started layering.  SIX layers later (felt, gingham, blue floral, more felt, the basket and finally the fabric tape) I had a tag.  I thought it would be fun to leave the basket and felt layers free, except for across the top.  The stitchery is backed with fusible interfacing to help prevent fraying. 

Next is the puddle jumper. 

Only 4 layers here - I fused the striped fabric onto a piece of Kraft-Tex (awesome stuff!) so the tag itself is nice and stiff.  Then I stitched the boot to some felt and glued the boot onto the stripes.  My original plan was to use the red gingham fabric for this tag, but when I put them together they were too busy.  However my PamKittyMorning stash came to the rescue ... and inspired me to dig out my scalloped scissors.  And you know me ... I gotta stick a bow on something every once in a while or I start to get all twitchy in one eye.

And then the bicycle. 

I took a cue from my Scrumptious bundle and thought a red & aqua bike would be fun.  The white scalloped backing is also Kraft-Tex and the striped fabric is fused onto it.  Then I fused the bike on top.  The sequins were an afterthought ... makes it look a bit more holiday-ish, I thought.

But then I had no room for a grommet so I just glued the ribbon to the back.

All right.  Do yourself a favour and go check out Amy's tags.  And then I'll see you next Monday with another set.  Remember to check out our Flickr Group for more inspiration.  And please add your photos too if you make any.  Amy and I love love love seeing what all y'all come up with!

PS:  I got a few questions about my cross stitch last week so in case you're interested, I usually use 2 plies of floss (except for smaller details like the spokes on the bike) and I favour 32 count linen.  The basket and boot are done on Belfast linen and the bike is on Evenweave.

Wednesday
Dec192012

2012 Holiday Tag-a-Long Week 4

Well here we are, the last week of our Holiday Tag-a-Long.  Wow.  Is it just me or did the last 4 Wednesday's go by really super fast?

So. I have a small confession to make.  Remember how I said I wasn't going to buy any new supplies for my tags ... just use what I already had?  Well, I kinda sorta cheated a little.  I didn't mean to, but I met a friend for lunch last week.  And the cafe was "conveniently" located next to one of our favorite shops that happens to carry some crazy beautiful embellishments, like these sequins. 

Aaaagh!  They're like jewels!!!  And I didn't even buy them with my tags in mind.  I just bought them ... just ... 'cause.  I was feeling a little guilty 'bout that, but then my lack of discipline led to a lovely moment of inspiration for this week's color theme ...

Hot Pink & Kelly Green

Yeah, baby!

For some reason I had "Baltimore Album" on my mind and I've always loved this classic laurel wreath.  I started with the embroidered branches, then added my pretty new colorful sequins, a few pink knots and some green leaves and voila! 

It's a bit bigger than the template because I wasn't going to frame it.  But it didn't look finished so I added the pink border and the ribbon trim  ... which you can't really see except up close.  But it makes for a more elegant finish.

I also thought a lot about embroidering the year or a monogram or a little festive word in the middle, but I couldn't make up my mind.  So I left it blank.

Next was this stitched wreath with the teensiest little irridescent flower sequins ever. 

I embroidered a simple feather stitch wreath and randomly added the flowers with greens knot. 

It looked a little naked so I added the white knots in the middle.  Not sure if I like them, but they're staying.  And solid pink for the entire tag was too much for me, so I added the green fabric and then covered the seam with a pretty white ribbon/bow.

Last but not least ... I used the fabric as the feature. 

I was just going to add the 2 ribbon stripes and be done with it.

Sigh.

But it reminded me too much of the ugly tube socks I used to wear for gym class.  NOT the look I was going for.  So I girlied them up with little embroidered bows and some sequin hearts.

I love them.

In fact, I'm pleased with all my tags.

And I LOVE Amy's tags too, of course. 

We hope we've inspired you to make some pretty tags too.  Or that you've at least enjoyed seeing our creations.  If so, then we have succeeded in our mission to spread some pretty, crafty holiday cheer.  Thank you to everyone who participated!  Please keep adding your lovely tags to the 2012 Holiday Tag-a-Long Flickr Group.

But you know what?  I've decided to sell my tags.  I know, you might think I'm crazy.  But I've already had my fun designing and making them and for me, it's always more about the making than the having.  I've listed them in my shop as their original sets, if you're interested.   UPDATE:  SOLD OUT!

Wednesday
Dec122012

2012 Holiday Tag-a-Long Week 3

Before I show you my tags, I need to quickly tell you about a giveaway.  It's for my book, which has started shipping to shops!  (I will have a limited number of signed copies available in my online shop soon.)

Click here to go to the C&T Stash blog to enter!

             *                    *                    *                    *                    *

A few days ago I was wasting valuable time doing critically important research on Pinterest and found myself making a Lovely Lavender board. 

'Cause I love lavender.  (Don't you just love it when people state the obvious?)

And while saving humanity with said ground-breaking research, I came across a few images that caught my eye ...


(Click on the photos to link to the sources.)

So my theme this week is decidedly non-traditional ... Lavender & Turquoise.

See?  Pinterest is NOT a colossal waste of time after all ... ;)

My first tag was totally easy-peasy.  Just glued on a bow & buttons. 

I originally had a purple bow on this tag, but after my Pinterest exploration I switched it to turquoise.  I think it looks more interesting.

Ok.  This next tag nearly did me in!  LOL! 

I won't bore you with the gory details about all the incarnations that poor English paper-pieced, appliqued hexagon flower went through.  But I'm so glad I stuck with it and I'm really happy with the final result.

Those little hexies measure 1/2" per side.  So I had to widen my tag to 2 5/8" to fit the flower.

You know, I thought my hexagon flower was going to be my favorite tag.  It SHOULD have been my favorite.  But this little lovely has stolen my heart.

I pieced together strips of fabric, embroidered the lavender sprig and then fused on the turquoise ribbon.

I started this tag thinking the stripes would be horizontal.  But after stitching the lavender, it all of a sudden wanted to go vertical and I could not change it's mind.  So I said, "Ok, be who you want to be!"

Love it. :)

Click here to see another batch of to.die.for tags from Amy.  Warning: The gingerbread man could give you a cavity just from looking at it ... it is sweeeeeeeet!

So ... how are your tags coming along?  The 2012 Holiday Tag-a-Long Flickr Group contributions continue to come in and there's lots of inspiration over there!

(And remember to enter the giveaway for my book!)

Wednesday
Dec052012

2012 Holiday Tag-a-Long Week 2

I gotta start by saying thank you to everyone who has joined Amy's and my little Flickr Group and added your photos ... please keep them coming!

This week my theme of red, white & linen was inspired by a recent trip to Ikea.

Now, I don't normally do Scandinavian with my decor.  But ... I dunno ... maybe I'm maturing or broadening my horizons or something.  A little.  'Cause when I walked through the Christmas section at Ikea - you know, the impulse shopping trap they set up just before the cashiers - I must have been in some kinda mood because there was something so very appealing about the clean, understated simplicity of it all.

So.  I came home and went straight to work.

It was surprisingly easy to find the fabrics I needed.

Don't think you can get any simpler than a little stick person feathered tree in a mist of snowflake knots.

Then I found this pretty linen with large white dots.  And I still had some sequins lying around from making these.

I filled in the spaces between the dots with red stars - double cross-stitches. 

Then added sequins & beads to each dot. 

And then kept adding more sequins to the remaining empty spaces. 

And then finished it all off with a running stitch around the edge.

And then added a little lace tab. 

(Too much?)

Last but not least, my favorite of the bunch.  I'm calling it my haberdashery tag.

I have a few old keys that were left in our house by the former owner, threw in some lace, a few buttons, a red bow and a few pieces of fussy cut fabric.

Voila!

I stitched the lace and fussy cut pieces to the tag first before I assembled the tag, and then just glued on the buttons, bow and key after I turned the tag right side out and stitched the side closed.

Thanks Ikea!

You never disappoint. :)

Remember, you can get a free downloadable PDF for the tag templates here and find a tutorial on how to make a basic tag here.  And check out Amy's tags here!

Wednesday
Nov282012

Wanna Tag-a-Long? 

My adorable friend Amy of the equally adorable blog nanaCompany & I love making pretty things with fabric.  We like the idea of making things that are useful AND recycleable.  And I think we can all agree that things made are always more special than things bought.  So we thought it would be fun to invite you to join us in making pretty gift tags for this holiday season. 

In the upcoming weeks before Christmas, Amy & I will share with you our tags on Wednesdays in hopes that you'll be inspired to make/design your own gift tags for family & friends. 

There aren't any rules.  No schedule or commitment on your part whatsoever.  For Amy & I, we've agreed to come up with 3 new tags every week - that's a total of 24 designs in all. 

We both decided to stick to the "make do" approach and didn't buy any special supplies except for the eyelets (tiny grommets).  I just raided my craft cupboard for "stuff" - pretty notions like ribbons & buttons, sequins & beads, lace & trim, bits & bobs ... you get the idea.  This project needs to be easy and affordable!

There won't be patterns for our designs - sadly Amy & I don't have enough time to write them out.  But we do have this free downloadable PDF with the tag shapes. 

And I wrote a tutorial to show you how we make a basic tag.  There's a link in my sidebar for future reference.

Amy also set up a Flickr group for our 2012 Holiday Tag-a-Long so please join in.  We'd love for you to share your tags with everyone - the more the merrier! 

For this first week I went with my favorite shabby Chirstmas colors ... pink & aqua ... of course.

I will always and forever love this traditional Christmas motif of holly berries & leaves. 

I made mine with a few mismatched buttons - because I didn't have 3 exactly the same - and a bit of felt. 

I stitched them on with embroidery floss, but you could just as easily use glue instead.

Mittens.  On a string. 

I may have been inspired by this recent craft project. ;)

I used fusible web for both the aqua rectangle and the mittens and then glued the ribbon & mittens in place.

This merry merry tag ended up being decorated with a bunch of stuff I found in my cupboards ...

... a scrap of oversized ricrac, a vintage rhinestone button and a bit of embroidery floss.

I used fusible web again for the pink & aqua fabric, machine appliqued them in place and then just used glue for the ricrac.

Now go check out Amy's tags.  Seriously, you do NOT want to miss them!

Well?  Are you inspired?  Are you already digging thru your cupboards and drawers and storage bins looking for things to make your own tags?  :)

And remember, for the next 3 weeks, Wednesday is Holiday Tag-a-Long day here and at nanaCompany.  Can't wait to see what everyone comes up with!

Wednesday
Nov282012

2012 Holiday Tag-a-Long  Tutorial

Well hello there and thank you for stopping by!  This tutorial will show you the basic construction process for the Tag-a-Long gift tags Amy & myself are making for Christmas. 

Step 1:  Download this free PDF for the templates.

Step 2:  Round up the following items:

  • 2 pieces of fabric at least as large as the template PLUS 1/4" extra on all sides for seam allowance
  • 1 piece of medium weight fusible interfacing large enough to trace the tag template
  • Pencil
  • Fabric scissors
  • Matching thread
  • Tool to turn out corners (I use a bone folder)
  • Package of eyelets (3/16" or 4mm) including the hole-punch and flattening tools
  • Hammer
  • 12" length of ribbon or string

Step 3:  Trace a template shape onto the fusible interfacing. 

Step 4:  Cut along the drawn line and fuse the interfacing tag to the wrong side of one fabric piece.

Step 5:  Lay both fabric pieces right sides together and pin.  Start stitching next to the interfacing edge near the bottom of one side.  Continue sewing around the interfacing shape but leave a 3" opening along the side. 

Then trim away the excess fabric leaving a 1/8" seam allowance - EXCEPT for along the opening, leave a 1/4" seam allowance (easier to tuck in later).

Tip:  Sew a few reinforcing stitches at both ends of the opening to help prevent them from coming undone when you turn the tag right side out.

Step 6:  Turn the tag right side out and use your corner tool to shape the edges & corners.  The interfacing shape will make this job easier.  Tuck the opening seam allowance inside and press the tag.  Hand-stitch the opening closed.

Step 7:  (Optional)  Top-stitch around the tag 1/8" from the edge.

Step 8:  To attach the eyelet, first use the punch tool & a hammer to make a hole in the fabric.  Just eyeball the location.

Then insert an eyelet into the hole and use the flattening tool & hammer to secure the eyelet in place.

Step 9:  Thread a ribbon or string through the eyelet.

Step 10:  Attach your homemade tag to a gift for someone special!

A few side notes.

If you like to keep the back side of your tag neat and tidy, I recommend adding your embellishments to the front side of the tag BEFORE Step 4.  That said, some bulkier items like large buttons should be added after your turn the tag right side out, but maybe before you stitch the side opening closed so you can hide knots and things inside.  Just be careful to center your designs.

And don't be afraid to use glue.  It goes a lot faster than using a needle and thread, especially when you end up with more great ideas than spare time!