Monday
Dec032012

I Had a Nice Weekend

How can I tell?  Here's the evidence ...

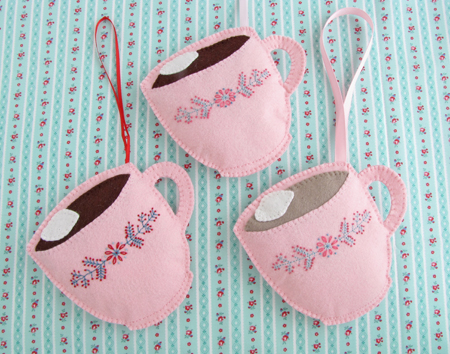
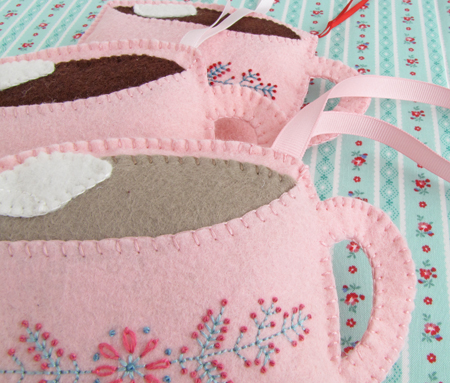
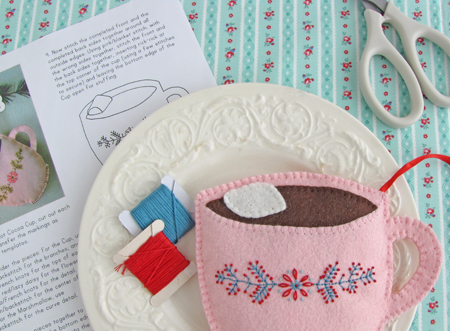
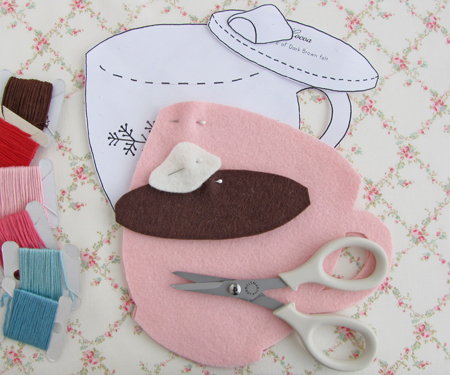
I started with red/aqua embroidery.

Not bad, but not quite right.

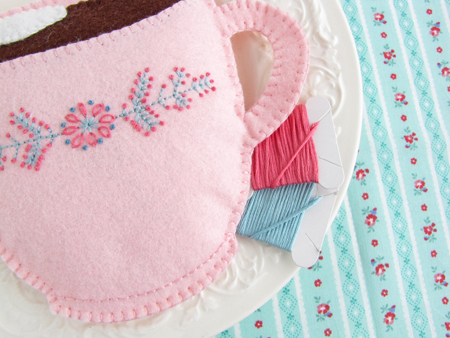
So I swapped the red for hot pink and used a lighter shade of aqua.

Better.

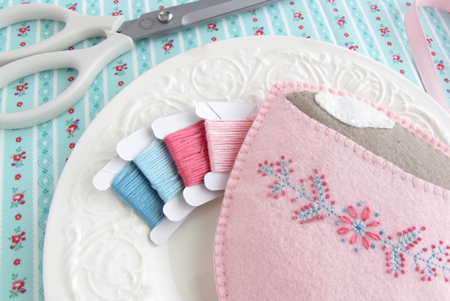
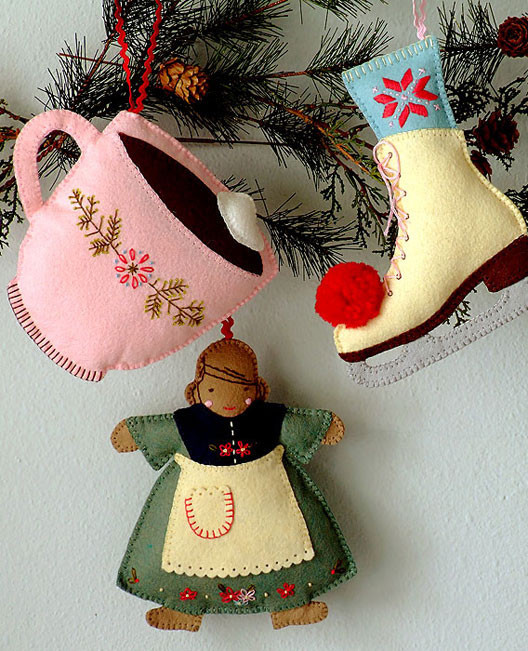
But I wasn't totally jazzed about the dark chocolate.  It looked more like black coffee to me.  And I don't drink coffee.  So I rifled through my felt stash and found the perfect "hot-winter-beverage-made-with-milk-chocolate-and-whole-milk" shade of brown ...

This one is mine. :)

Friday
Nov302012

More Felt Ornamenting

No denying it.  I am fully immursed in Christmas crafting.  And our tree is hopefully going up this weekend.

Alicia's Ice-Skating Afternoon ornament set was her first collection in 2008 but I didn't discover Posie Gets Cozy until February 2010.  When I first saw this set I went straight to her shop and I remember my heart sinking when I read they were SOLD OUT.  To say I was bummed out is an understatement.

But when she re-released them as both a kit AND a PDF the following year ... and every year since! - my world went back to normal.

So.  Here's the mug in progress.  Not much ... just the pieces cut out.  But I think I'm going to deviate from the embroidery floss colors - less red & olive, more pink & aqua.

Have a great weekend ... perhaps making some tags?

Wednesday
Nov282012

Wanna Tag-a-Long? 

My adorable friend Amy of the equally adorable blog nanaCompany & I love making pretty things with fabric.  We like the idea of making things that are useful AND recycleable.  And I think we can all agree that things made are always more special than things bought.  So we thought it would be fun to invite you to join us in making pretty gift tags for this holiday season. 

In the upcoming weeks before Christmas, Amy & I will share with you our tags on Wednesdays in hopes that you'll be inspired to make/design your own gift tags for family & friends. 

There aren't any rules.  No schedule or commitment on your part whatsoever.  For Amy & I, we've agreed to come up with 3 new tags every week - that's a total of 24 designs in all. 

We both decided to stick to the "make do" approach and didn't buy any special supplies except for the eyelets (tiny grommets).  I just raided my craft cupboard for "stuff" - pretty notions like ribbons & buttons, sequins & beads, lace & trim, bits & bobs ... you get the idea.  This project needs to be easy and affordable!

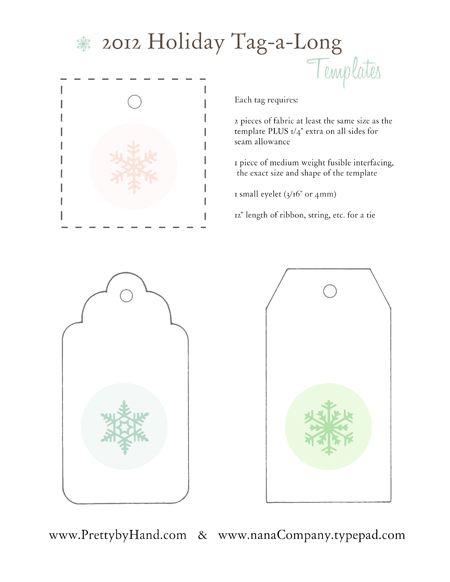
There won't be patterns for our designs - sadly Amy & I don't have enough time to write them out.  But we do have this free downloadable PDF with the tag shapes. 
And I wrote a tutorial to show you how we make a basic tag.  There's a link in my sidebar for future reference.

Amy also set up a Flickr group for our 2012 Holiday Tag-a-Long so please join in.  We'd love for you to share your tags with everyone - the more the merrier! 

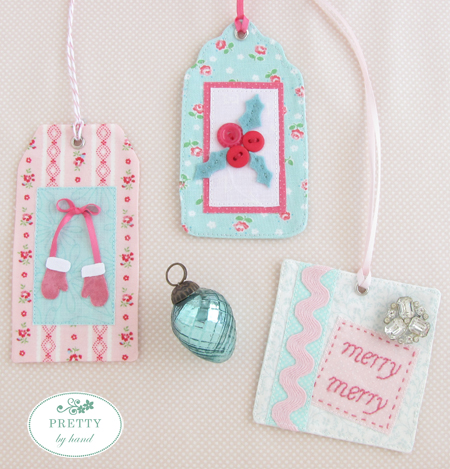
For this first week I went with my favorite shabby Chirstmas colors ... pink & aqua ... of course.
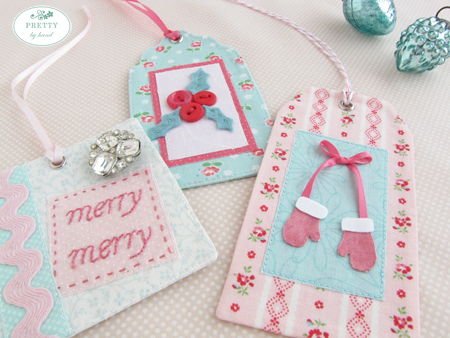
I will always and forever love this traditional Christmas motif of holly berries & leaves. 
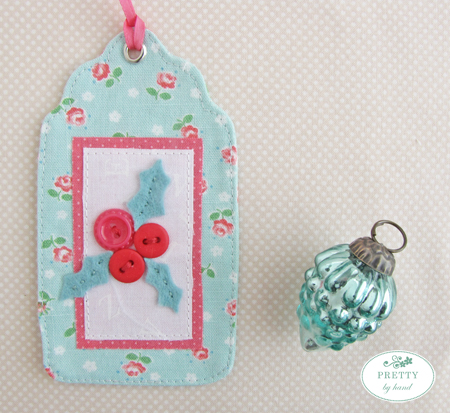
I made mine with a few mismatched buttons - because I didn't have 3 exactly the same - and a bit of felt. 
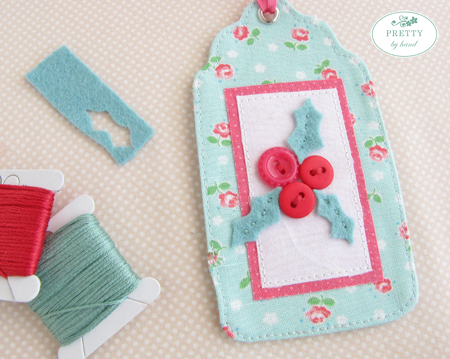
I stitched them on with embroidery floss, but you could just as easily use glue instead.

Mittens.  On a string. 
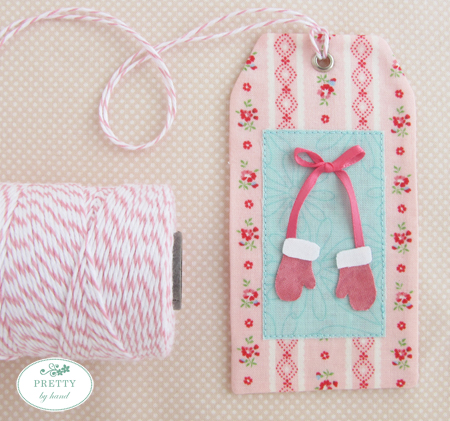
I may have been inspired by this recent craft project. ;)
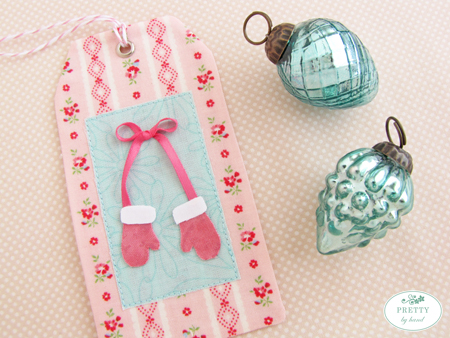
I used fusible web for both the aqua rectangle and the mittens and then glued the ribbon & mittens in place.

This merry merry tag ended up being decorated with a bunch of stuff I found in my cupboards ...
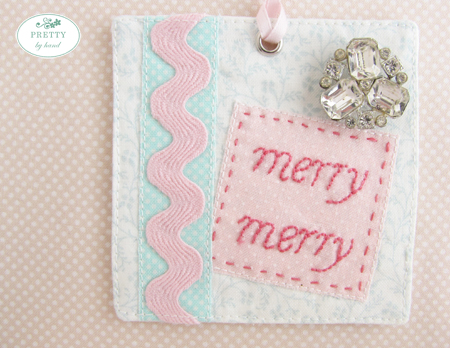
... a scrap of oversized ricrac, a vintage rhinestone button and a bit of embroidery floss.

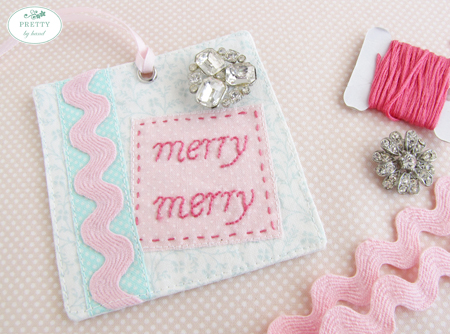
I used fusible web again for the pink & aqua fabric, machine appliqued them in place and then just used glue for the ricrac.

Now go check out Amy's tags.  Seriously, you do NOT want to miss them!

Well?  Are you inspired?  Are you already digging thru your cupboards and drawers and storage bins looking for things to make your own tags?  :)
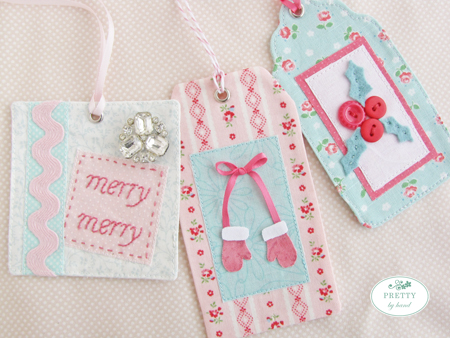
And remember, for the next 3 weeks, Wednesday is Holiday Tag-a-Long day here and at nanaCompany.  Can't wait to see what everyone comes up with!

Wednesday
Nov282012

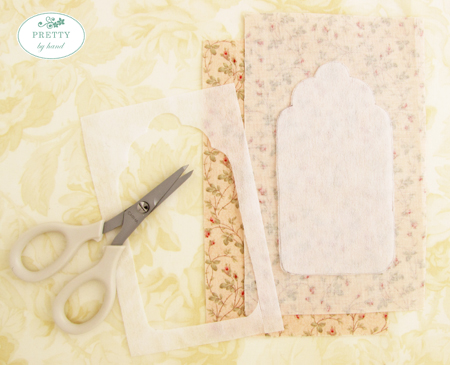
2012 Holiday Tag-a-Long  Tutorial

Well hello there and thank you for stopping by!  This tutorial will show you the basic construction process for the Tag-a-Long gift tags Amy & myself are making for Christmas. 

Step 1:  Download this free PDF for the templates.

Step 2:  Round up the following items:

  • 2 pieces of fabric at least as large as the template PLUS 1/4" extra on all sides for seam allowance
  • 1 piece of medium weight fusible interfacing large enough to trace the tag template
  • Pencil
  • Fabric scissors
  • Matching thread
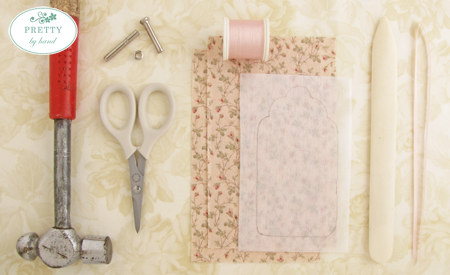
  • Tool to turn out corners (I use a bone folder)
  • Package of eyelets (3/16" or 4mm) including the hole-punch and flattening tools
  • Hammer
  • 12" length of ribbon or string

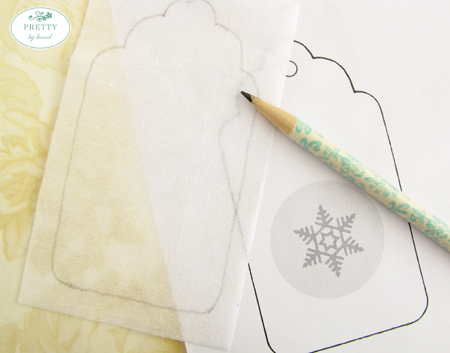
Step 3:  Trace a template shape onto the fusible interfacing. 

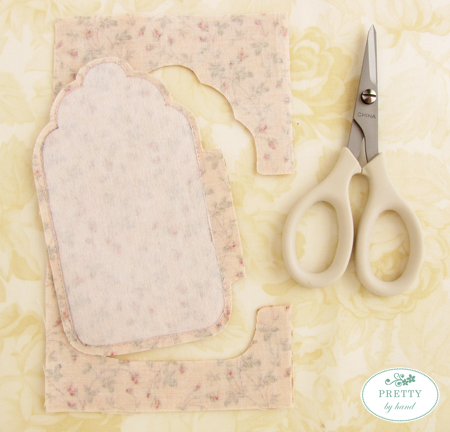
Step 4:  Cut along the drawn line and fuse the interfacing tag to the wrong side of one fabric piece.

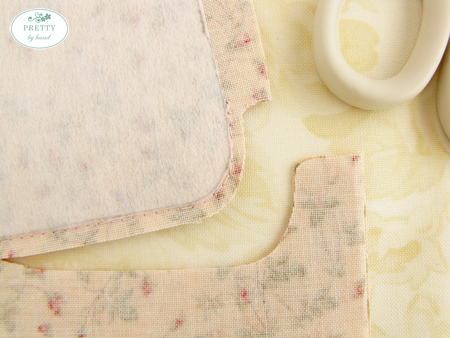
Step 5:  Lay both fabric pieces right sides together and pin.  Start stitching next to the interfacing edge near the bottom of one side.  Continue sewing around the interfacing shape but leave a 3" opening along the side. 

Then trim away the excess fabric leaving a 1/8" seam allowance - EXCEPT for along the opening, leave a 1/4" seam allowance (easier to tuck in later).

Tip:  Sew a few reinforcing stitches at both ends of the opening to help prevent them from coming undone when you turn the tag right side out.

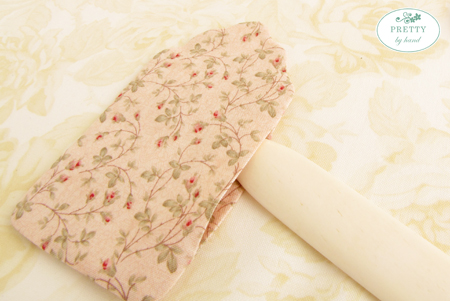
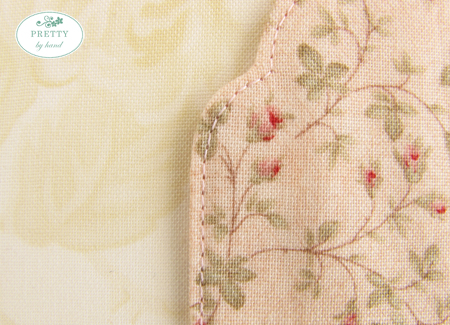
Step 6:  Turn the tag right side out and use your corner tool to shape the edges & corners.  The interfacing shape will make this job easier.  Tuck the opening seam allowance inside and press the tag.  Hand-stitch the opening closed.

Step 7:  (Optional)  Top-stitch around the tag 1/8" from the edge.

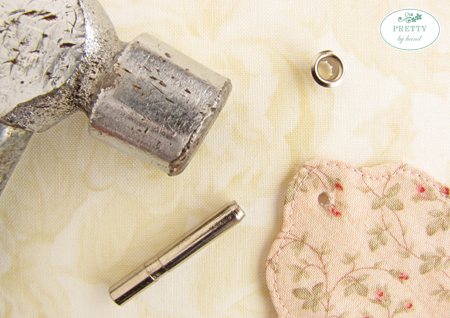
Step 8:  To attach the eyelet, first use the punch tool & a hammer to make a hole in the fabric.  Just eyeball the location.

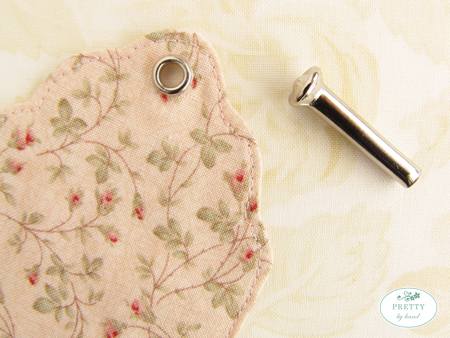
Then insert an eyelet into the hole and use the flattening tool & hammer to secure the eyelet in place.

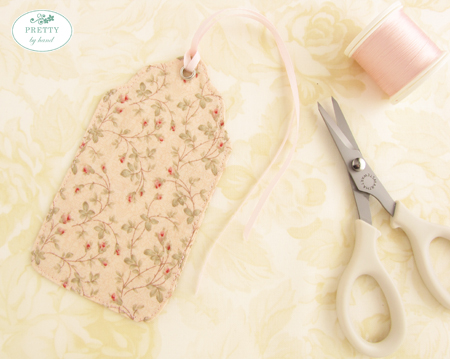
Step 9:  Thread a ribbon or string through the eyelet.

Step 10:  Attach your homemade tag to a gift for someone special!

A few side notes.

If you like to keep the back side of your tag neat and tidy, I recommend adding your embellishments to the front side of the tag BEFORE Step 4.  That said, some bulkier items like large buttons should be added after your turn the tag right side out, but maybe before you stitch the side opening closed so you can hide knots and things inside.  Just be careful to center your designs.

And don't be afraid to use glue.  It goes a lot faster than using a needle and thread, especially when you end up with more great ideas than spare time!

Tuesday
Nov272012

Betcha Can't Make Just One

That is my take on an old potato chip commercial.

Apparently, these felt ornaments are my new potato chip.

At least they're not fattening!

Friday
Nov232012

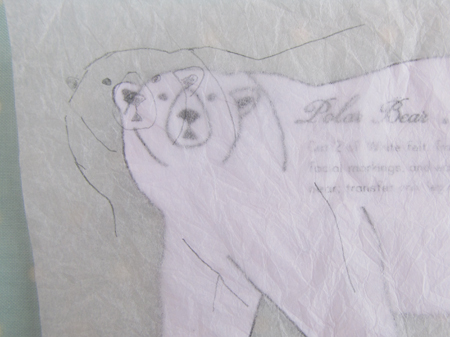
Is There Such a Thing as Tri-Polar?

If so ...

then I have it. ;)

See ya next week!

Wednesday
Nov212012

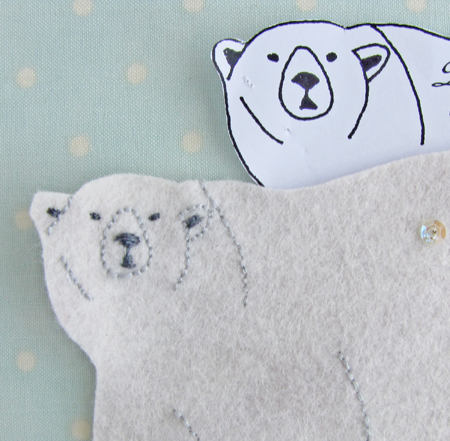
How I Transfer Embroidery Designs onto Felt

There are several ways to transfer embroidery designs onto your stitching cloth.  When it comes to quilting cotton, I favor a light source and a Micron Pigma Pen.  However that won't work for felt because you can't SEE through it.

In Alicia's pattern, she tells you how to use dressmaker's chalk pencil, carbon paper, fabric marker & and iron-on transfer pencil.  I confess I've never tried that method.  For me old habits die hard because I'm still happy using the way my mom taught me when I was little using cheap and cheerful tissue paper.

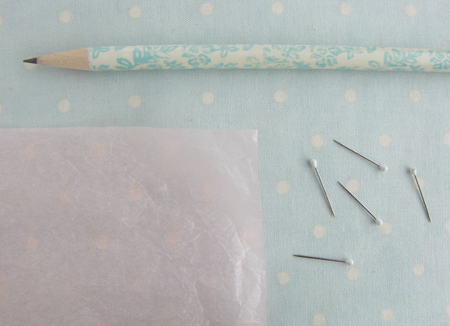
You need:

  • a pencil
  • a few pins
  • a sheet of tissue paper large enough to accommodate the design you are transferring (I just dug out a wrinkly used piece from my gift-wrapping supplies & ironed it smooth). 

Here's how:

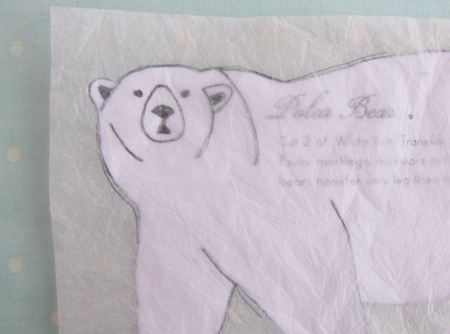
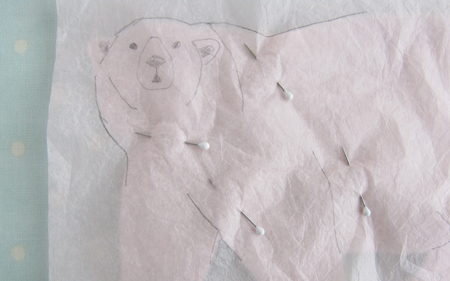
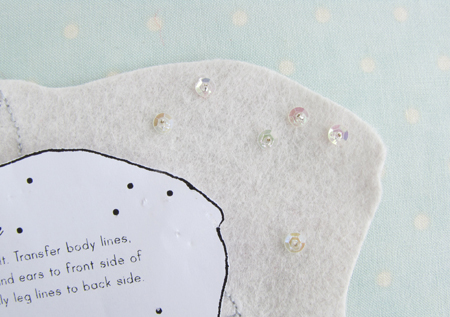
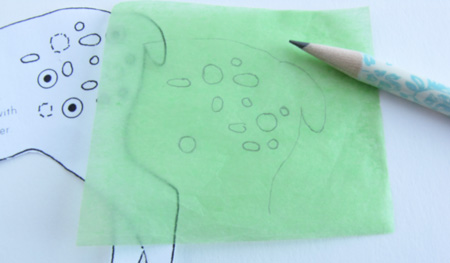
Step 1 - Trace the design onto tissue paper.

I also trace parts of the outline as registration marks so I can line up the design accurately onto the felt.

Step 2 - Pin the tissue paper to the felt exactly where you want the embroidery to be situated.

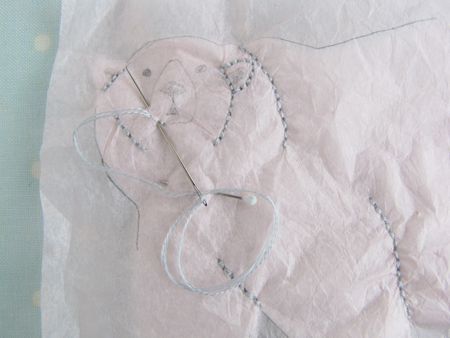
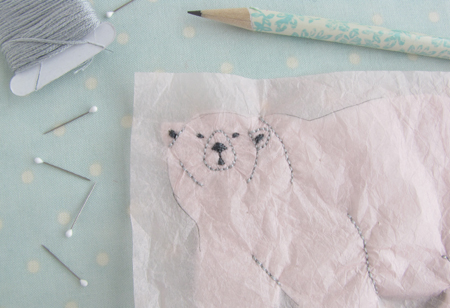
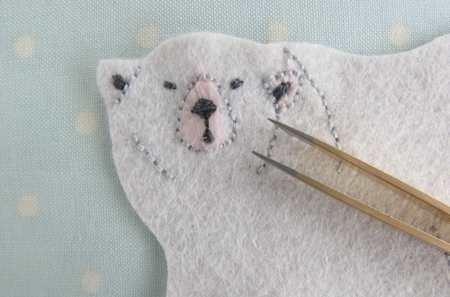
Step 3 - Embroider your stitches through both layers of felt and tissue.

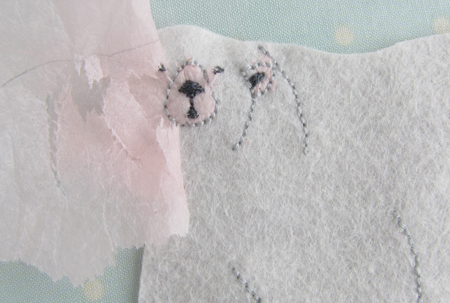
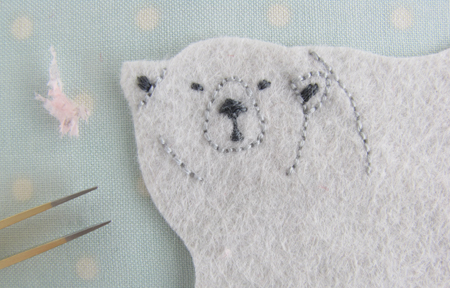
Step 4 - Remove the pins and GENTLY tear away the tissue paper.

You may find a pair of tweezers helpful for picking out some of the little stubborn bits of paper ...

especially within enclosed stitches or underneath satin stitches.

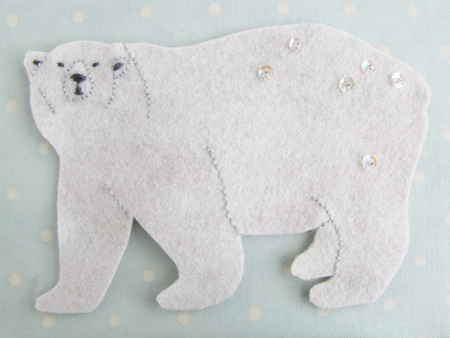
I just eyeballed the few sequin placements.

That's it!  Easy peasy.

I wrote a similar post last year when I was making this other felt ornament set, if you don't mind listening to me repeat myself repeat myself.

Monday
Nov192012

A Red Coat

As I've said before, I'm not really a red girl.

I don't wear red.  And I don't decorate with red ('cept a little bit a Christmas & Valentines).

But I am absolutely head over heels in love with this red coat. 

It feels so good to finally have one of my own after coveting this pattern for the past few years.

I have the bear cut out.  But now I sorta feel like making my pink coat next.

Might come down to a coin toss. 

Or the always popular eeny meeny miny moe approach to decision-making.

Friday
Nov162012

A Wee Bit of Progress ...

I haven't had a ton of spare time these past few days,

but I did manage to steal a couple of hours for a little crafty fun.

These ornaments are soooooo addictive!

Happy weekend!

Wednesday
Nov142012

It's That Time of Year Again

... felt Christmas ornament making season, to be specific. 

Already?  Sheesh!  If you're a "United Statian" (as my 9 year old calls you), you haven't even had Thanksgiving yet.  Canadians schedule it for early October - I think to help avoid O.D.ing on turkey & stuffing & ... well, I was GOING to add pumpkin pie to that list, but personally I don't think it's possible to O.D. on it.

Last year I made these lovely felt ornaments designed by the lovely Alicia Paulson of one of my favorite blogs "Posie Gets Cozy".

I enjoyed both making and gifting them so much I couldn't NOT make more this year.  So I got the downloadable PDF for the "Snow Day" set, also designed by Alicia, and I can't wait to get started.

I have a few coats to make for certain people. 

That coat just slays me.  I think of Alicia's FIFTEEN designs, this one is my all-time-favorite.

Could you not just weep for joy at the sight of this adorably diminutive coat?!

And of course I need a pink one for myself.  I actually own a Laura Ashley duffle coat that is almost this very same color pink.  It's almost 20 years old and I still have it in the back of my closet somewhere.

And then there's the mystical polar bear. 

As a Canadian, it's really more a matter of national pride that I make one for our tree, eh?

Sadly, I can't knit.  But a friend of mine has kindly agreed to make a few scarves for me. :)

Stay tuned.  I'll be back with more.

Hopefully sooner than later.  Christmas does not wait for you to get all your crafting done.  I've asked.  Several times.  That's how I know.

Tuesday
Nov132012

Her Favorite Color is Green

Before I make a gift for my daughters to give to their friend, I always send them on a reconnaissance mission first - find out the birthday girl's favorite color. 

It makes the gift that much more special.

It also saves me from making EVERYTHING pink.

'Cause you and I both know ... I totally would.

Monday
Nov122012

Just Call Me Zorro

I'm not super mom.  I want to be.  I planned to be.  I thought I would be.  But I'm not.  My failings are many. 

However, there is one thing you can always count on me to do  ... make birthday gifts for little girls.

(The stitch ripper is me making fun of myself.)

I don't think I've ever bought one.  Whenever my girls are invited to a birthday party for a friend, I make something.  Partly for fun.  Partly because I can.  Partly because I know my girls are proud that I can make pretty things.  Partly because things made are always more special than things bought.  And now partly because it's become my thing.  You know, like Zorro's initial etched in stone with his sword.  Yeah, just exactly like that.  (I have a very rich and delusional imagination ... )

I've made purses, monogrammed pillows, drawstring bags, lavender sachets, recorder cases, coin purses and now we're on a pencil cases phase.  I made them all without patterns. 

'Cept for now.  Oh sweet irony that I need to rely on my own pattern for this project.  (available here)  Just for the measurements, though.  LOL!

See how I slipped in that VERY SUBTLE SHAMELESS PLUG!  As if brackets somehow make it look less obvious.  Clearly I wield a stitch ripper better than I employ subtlely.

Oh, and did I mention this pattern is also my top seller?

Oops.  There I just went and did it again.

tee hee

I'll show you the finished pencil case tomorrow.

Friday
Nov092012

Mystery Solved

You may (or may not) recall that I made last year's Fat Quarter Shop Mystery Block of the Month quilt.

Well here it is.

What do you think?  (Sorry 'bout the crap photo ... this quilt is too big to photograph well.  Or maybe it's my house that's too small to photograph the quilt well!  LOL!)

I used the finishing kit.  Cute idea to turn blocks into flower heads.

My favorite block.

My other favorite block.

And my OTHER other favorite block ...

which inspired me to change the border fabric from a large taupe/red floral to smaller pink strawberries print.   I am nothing if not predictable.

I also changed the blossom fabric to be all white - more strawberry blossomy.

And to finish it all off a lovely longarmer applied her magic for me ...

with an apropo strawberries design ('cause the fabric collection is called "Strawberry Fields" ... I know, right?)

in a pale pink thread.

Sarah is an amazingly talented long arm quilter who lives in a suburb of Syracuse NY (but she has customers ship quilts to her from all over).  Her philosophy on longarming is that quilters put so much time into a quilt that it has to be top-stitched exactly how the maker wants it.  She has lots of pantograph designs (also known as "all over" or "edge to edge") to choose from and does some free motion too.  Her turn around time is a week or less and she treats every quilt as if it were her own.  You can email her at:

srussett514 (at) yahoo (dot) com

Thanks again Sarah!

Now all I need to do is bind it. 

I'm just waiting for a day when it's freezing cold and snowing outside. 

Oh wait. 

I forgot.

That's today.

And yesterday.

(And by forgot I mean tried really hard to pretend I live here.)

Wednesday
Nov072012

Still Pretty After All These Years

At Quilt Market there are always a few antique quilt vendors.  I should learn to just stay away from them because I always fall in love with something I can't afford and it hurts to say goodbye to them. 

Love the combination of the striped fabric and the scalloped edge.

Pink roses

closeup

I die.  Seriously.  I heart Grandmother's Flower Garden.  Even love the different greens.  You know, making do and all.

Tiny hand quilting.  Sigh.

Fantastic graphic.  (in pink)

Hester Ann Finsham - a quilter born over 100 years before I was - has just inspired me to be more disciplined about labelling/signing my quilts.  And she did hers so beautifully with simple embroidered handwriting.  What could possibly be more lovely?

Wish my linen closet looked like this ...

and this ...

and this ...

I really wanted this little pink & white cutie.

Love the dotted red print.

Half square triangle heaven!

Obviously well loved.

The next time someone (and by someone I mean me) worries about points not matching or being cut off, I'm going to show her this photo and tell her to just lighten up already!

Here's the honey bunny I really wanted to bring home with me.

Angled edge and EVERYTHING!

Maybe I will recreate this one with some beautiful tiny prints and solids.

Someday.

Maybe.

I hope.

Monday
Nov052012

Things I Found While Looking Around Quilt Market

I'll start with this lovely quilt.  Looks like it could be antique, but it's not.

Closeup of above

Free quilt pattern featuring Yoko Saito's new Centenary collection for Lecien

Cute Halloween embroidery design by Meg Hawkey

Closeup of above

A couple projects from my book in the Lecien booth (shameless plug)

Sweet new Durham fabric collection by Brenda Riddle

Sue Daley's handwork.

 ... she's amazing.

This display caught my eye ... don't know why ... it just did.

A few pretty quilts from Andover.

Another stunner called "Robin's Nest" by Karen Styles

Hmmm, wonder why I liked this quilt made with these Quilt Gate "Mary Rose" fabrics?

Beautiful Japanese woven taupes - quilt made by my friend Keiko.

Sweet!

Verna Mosquera's latest fabric Collection "Prima Ballerina" with Freespirit.

Holy bright colors, Batman!

(Michael Miller)

Love a sense of humor.

Signing a copy of my book for Sherri. :)

My friend Tasha's new collection at Riley Blake

Too cute!

Another stunning quilt ... this one by Sandy Klop of American Jane.

Leave it to Moda to haul a CAMPER into the convention centre!  Fun.

Anne Sutton's newest Easter design.  Very cute.

A Cosmo Crickets quilt in the Moda booth.  I've always loved this design, Kalidescope.

Another project from my book in C&T Publishing's booth. (surreal)

Love the softness of Sweetwater's booth

What a fun idea!

Can you just imagine recovering your entire library with your favorite fabrics?  And then embroidering all the spines?  LOL!  I think I'd have to be beyond bored to actually DO that ... but a girl can dream, right?

Ok.  Hope I didn't kill you with photos today.

I still have more, ya know.

                    *                    *                    *                    *                    *

Just found out there is a fun giveaway going on over at Shabby Fabrics!  Tomorrow is the last day to enter.

Friday
Nov022012

(A Few) Lovely Ladies of Quilt Market

I can't believe it's been almost a week already since I got home.  What the heck have I been doing?  Oh yeah, anything that didn't require USING MY FEET!  LOL!

But I think I've recovered now.  And have gone thru all 300+ photos.  It pains me to tell you that my camera accidentally got set to 'portrait' instead of 'auto' for much of the time and I didn't notice ... so I had to trash a ton of super blurry ones.  (Bad blogger!) 

Also, it seems I've turned into a wimp of epic proportions because I kept leaving my camera a booth somewhere because it was too heavy.  What?  I've carried 2 human beings to term PLUS all that "baby weight".  A little camera is like a feather in comparison.  And of course as Murphy's Law would have it, I kept running into my favorite people sans camera and didn't get photos with/of them.  (Very bad blogger!)

Despite my incompetence, I still have some lovely ladies to show you.

Deb Strain - She is just so adorable.  And talented.  I asked her which of her quilts she wanted me to photograph her with ...

This girl is quite the artist.

Allison - another cutie.  I love her blog.  Her new baby girl makes my ovaries ache.

Me & My Sister - these two should take their comedy routine on the road.  They are so funny.  And their colorful sense of humor translates to both their fabric designs and their booth displays.

A jelly rolled mummy.  Ok ... NOW I've seen EVERYTHING!  LOL!

Aneela - my embroidery homie.  Love her Tova top.  Fun to see in person something she showed on her blog on the other side of the world a few days earlier.

Managed to snag a F8 bundle of her new "Posy" collection.

Sue Daley - template user, appliquer, traditional quilt designer extraordinaire ...

with her first fabric collection Prairie Rose!

Jo Morton - Another traditionalist I admire idolize. (Sorry 'bout the crap photo)

You'd know I was lying if I said I related to her colors - beautiful reproductions that they are.  But I simply adore her quilt designs and traditional style.  I TOTALLY relate to her on that level!  (She teases me about how she doesn't get my obsession with white.)

But I think my favorite run-in was Sherri.  I've followed her blog for a long time now and it was such a treat for me to finally meet her in person.  I knew she was somewhere among the thousands of people.  Near the end of the first day I was standing in line chatting with a friend when all of a sudden there she was - standing right behind me!

(Had to steal this photo from her!)

More next week.  TGIF!!!

Thursday
Nov012012

Introducing Wanda the Witch

Ok you guys.  Please don't make fun of me, but I want you to meet an old friend of mine ...

Wanda the Witch.

I cross stitched her onto a Laura Ashley turtleneck about 20 years ago.   (So, technically, the Laura label makes it "designer", right?)

And I've worn her (almost) every Halloween since, including last nite.

(Notice my outline oopsies on the shoe ... this was my first time using waste canvas.)

Wanda's my annual tradition.  I used to wear her out and about in the 90s (just for the week before Halloween!).  But now I only wear her when I hand out candy.

I still really like her. 

She's cute. 

Her and her cockeyed scaredy cat.

Do you have something in your closet from a long time ago that you still bring out once a year for a silly special occasion?  I could use some moral support here because I know all my stylish friends are totally rolling their eyes at me right now and throwing up their hands in dispair because despite their attempts to drag me and my wardrobe into this decade, I still exhibit an occasional inability to let go of past fashion trends that have long since been deemed ... hmmm ... what's the word ... ill-chosen? unacceptable? tasteless?

Oh wait.  I got it. 

Straight up no-holds-barred WRONG!  LOL!

So.  Anyone?

A Christmas sweater, perhaps?  Or maybe even a pair of MC Hammer pants?

Wednesday
Oct312012

Insider Baseball

First an update.

I use a company called Squarespace for my blog.  Fabulous company.  Love them.  As I mentioned yesterday, my blog was going down temporarily due to flooding in NYC.  Because of the committed and tireless efforts of the folks at Squarespace, this hasn't happened yet.  But they cannot continue their Herculean efforts indefinitely so you may lose me yet.  Then again, maybe not.  No way of knowing at this point. 

If you're interested, you can read more here about what it's like to be a business in NYC trying to keep things going in the aftermath of Hurricane Sandy.  Pretty incredible if you ask me.

                    *                    *                    *                    *                    *

I sat down just now to write my first post from Quilt Market (industry trade show).  It was such a busy weekend.  SO much fun.  I'm still recovering.  And my sewing room is in terrible shape.  Seriously bad.  I really should be cleaning it up right now.  I made a ridiculous mess in here during the weeks before Market getting things ready and now I need to find a home for all the stuff I brought back ... so ... you know where this is going, right? ;)

Yep.  I'd really rather talk to you and share some of my favorite stories, starting with this one about the cute, funny, smart and TALENTED Angela Walters

(This picture was taken first thing in the morning on the last day after a late and somewhat sleepless night for me and I could NOT have looked worse, so ... that's why I cropped most of me out.)

I met her online almost a year ago when I was in the middle of a serious book deadline crisis.  There are two quilts in my book and I needed them longarmed.  But my favorite local longarmer (Hi Laura!) had just taken ill and couldn't do them.  Oh, and did I mention my deadline to have all my book projects to the publisher was DECEMBER 18th?!  I know.  What was I thinking?  Note to self - NEVER agree to ship time sensitive things during the Christmas rush.

I managed to get an extension, but I still needed to find a longarmer.  So I asked C&T Publishing if they could recommend someone.  They sent me to Angela who had just written her first book with them.  If you've ever tried to hire a longarmer you know that the really good ones are booked up months - sometimes a year - in advance.  It's not uncommon to be put on a waiting list.  Angela already had an amazing reputation with international customers.  So I crossed my fingers and called her up.  As a fellow author, she was sympathetic to my plight and kindly took pity on me. 

I didn't see the quilts again in person until this past weekend when they were hanging in 2 different booths at Quilt Market:  the girl quilt with C&T ...

(needed to include that cute embroidery hoop mobile!)

(sorry for the lousy photos ... I was literally running up and down the aisles of Market an hour before I had to leave for the airport snapping pix.)

... and the boy quilt with Lecien ...

... because I used all COSMO embroidery floss in my book.  And all Lecien fabric too.  I know.  Shocker, right?

You know, there are so many seriously cool and lovely people in the quilting industry and I need to give huge credit to those who made my book look so much better than I ever could on my own.  Angela is one of them. 

I met her in person the first day in Houston when she was giving a talk on her newest book.  (I won a door prize!)  It was so fun to finally thank her in person as she handed me a copy of her book.

So that is just one of the highlights of Market for me.  I'll be back with more.

Tuesday
Oct302012

Hurricane Sandy

Quick note to tell you my blog will be going down temporarily because my service provider in NYC is flooding due to the hurricane.  Will be back when I can.

Heartfelt wishes to everyone in Sandy's path.

xo k

Wednesday
Oct242012

It's What I Do ...

The last few times I went to Quilt Market I made myself a new bag (plus another one for my friend). 

This bag is basically a miniature version of a quilt designed by the adorable & uber-talented Camille Roskelley ...

from her book "Simplify". 

And this one is also a miniaturized version of a quilt I designed for the Lecien Quilt Market booth last year to promote the then newest Flower Sugar fabric collection.

(Free quilt pattern here.)

Well, I simply could NOT help myself. 

I was compelled to make a bag inspired by this quilt - another commission by Lecien for last Quilt Market (I didn't go to that one).

(Quilt pattern available here.)

The blocks in the quilt measure 5 1/2"/side.  The ones on this bag?  A mere 1 3/4"! 

If I'd had more time I might have made more blocks.  But necessity is the mother of invention, right?

I wanted to add a bit of embroidery, but I didn't have gobs of time so I opted for a simple open lazy daisy stitch to create a delicate scalloped/lace trim.  (I also started adding knots between the scallops, but it was too busy so I took 'em out.)

I love this novelty print from Meg Hawkey's "Whitewash" collection.  

It features vintage sewing motifs and was perfect for this tote.

It didn't take me long to go with the chocolate brown dotted print for the bottom.  Gives it a fun personality.

And I went for a lighter inside - makes it easier to find stuff in there!

It's a pretty roomy tote.

Ok.  I'm signing off now until I get back from Houston.  I promise to bring back lots of pictures and hopefully some other fun stuff.

If you're going to be there too I'd really love to meet you!  I'll be at the C&T booth Saturday at noon for my book signing.  I'll also be doing an embroidery demo (C&T booth again) Sunday at noon.  Just remember "Nooners with Kristyne". 
Uh ... wait a sec ... doesn't that mean something else?  Never mind.  You know what I'm sayin'. ;)

PS:  For all you sick and twisted people who are jealous of my snowy climate, here's the view from my sewing room window. 

Any volunteers to come and shovel?  And scrape the ice off my windshield in the morning?