Entries in Quilting (64)

Wednesday
Jun052013

Little Hexagons Tutorial

I heard all your lovely requests for a "little hexagons" tutorial last week (watch strap tutorial to follow soon!) so here it is.  I hope you find it helpful.
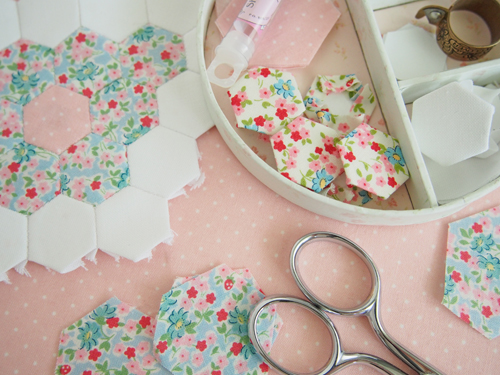
I want to start by saying the technique for English paper-piecing (EPP) small hexagons is no different than for larger ones.  In fact, EPP is the same regardless of template size or shape.

And there are a few EPP basting variations out there, but I wrote this tutorial to show you how I do it ... with glue.

Step 1 - Cut out a paper template (or buy precut templates) the size you want your hexagon to be when it's finished.  Regular computer printer paper works just fine.  The precut templates are a lightweight card stock - a little stiffer than regular paper, but still very easy to pierce with a needle. 

Then cut out a piece of fabric that is 1/4" larger than the paper template on all sides.  Accuracy is not critical for cutting the fabric.  You should have at least 1/4" seam allowance, but if it's more don't worry.  Unless I'm fussy cutting a hexagon, I usually stack up to 6 scraps of fabric, lay a template hexagon on top and cut my 1/4" allowance - based on the template - with a rotary cutter.  You can just as easily use scissors.  Some people like to make a fabric cutting template. 
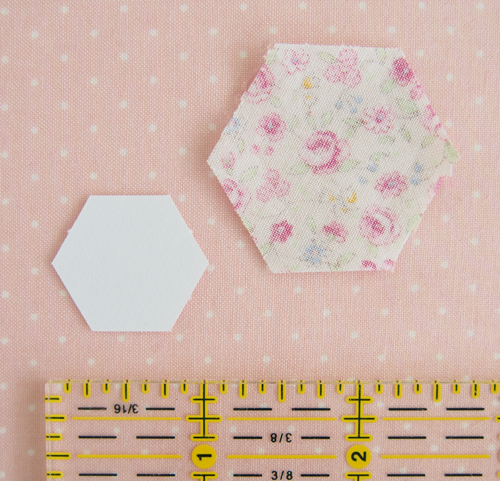
My paper hexagon templates here are 1/2" which refers to the length of one side of the hexagon. 

Step 2 - Lay the paper template centered on the wrong side of the fabric hexagon.
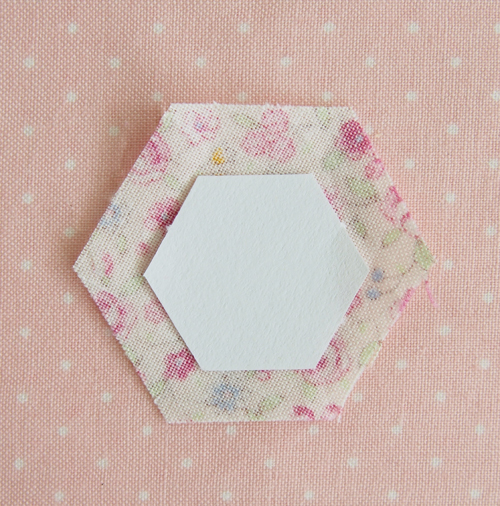
Step 3 - Using a fabric glue pen (I use Fons & Porter) add a small dot of glue to each side of the paper template.  It goes on blue but dries clear. 
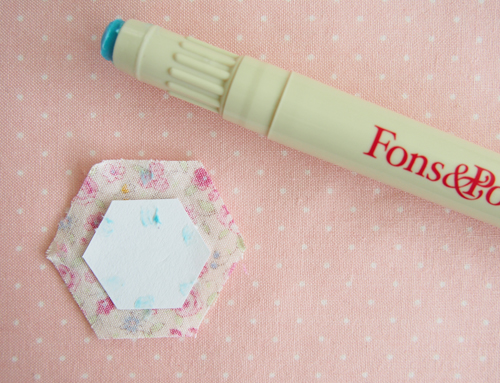
If you're working with larger hexagons (or any other EPP shape) you may want to use a few dots of glue per side.

Step 4 - Fold two opposite sides of the fabric hexagon onto the paper template (at the same time) and press the seam allowances into the glue to make them stick.
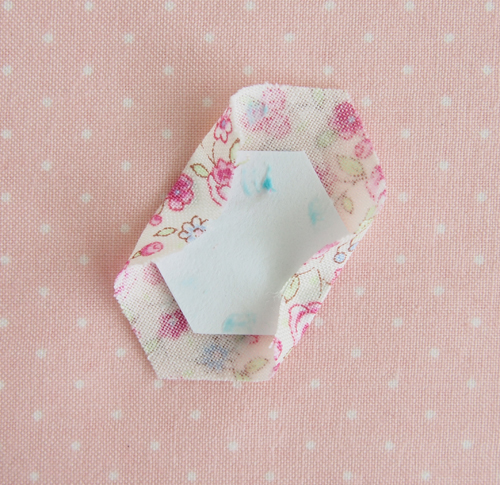
Repeat for the remaining sides.
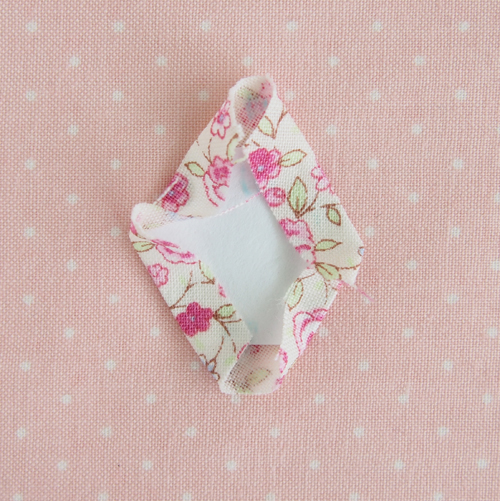
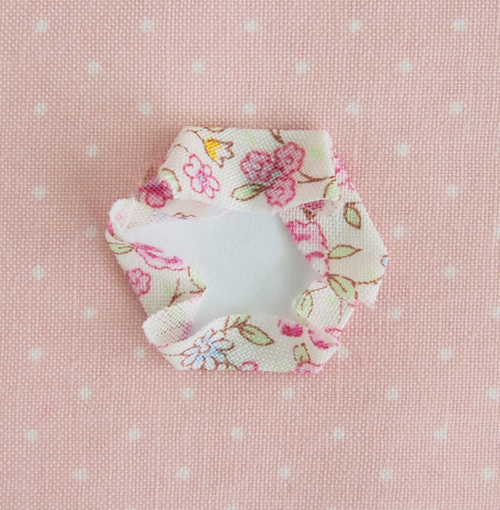
Step 5 - Make a bunch.  (To make a flower you need one center and 6 petals.)
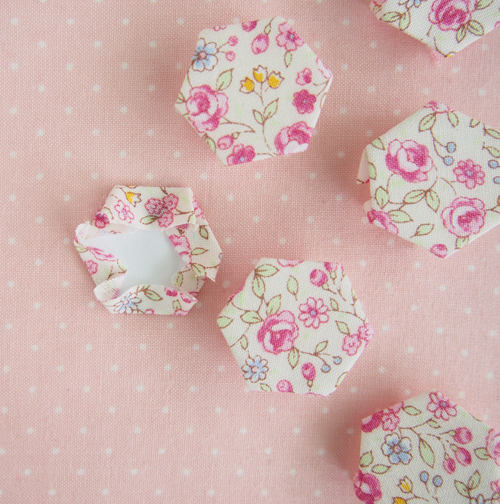
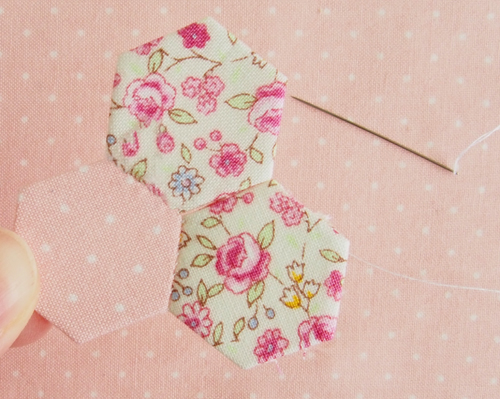
Step 6 - Take a center hexagon and a petal hexagon and hold them right sides together, lining up to edges.
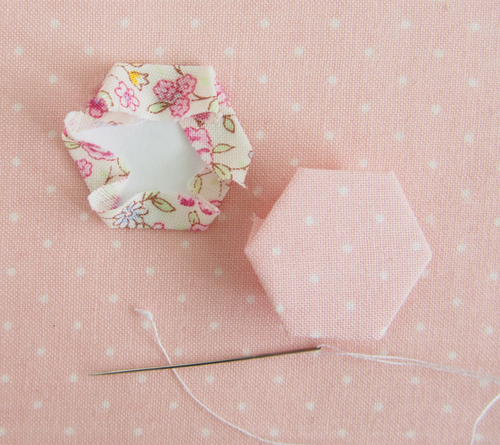
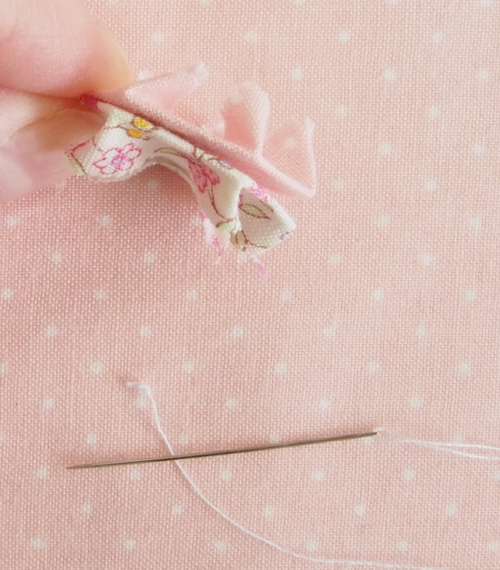
Step 7 - Thread a needle (I use Sharps) with a color that will blend (if using contrasting colors, match the darker fabric) and knot the end.

Starting at one corner, sew the two edges together with a whip stitch.  Do not catch the paper template with your needle - just grab a little bit of fabric that is on the fold.
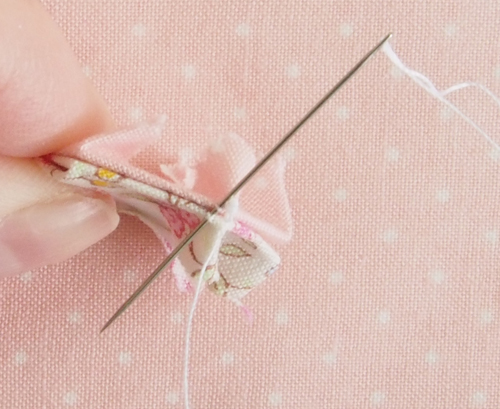
The tinier your stitches are, the better.  (Here's an example with a high contrast thread so you can see.)
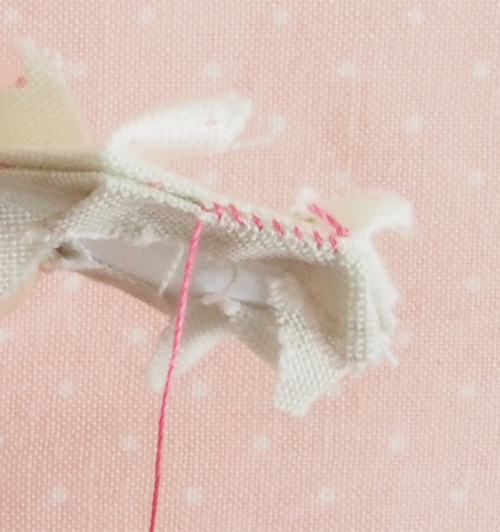
Step 8 - When one edge is complete, fold the hexagons open and lay a second hexagon onto the center - right sides together.
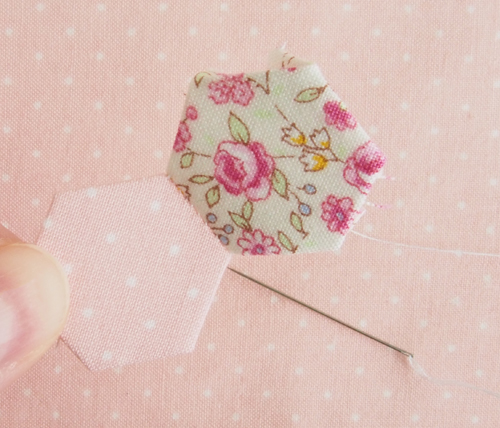
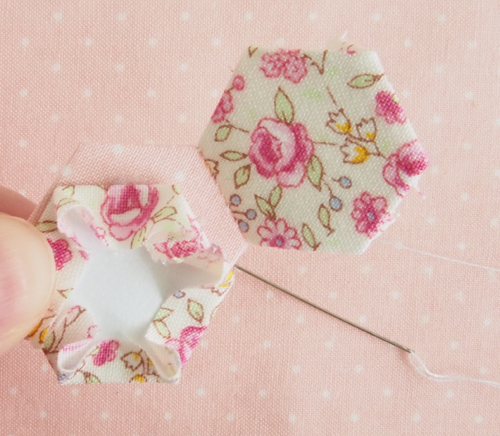
Sew the next edge of the center to one edge of the second hexagon together with a whip stitch.
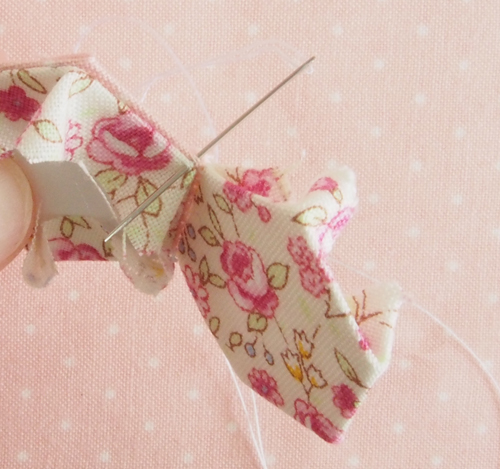
Step 9 - Repeat until all 6 petal hexagons are attached to the center hexagon.
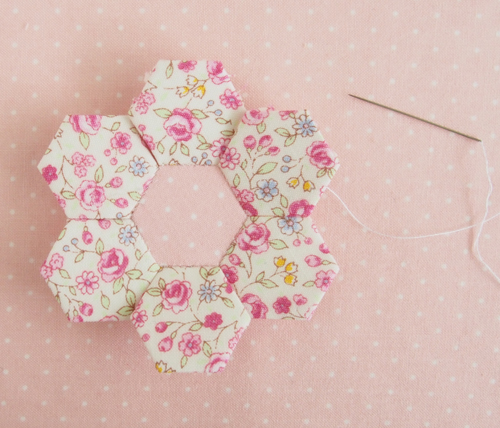
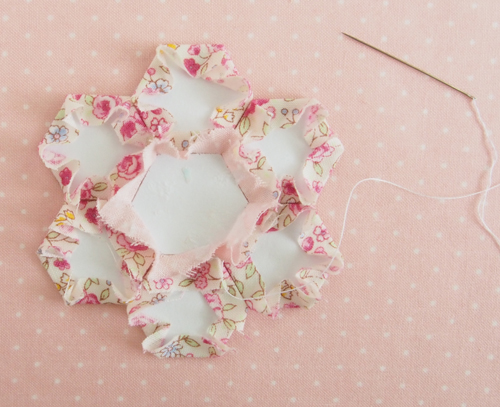
Step 10 - On the back side, gently pull the glued seam allowance of the center hexagon away from the paper template.  (Remember, you only need a little glue.  The more glue you use, the harder it is to separate the fabric from the paper.)
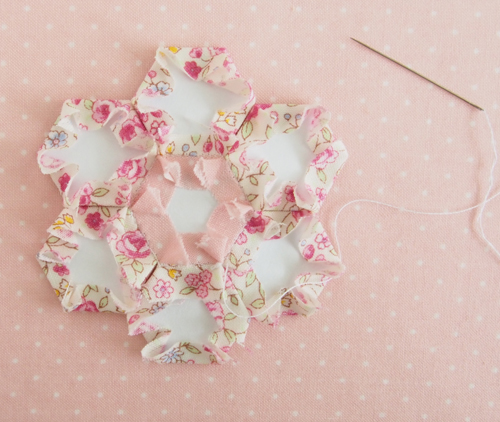
Remove the paper template.  Most (if not all?) of the glue seems to stay stuck to the paper, not the fabric.
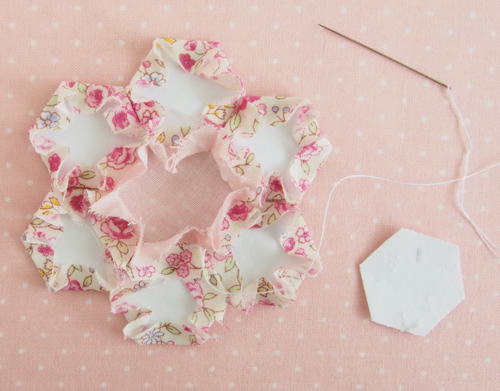
Some of my quilting friends do not like glue basting.  They would rather spend a little more time thread-basting because it's cleaner to pull out than to peel glued fabric off of paper.  And sometimes the seam allowance will fray a bit - which is not a problem because the fabric is already sewn in.  But for me, I really like the speed of glue basting.  It's a personal choice.

Step 10 - Fold the center hexagon to stitch the petals together.
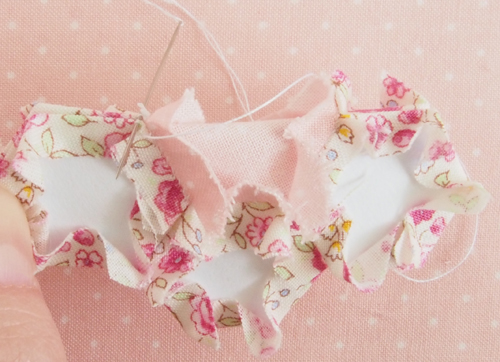
That's it. 

You can join together as many hexagons as you like.  Remove a template when all sides of the shape have been whip-stitched to another piece.

Get creative and make beautiful designs with fabric placement.
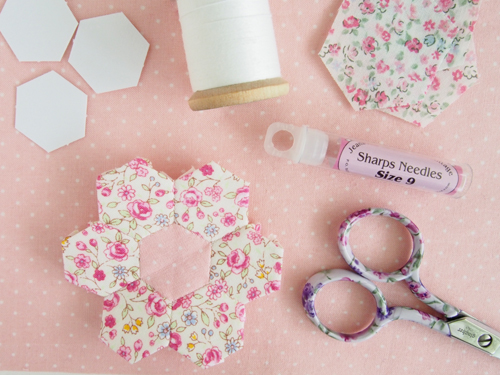
It's not at all complicated.  It just takes time.  You will find that one little flower goes together very quickly and you can have a bunch made in an afternoon. 
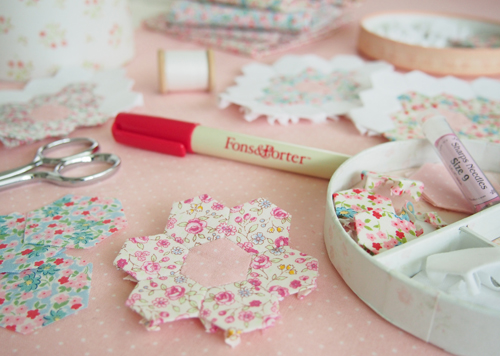
EPP is the perfect hand sewing activity to do when you don't want to think or do anything that requires much concentration, but you just want to keep your hands busy.  It's portable too.  Just prep a bunch of hexies, toss them in a container with a needle, thread & scissors and you're good to go!

Monday
Jul162012

Farmer's Wife Quilt - The Big Assembly

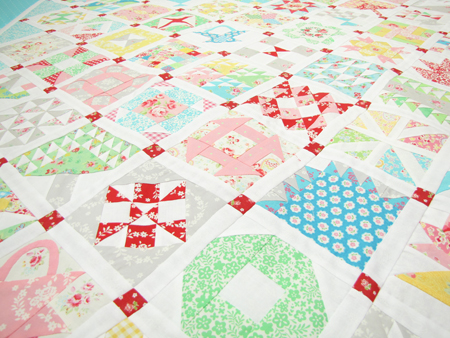
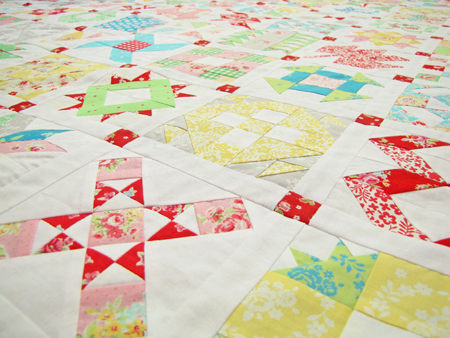
I wouldn't be surprised if you thought I was ignoring my FW quilt because you know how OCD I am with block placement and all my silly rules about colors and prints etc. not touching and all that.  Some of you even (rightfully) poked fun at me and how hard a time I was going to have with the layout process of my 98 blocks.  Remember the nightmare I had with only 12 blocks?!  LOL!

Lucky for me I still have a few brain cells that operate on common sense and they made me realize it was totally, utterly and completely IMPOSSIBLE for me to lay out this quilt AND follow all my rules ... AND keep my sanity.

So.

I let all my silliness go ... (ok, maybe just most of it ...)

I really only made sure that:

  • the reds were evenly distributed (100% successful)
  • the blocks - which I sorted into "lights" and "darks" - weren't clumped anywhere (mostly successful ... found a few problems after the top was put together ... I just practice taking deep breaths when I notice them)
  • and of course I tried to avoid any obvious color/print touching (much leniency was required in this regard)

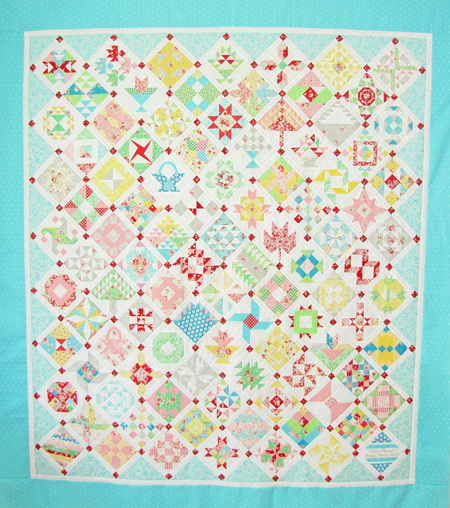
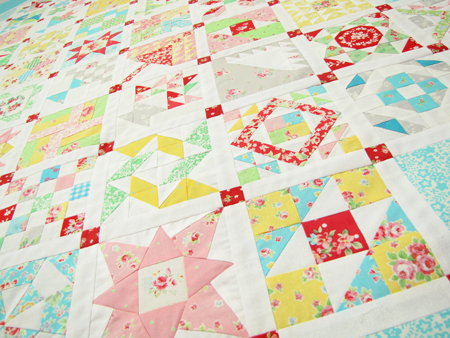
So now let me show you how it all came together. 

It's not often a quilt looks as good or better in real life than it did in my mind when I started.  It's always still a bit of a surprise to me.  Sometimes I'm close, others are total disappointments.

But never mind.  My Farmer's Wife quilt is an unmitigated success.  For me.

Remember my pink sashing disappointment ...

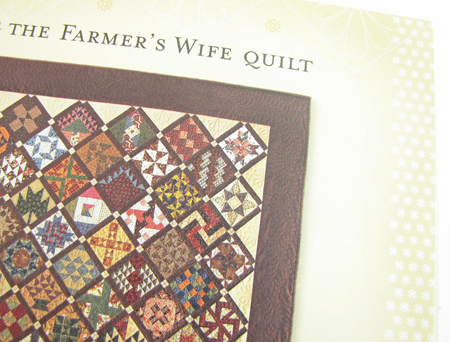
because I was trying to make my quilt look like this ... ?

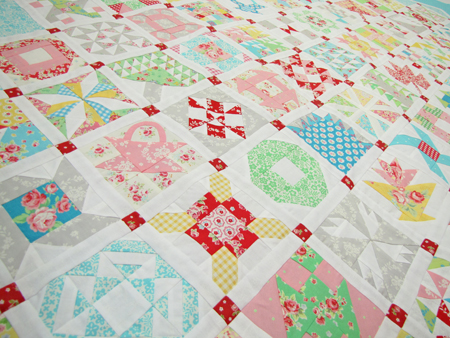
Well, I officially forgive that pink fabric for not cooperating because I gotta say, I'm THRILLED with how the white turned out.  I especially love how the white background blocks "float". 

The red.  Ok.  I'm not much of a red girl ... unless it's for Christmas or Valentine's Day.

However, from the very start - before I even made my first block - I pictured this quilt with red ... sparkle ... you know?  I didn't want any bold or heavy redness so I carefully used it just as little bits here and there.

For the few red (& white) only blocks I used prints that weren't dark, but had lots of white or other colors in it, like these.

(There's a reason why this block is going on the back ... )

And the red posts?  They finish at a mere 3/4" and seem to hold everything together.

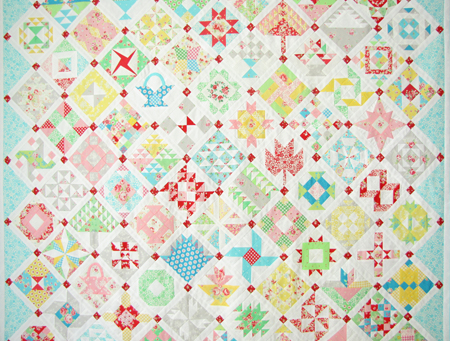
When I stand back and squint my eyes to look at this quilt, I'm fascinated by the pretty, "random" geometric pattern created by the red punctuations.  (I overexposed this photo to help you see what I mean.)

Oh, and one more thing about the posts.  I wasn't wild with the finish in the book and how the outside posts were cut in half. 

That would have driven me banana nuts crazy.  So I made mine full squares.

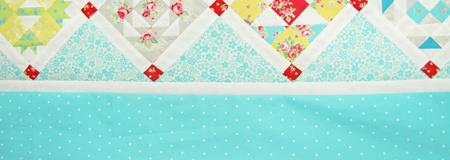
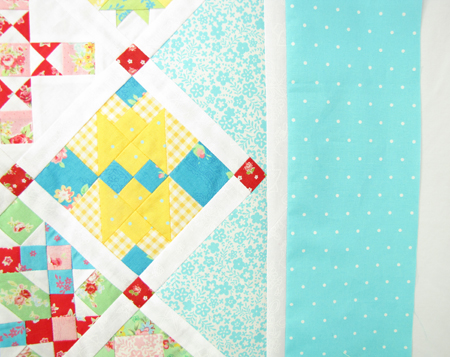
And I am so pleased with how the light blue side-setting triangles frame the blocks without being too .. chunky.  Subtle, but effective to my eye.

Also the book only has one large border.  I wanted something a little different.  So I added an inner border the same fabric & width as my sashing.

And then I went with this happy blue dot - mostly because I have limited "Flower Sugar" yardage in my stash. 

But I wonder if I had a choice of every print in my quilt that I would have picked this one anyways.  It's perfect.  Grounding, happy, love the personality of the dots ... it's strong enough to hold up as a frame, but not too busy as to take the focus away from the intricate piecing in the blocks.

No, it's not pink. 

And no, I don't care. ;)

For width, the outer border finishes the same width as a block (4 1/2").  It always seems logical to me to repeat a dominant measurement from the body of a quilt for the border. 

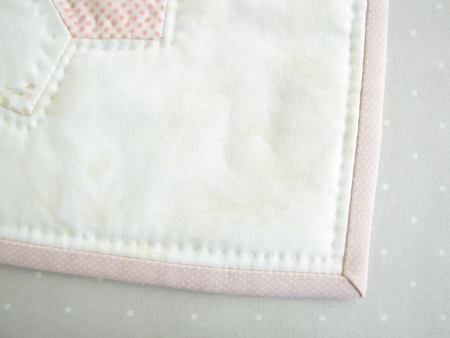
I'm also going to bind it with the same border fabric.  I was originally planning either red or scrappy, but now I think both those options would be too much.  I'm just gonna keep it simple.

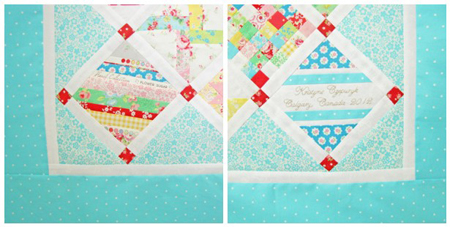
Now.  I'm still not sure about these blocks being stuck in the bottom corners.

I don't know why, but I assumed the signature should go in the bottom right corner .... you know ... like where you sign a letter.  That is until someone suggested placing it in the middle.  Oh that would be so nice!

And I'm not happy with the other horizontal striped blocks so symmetrically placed.  Looks ... predicable?  And maybe boring.  Not sure what I mean.  So I'm thinking about moving at least one of them. 

But I haven't yet.  Cause doing stuff like that makes me cranky. 

Sigh.

I should probably just do it.  I think I'll be unhappy if I don't.

Oh WHO AM I KIDDING?!! They are staying put.  The end. ;)

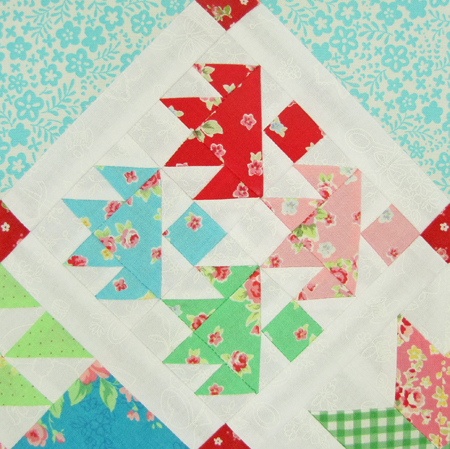
And a quick mention about this "Flock of Birds" block ... I set it so the birds are flying east ...

... 'cause remember my crazy birding sister?  She lives east of us.  So the birds are flying in her direction.

But now to the quilting decision.  I have a habit of cheaping out on things sometimes - either with the border, or the backing ... or in this case, the top-stitching.  And then I live to regret it.

I can do it myself with a cross-hatch - classic, acceptible ... but not necessarily the best option for taking this quilt to the next level of amazing, right?

I could free-motion quilt it, but my FMQ repertoire is limited at best and totally inappropriate for this quilt at worst.

So lucky for my I've let my BFF talk me into having it longarmed ... so now I'm saving my pennies.

Thursday
Jul052012

How This Quilter Mends Pants

Ok.  I hate mending.  Seriously.  I would rather make something from scratch than mend.  Even hemming pants or reattaching a button ... yuckeroni.

HOWEVER.

If I can figure out how to turn a mending chore into some semblance of a quilting task ... well ... THAT is something altogether different.

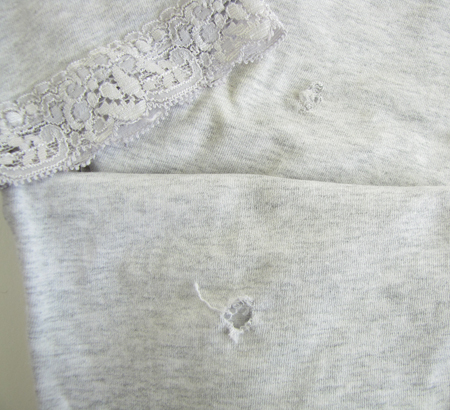
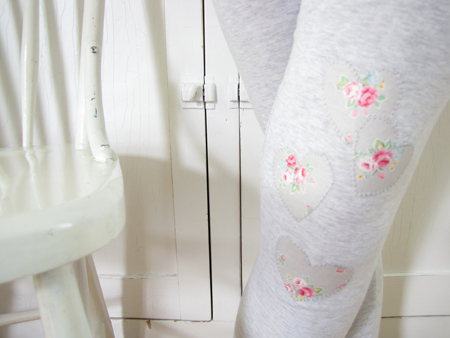
This is a pair of my daughter's leggings with not one, but two holes.  (She's an overachiever in this department.)

Not expensive.  And she'll probably outgrow them next week.

But never mind.  I've got an idea.

                         *               *               *               *

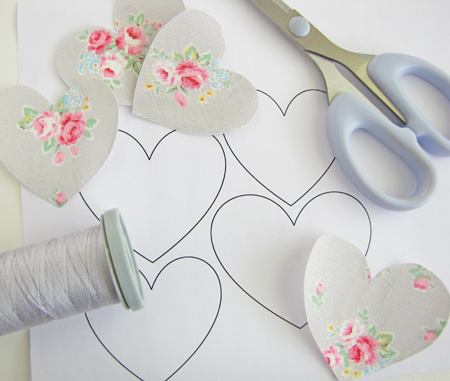
I drew a few hearts on my computer, printed them out, traced them onto fusible web, made fusible patches from pretty coordinating fabric (Lecien's Flower Sugar) & found matching thread. 

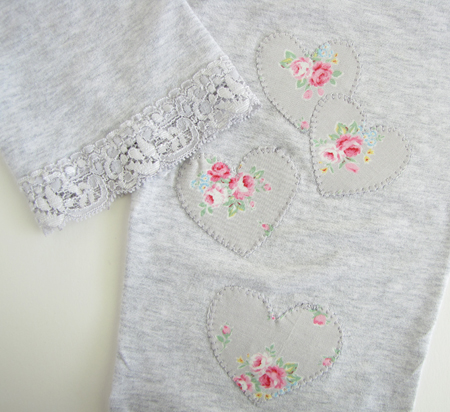
Then I spent all of about 10 minutes at my sewing machine.

Tada!

Only the top and bottom hearts are covering holes.  But they're so far apart I thought it would look better with a few connecting elements. 

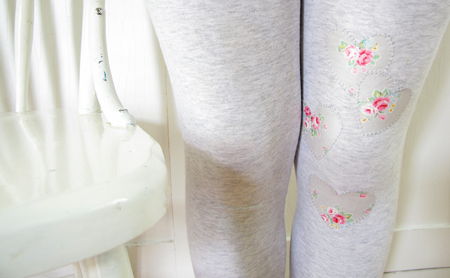
I don't think anyone would ever guess this was a patch job! 

AND she really likes them.  Bonus!

Friday
Jun292012

"With Fabric & Thread" Cherry Blossom Quilt II

I.love.making.quilts.  I just do.  I can't help it.

I love picking all the fabrics.

I love cutting all the pieces.

I love building the blocks.

I love pressing the seams.

I love perfectly nesting seams and clean points (when they happen ... 'cause they don't always ... happen, that is).

I love it when a quilt top is all put together.

I love pin basting. 

No, wait. 

That is a total lie. 

I reeeeally don't like that part at.all!

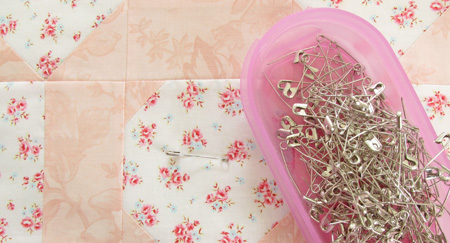
And yes I use a pink tupperware for my basting pins ... ;)

I love top-stitching.

Especially my true love grid-on-point ... people, you simply cannot argue with a classic.

I love binding ...

hmmmm ... no, that was another fib ...

I TOLERATE binding,

... when there's something good on tv.

But I FOR SURE FOR SURE love washing and drying a quilt for the first time to magically turn it into a family heirloom - all puckered & soft & loved.

Yes. 

Making things with fabric & thread. 

That's what I love. 

Oh and chocolate. 

Can't forget about chocolate.

Friday
Jun152012

Oh You Have GOT to be Kidding Me!

Okay. 

So.

(Sigh.) 

I got a new iron.  Which boasted - among other features to justify the $160 price tag - that it WOULD NOT scorch fabric.

May I present to you Exhibit A ...

Seriously?  Are you KIDDING me? 

I think I might have used every bad word in the English language. 

More than once.

Because "picklejuice" and "fiddlesticks" weren't cutting it.

Don't worry, I spared the children by using my inside-my-head voice.

But I'm pretty sure Martin Scorsese woulda been impressed.

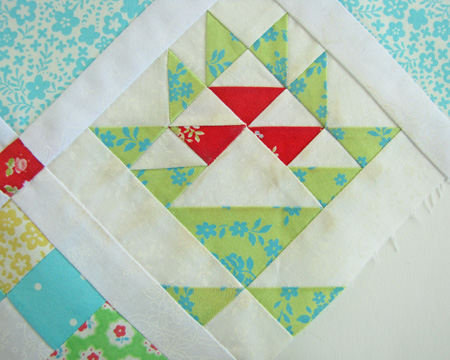
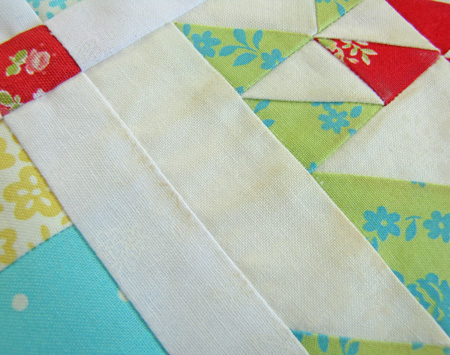
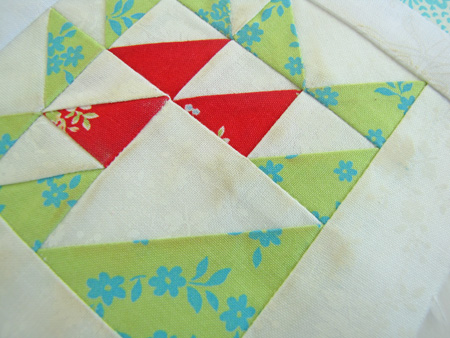
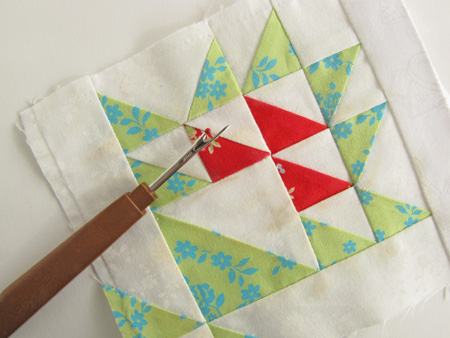
So now do I use one of my reject blocks?  Or replace this one ... because it WAS one of my favorites ...

I think I need a break from this quilt.  Clearly I'm being punished by the quilting gods for not making that 111th block.

Besides, I got a fun new book I want to show you next week.

And I really need some fun right about now. 

"Look out Weekend, here I come!"

Thursday
Jun142012

Borderline

Just channeling my inner Madonna with that title ... ;)

Thanks for all your sympathy yesterday.  It felt just as good as the cheesecake tasted. ;)  But as you'll see today, I chickened out and ran to the safety of white sashing ... not exactly the look I wanted, but at least I know it will look ... nice.

                           *                *               *               *

With lost motivation/inspiration, block reductions & that disappointing sashing failure my FQ quilt is really giving me a run for my money!

And my side-setting triangles for the border have proven just as difficult.  I'd always had it in my mind's eye - based on pink sashing, mind you - that the triangles would be white with flowers to make the blocks look like they were surrounded by a garden ... sorta.

Well, I think this print would have worked very well with pink sashing, but with white ... not so much.  I think it looks too ... I dunno ... bedroomy? ... I find it VERY Laura Ashley circa late 80s/early90s ... which I would normally be all over like white on rice, but it just isn't holding up here for some reason.

So I tried a few other fabrics and it was unanimous (with me and my daughters) this blue/white print was perfect. 

Not too heavy, but with enough definition to frame the blocks nicely.

But, of course, THE ONE BLOCK of NINETY EIGHT that has the EXACT fabric as the triangles is RIGHT IN THE CORNER!!! AAAGH! You can just imagine me and my OCD "Fabrics Can't Touch" thing EXPLODING ALL OVER this!

I'm starting to wonder if I should have my seam ripper surgically implanted because I've been using it WAY TOO MUCH LATELY!

(Sorry, I'll stop yelling now.)

Wednesday
Jun132012

Sashing Situation

Ok, ok, ok.  You were right.  I was wrong. 

Remember a few months ago when I showed you the fabrics I was contemplating for my FW sashing & posts?  All ya'll said the pink didn't look right.

In my defense, the color on my computer screen doesn't quite match the fabric in real life.

So stubborn me went ahead and cut like 100 sashing strips and sewed about 70 of them on ...

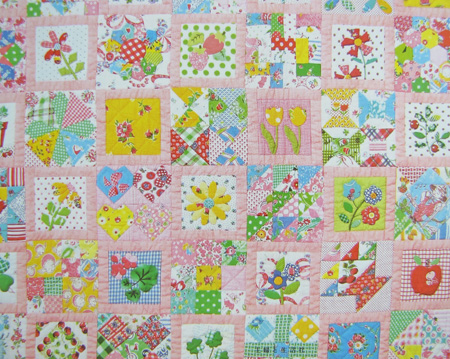
... because you guys I really, REALLY wanted my quilt to look like THIS!

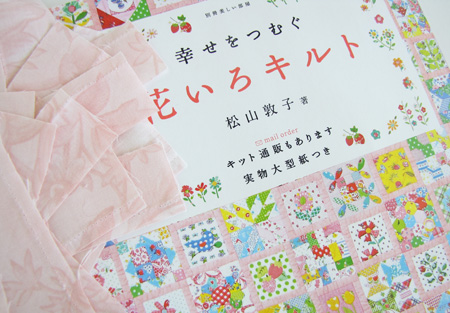
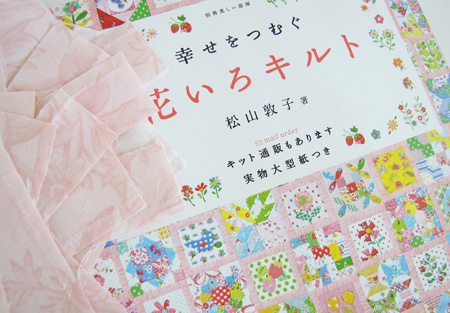
This is the cover of one of my favorite Japanese craft books and was largely the inspiration for me choosing Flower Sugar fabric for my FW quilt in the first place.

Isn't it just the happiest quilt you've ever seen?  I mean come ON!

But then I laid my partly sashed blocks out on the floor.

And then I started to pout as my pink sashing dream faded before my very eyes.

So I sulked for a bit.

And then I did this ...

Which is why god created Tivo.

And Madmen.

And New York style cheesecake.

Tuesday
Jun122012

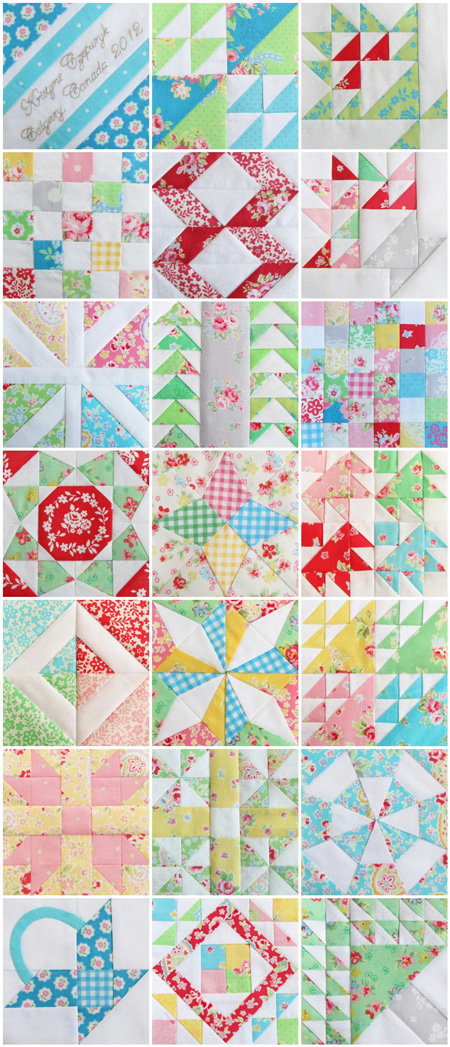
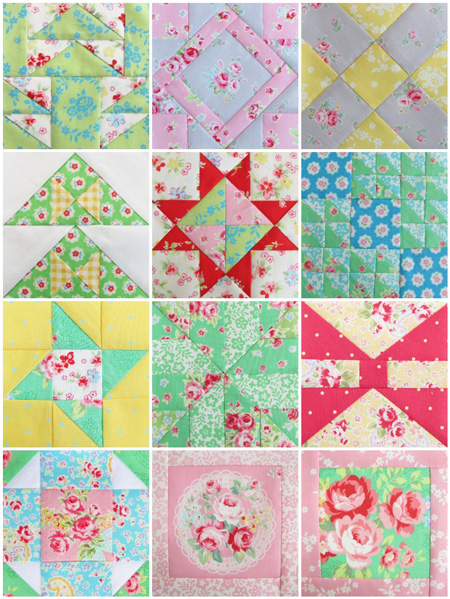
Farmer's Wife Favorites, Fussy Cuts & Failures

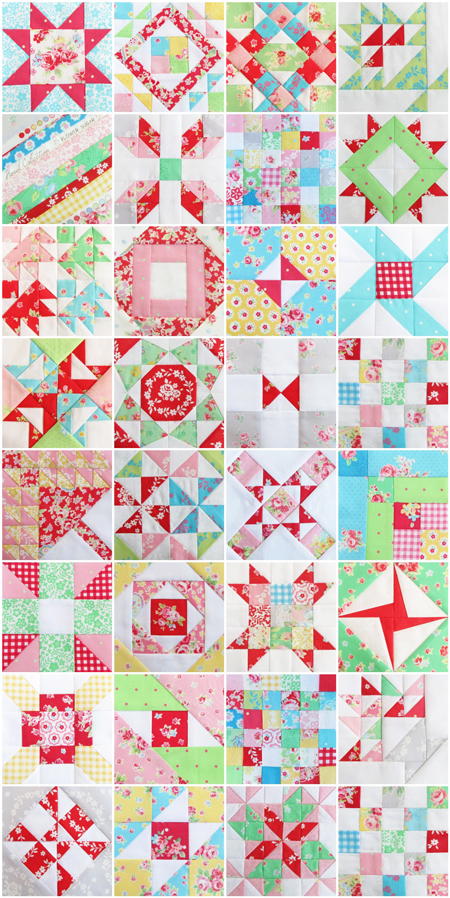
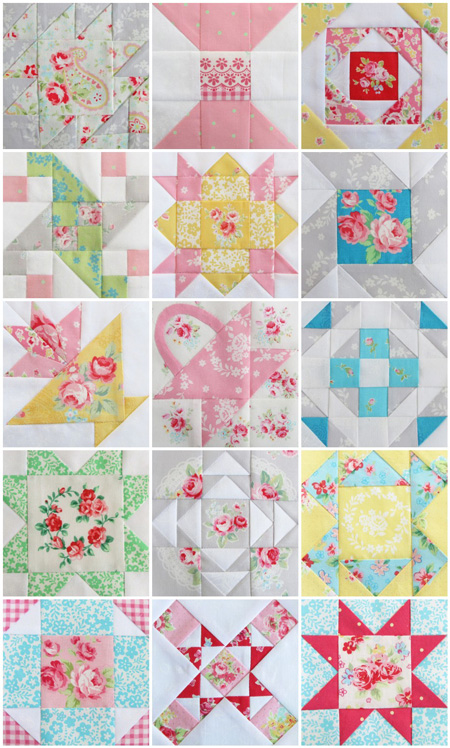
That's right.  I've got some of each.  Wanna see?

Favorites:

All time favorite:

Other all time favorite:

Honorable Mentions:

(reminds me of my wedding)

(has the most pieces ... at 64 ... )

(because I went all surreal and it.felt.GOOD!)

Fussy Cuts:

Best Fussy Cut:

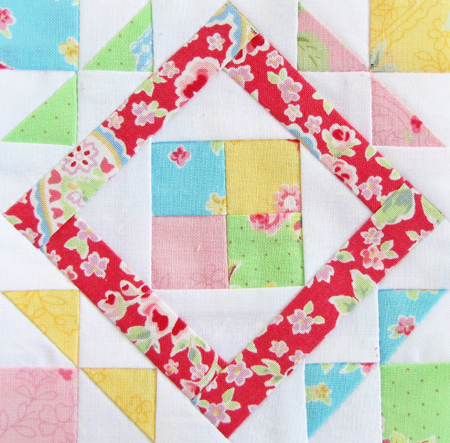
I was gonna pick this one because it's SUPPOSED to be a tea cup sitting on a doily,

but my nine year old offered her opinion that this block "looks like a fancy apron worn by someone very rich who was cleaning her really big house".

(cricket chirps ...)

I know.  I don't get it either ... but I thought it was funny. 

Failures:

This is my solution to being short one block ... remove another 12!  LOL!!! 

Ah geez, I crack myself up sometimes.

But seriously, I got to thinkin' ... just because I MADE these blocks doesn't mean I have to put then IN my quilt, right?  And I simply don't love - or even really like - these blocks.  Life is too short to live with a quilt with blocks that don't make your heart smile.  (It's interesting to me how all but one of them are "heavy".)

So they're going on the back ... 'cause I don't want to WASTE them.

All right.  That was quite enough farting around with mosaic making ... now it's on to sashing and posting and rowing and side-setting triangle ... ing ...

Tuesday
May292012

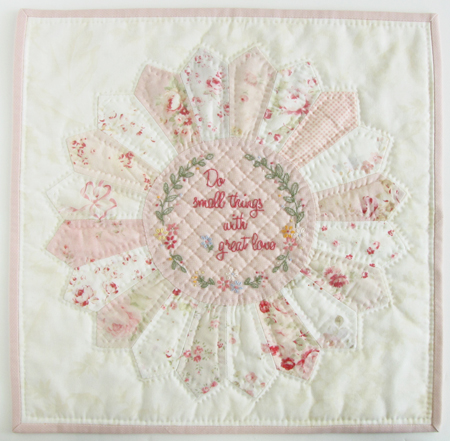
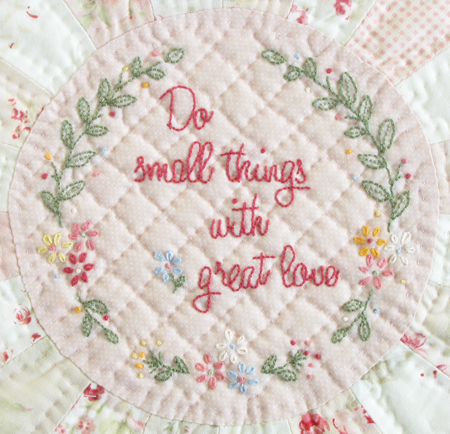
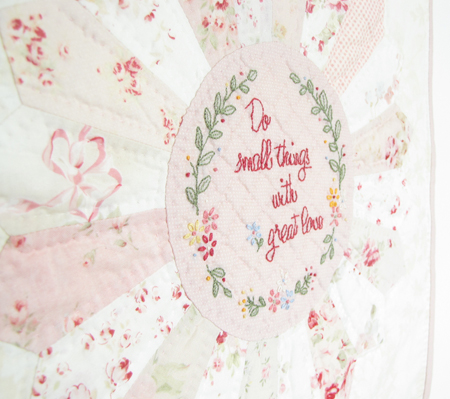
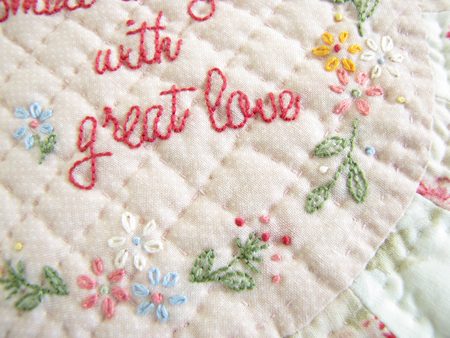
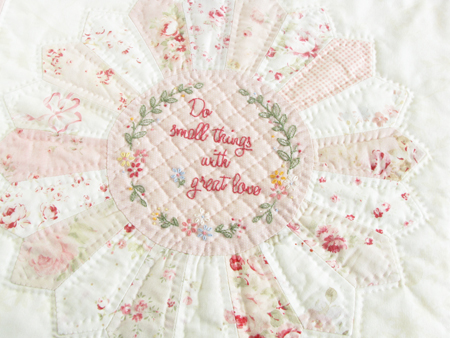
I Did a Small Thing ...

and I did it with great love ...

love for making things,

for pretty fabric,

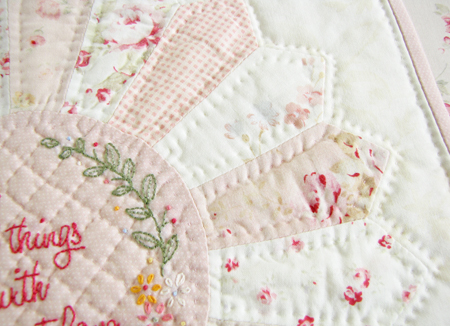
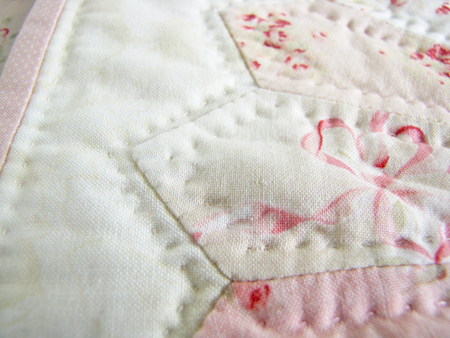
for sewing, (I really should hand quilt these blank corners ... but I know I never will ... )

quilting, (this is the back, another print from the same fabric collection I used for the dresdan plate)

embroidery, (omg do I ever love that hit of orange ... seriously ... who woulda thunk ... certainly not me!)

for my sweet friend Amy and ... and for YOU of course!  Every single one of you who takes time to say hello, whether you comment or not ... 'cause I know you're there. 

I hope you're inspired to make something too.

Thanks again Amy for designing this free pattern

Loved.every.stitch ... yes, even the ones I had to take out ;)

Friday
May252012

A Word About Hand Quilting, If You Please ...

When I made my first quilt in the mid 80s (I was 19), I thought that a quilt was only a REAL quilt if it were ALL pieced AND quilted by hand.  (Feel free to roll your eyes ... I won't be offended.)

The first two quilts I made were English paper-pieced hexagons ... and I didn't know how to hand quilt properly so I STAB STITCH hand quilted them all in the ditch ... I'd say several miles worth of thread.  Remember I never exaggerate.  (I also used polyester batting, backed one with a bed sheet and didn't know about binding ... but I digress.)

I realized if I wanted to make more than five quilts in my lifetime I was gonna have to figure out how to do this quilting thing faster ... enter straight line machine quilting.  Regarding my 19 year old attitude, I'm proud to say I'd matured considerably.

I finally took a hand-quilting course in 2000 after I made a Baltimore Album quilt and felt it really needed to be hand quilted.

As I watched my needle-rocking technique improve dramatically over 16 blocks and was reminded how beautiful PROPER hand quilting looked, I regressed to my 19 year old obnoxious self and proclaimed I would NEVER again finish ANY of my quilts by machine.  EVERRRRRR.

AHEM.  Yeah, RIGHT!  Enter motherhood 6 months later.  I managed to finish 3 baby quilts by hand before obnoxious me finally shut up about hand quilting 11 years ago.

Fast forward to today.  OmG do I ever hate how long it takes to hand quilt.  And omG does it ever wreak havoc on my tendonitis.

But OMG do I ever LOVE the look of it!  I can't help it.  Call me a snob, I don't care.  I will NEVER in a million years feel about machine quilting the same love I feel about hand quilting.  Never.

Don't get me wrong.  I highly respect longarm quilters and the very talented work they do.  And I've seen countless machine, FMQed and long-armed quilts that are nothing short of breathtaking.  I've hired several in the past and will continue to seek out and enjoy long-arm quilting on future quilts.

But I hold a very special place in my heart for tiny dimpled rows of stitches made by hand.

I would have machine-quilted this project too ... in a heartbeat ... because I was anxious to get it done and my wrist was hurting from the several consecutive days of embroidery and applique.  But I really wanted to honour Amy's design and knew the embroidery would look a million times better if I bothered to hand quilt carefully underneath my stitchery.

So glad I did. :)

Thursday
May242012

My Needles - A Primer

Yesterday I had a few questions about needles so I thought I'd write a post on the subject. 

Brand

There are a bazillion needle manufacturers out there ... and I never exaggerate. But my favorite needles are from Jeana Kimball

If you know anything about marketing, you would label me as a "brand loyal" sort of person.  Jeana's got needles for all my sewing needs, the quality is really nice, I never have trouble with them, I can find them locally ... and I love the cute little cases they come in.

Purpose

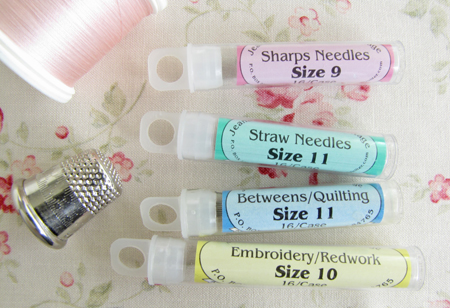
I have four types of needles in my sewing arsenal...

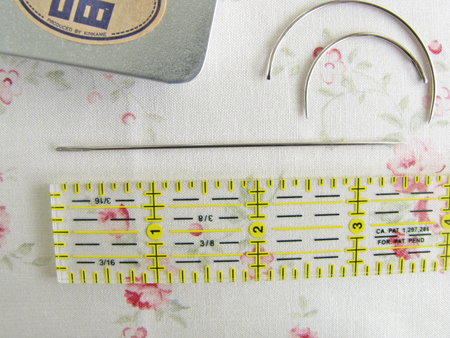
(not including the curved upholstery and super long soft sculpture needles from a bear-making class I took some 15 years ago)

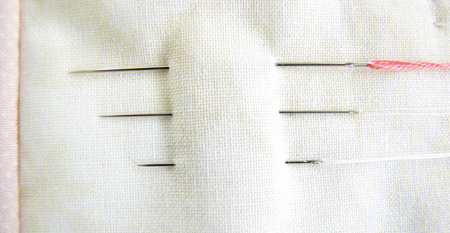
... each for different uses.  Sharps, Straws, Betweens & Embroidery.  (Keep reading for an explanation of each.)

Size

As with other manufacturers, Jeana's needles are sized according to length.  I don't know why, but the bigger the number, the smaller the size.  I'm sure there's a very logical explanation for this nomenclature ...

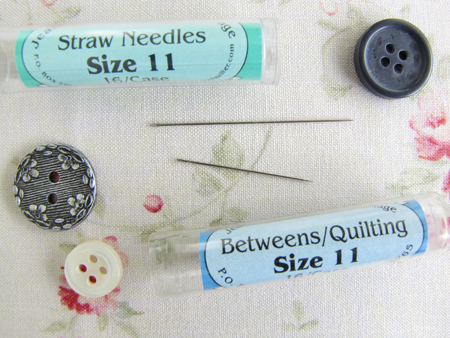
Also, it's important to know that a #size of one type does NOT translate to the same size in another type. 

For example, see the difference between a size 11 Straw and a size 11 Betweens?

Does Size Really Matter?

That depends.  ;)  Lemme 'splain. 

If you find yourself trying a new sewing method and aren't sure what size needle to use, I know Jeana sells Sampler Packs - an envelope with one of each size of that type of needle.  The fact that Jeana and other manufacturers actually SELL Sampler Packs should tell you something.  I suggest getting one of these packs and trying out the different sizes.  Some people don't care.  But I've found that most stitchers who spend a lot of time with a needle in hand will develop preferences based on everything from the task to the size of their hand to their technique. 

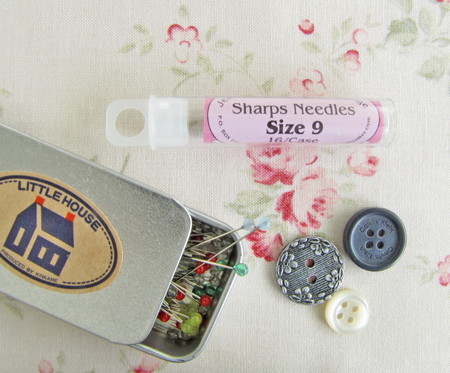
Sharps

This is my "go-to" needle for general things like mending, reattaching buttons, that sort of thing.  I'm not really picky about size with these ... whatever I have on hand usually does the job. 

Although you can bet I've used Straw needles to hem pants and Betweens to sew on a button ... most of the time my mending needle is the first one I pull out of my pin cushion!  Major bonus for me if it's already threaded with the right color. ;)

Currently I have a package of size 9 Sharps in my drawer.  

I seem to go through a lot of these.  Not sure why.  I think there's a needle black hole somewhere in my house.  My husband used to find them with his feet ... a lot.  But since becoming a mom I'm better at keeping track of them ... sorta.

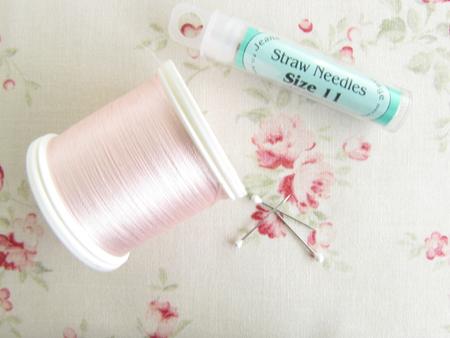
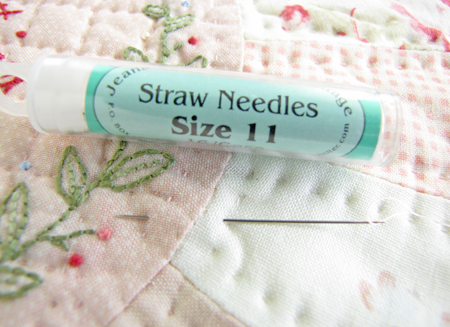
Straws

I only use these for applique.  They are thinner and tend to bend - which is a good thing for applique work.    I like size 11.

I've heard more than once these work great for hand-stitching quilt binding.

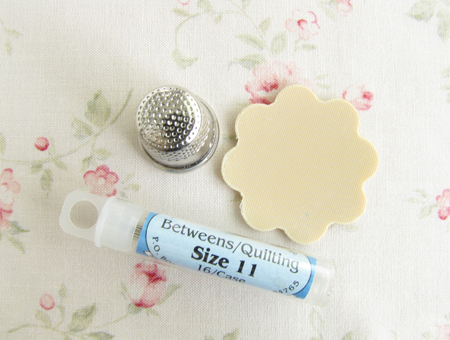
Betweens

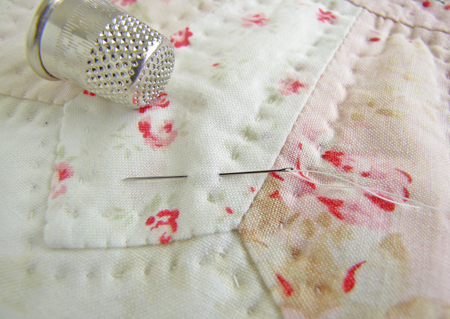
These are designed for hand quilting.  Whereas Straw needles are very thin and long and therefore bendy, Betweens are thicker and shorter and much less flexible because they need to endure a lot of pressure from the thimble and being loaded with multiple, heavy stitches.  And after a lot of use, however, my Betweens will still develop a slight bend. 

Again, size 11 is my preference. 

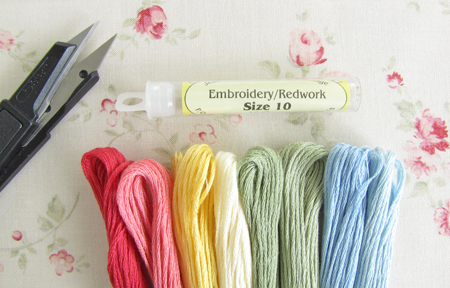
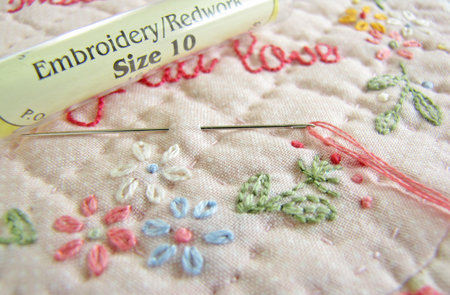
Embroidery

I used to buy 11s but now I find my poor aging hands are more comfortable with the slightly longer 10s.

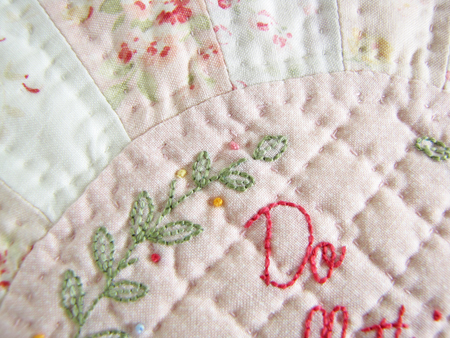
I've used 3 of my 4 needle types just for this one project:

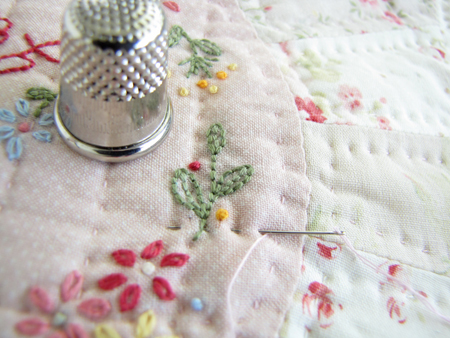
Embroidery for the embroidery ...

Straw for the applique ...

and Betweens for the hand quilting ...

I only know about these needles because I've taken applique, hand-quilting and embroidery classes ... and used them all ... a lot.

Wednesday
May232012

Small Things Progress Report

I'm working on it ...

Honest! 

But I didn't mean to go THIS crazy overboard with the hand quilting ...

(And boy is my needle rocking ever rusty.)

Tuesday
May222012

Yeah, no.

I tried something new ... new as in I've never done it before ... not new as in I'm so brilliant to have just invented quilting with embroidery floss.

Amy quilted around her circle with floss and I love hers.

And Monica did an AMAZING job quilting her Granny Squares with floss.

But I'm only lukewarm about my circle quilting.  And this edging?

Hmmmm, yeah no.

Don't like it.  It's too ... I dunno ... loud?  Too chunky?  I'm not doin' so good with my adjectives today.  It doesn't have the  refined daintiness (better) I'm going for with this project.

And plus I think I pulled my quilting stitches too tight so the circle is all ... hoochy coochy poochy.  (HA!  Take THAT you troublesome English language!!!)  (Just please ignore the "and plus" at the beginning of this paragraph ... I know it's naughty ... but I did it for comedic effect.)

So I unpicked.  All of it.  This pretty little thing is too ... pretty ... to not fix.

Sigh.  No pain, no gain. 

Thursday
May172012

It's a mystery to me ...

why not EVERYONE loves to do this sort of thing.

Seriously.

Making stuff - 'specially pretty stuff - is THE.best.therapy.GOING! 

                    *               *               *               *               *

I've had a few questions about the size of my blades and the circle for this project.

I made this template for myself ...

But both Amy and Anne used this nifty tool.

And my circle for the embroidery finished at about 6" so cut it 6 1/2" in diameter.  That said, I'm not using an embroidery hoop so I don't need extra fabric.  If you like using a hoop, I'd suggest cutting a 10" square, tracing the design, stitching and THEN cutting out the 6 1/2" circle.  Make sense?

Wednesday
May162012

Happy Camper

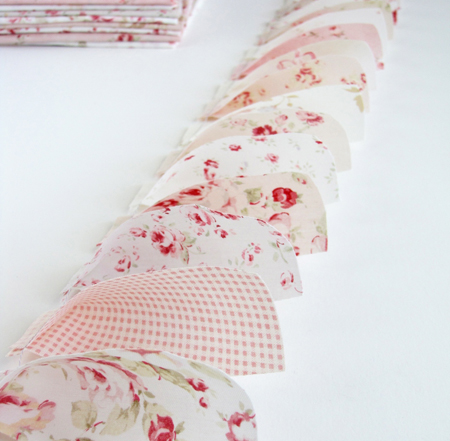
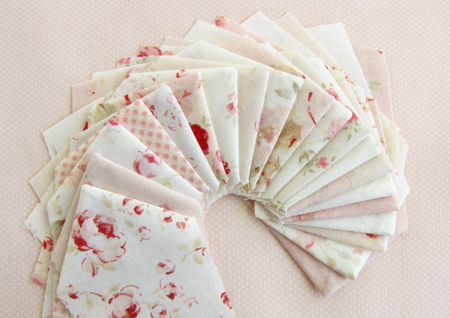
My little dresdan blades have gone from these ...

to these ...

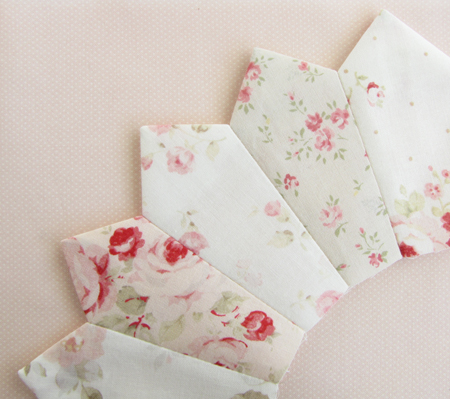
to this ... (wheeeeeeeeeee!  Yes, I totally squealed out loud when I pressed this little section together and flipped it over on my ironing board!!!)

(There may have also been clapping and jumping.)

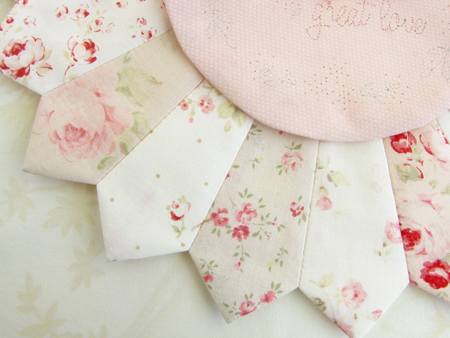
And then this ...

Amy, if you were here right now I'd kiss you on the mouth!  LOL!

Kidding.

Maybe. ;)

And now I'm moving on to the embroidery.

I am one SERIOUSLY happy camper right now!

Friday
May042012

Whatcha Doin'?

No really.  I'm curious.  What are you working on?  A quilt?  Embroidery?  A DIY decor project?  Something else?  Too many things?

Me?

I'm doin' these ...

... all 52 of 'em.

With these ...

... to keep me company.

(SO wishing I had a magic wand right now!)

Wednesday
Apr042012

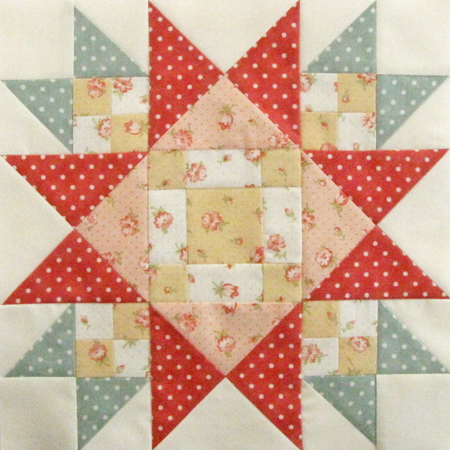
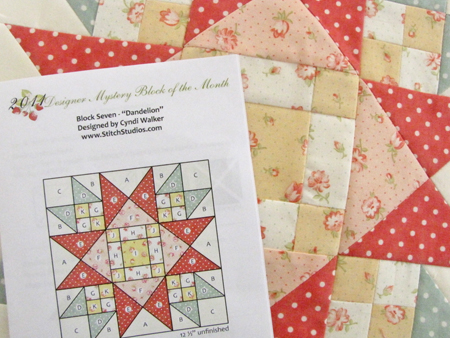
Mystery Block of the Month 7

I signed up for this project with a friend.  But she lives almost an hour away and our schedules are turning out to be far from compatible.  We've only managed to get together ONCE last Fall to sew our blocks.  I cheated a little and did a few more without her, but I felt so guilty for going a little ahead so I haven't made any since.

But I'm starting to feel so disorganized and I have so many other projects going on here that I just NEEDED to get caught up with this & start planning the final quilt.  So she graciously gave me permission to continue if I promised to still help her when we can get together. 

Done. :)

So!  Here's block #7 ... only about 5 months late.

It was designed by the lovely Cyndi Walker.  I had the pleasure of meeting her at Quilt Market last year.  Super nice girl.

Cute, eh? 

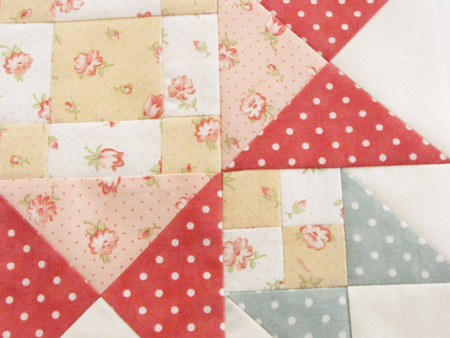
While making this block I realized these are my two favorite prints ... polka dots and little flowers on a tiny dot background.

Wednesday
Feb082012

Farmer's wife Quilt Along Week 34

YAY!!! I'm back!  Oh this feels so good. :)

Thank you so much for your all your responses to my request for feedback on my blog banner.  Wow you guys are so nice!  I wasn't expecting so many of you to tell me to do what pleases me.  That is pure generosity and I am totally grateful. 

My favorite comments were ones that suggested I do "the same but different".  So now I'm working on a new banner that you will recognize as me ... for sure ... promise.  It will be the same, but different.  Not sure when it will be ready.  But you'll be the first to know when it's done. :)

And now back to our regularly scheduled program.

I have some MAJOR catching up to do here on the farm and beLIEVE me, I've been farming!  I'm going to spend this week showing you (some of) my new FW blocks ... and there are some beauties I tell ya, like today.

Green, Gray & White

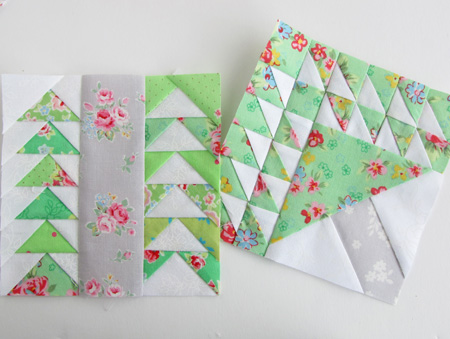
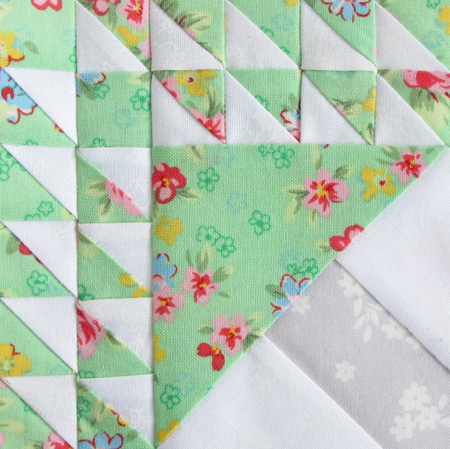
#67 - Pine Tree

I live nestled in the foothills of the Great Canadian Rockies.  I suppose I should appreciate the landscape more, but I'm not into rocks & mountains and the indigenous flora that isn't anywhere NEAR my preferred English Cottage look ...

We have an abundance of pine trees and I think almost every other species of tree with needles & cones.  I bet there isn't a single residential street in the city without at least ONE.  Again, I suppose some people would find that charming and romantic.  Not me.  I only like these trees at Christmas time.

However, THIS is the kind of pine tree I can get jiggy with ...

all covered with flowers! :)

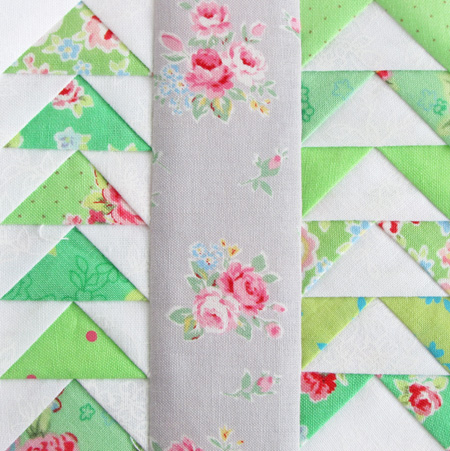
#105 - Wild Goose Chase

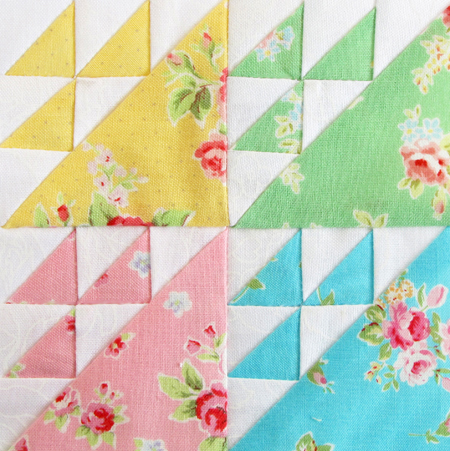
I had the.hardest.time deciding how to make this block in terms of print/color.  Should I go two-tone? Symmetrical?  Totally scrappy? And all the beautiful and inspiring versions I found on the FWQAL Flickr group didn't make my decision an easier.

But I finally went with these colors, scrapped "the snot" out of the green and I EL-OH-VEE-EE it!

YUM! :) 

(Just so we're clear here I mean yum the color ... not yum the snot.)

Monday
Jan092012

Farmer's Wife Quilt Along Week 33

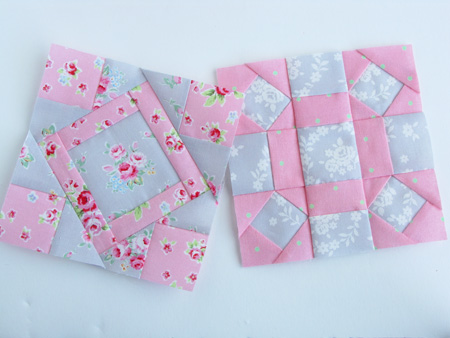
Pink & Gray

I think all my FW blocks this month will have gray because, well, I liked last week's blocks so much and I really need to catch up with this color for my quilt.

#40 - Friendship Block

Yeah, this block and I are DEFINITELY friends! :)


#80 - Single Wedding Star

Yep.  I totally love pink.


Sorry guys, no funny in me today ... I looked EVERYWHERE for it.

But I got nothin'.  Nada.  Zip.  Zero.  Zilch.

Maybe if I had a glass of wine or something.  Naw, it'll just make me sleepy and then I won't be able to feel the end of my nose.

And then I'll have to pee.

Never mind ... I'll keep lookin'.  Maybe it'll show up tomorrow.

Friday
Jan062012

Farmer's Wife Quilt Along Week 32

Blue, Gray & White

Today is our 16th wedding anniversary.  Wow.  I wonder what that is in Hollywood years?  ;)

Yes, "we" (meaning me) decided to get married in the winter ... 'cause I really wanted to wear a velvet jacket as part of my wedding dress  ... so I could hide my chubby arms ... not kidding ... 

The color theme was silver & white and my sister-matron-of-honor wore a navy velvet dress.  So in honor of this special day, I made blue, "silver" & white blocks. 

I also chose these blocks specifically for their names.

#89 - Steps to the Altar

This block ended up looking more like a tree to me but ... whatever ... let's go with it.

The church still had a nativity scene set up on the altar and I remember spending the entire ceremony looking at astro-turf bedding in the manger and cotton ball snow on the trees. 

I am SO not even joking about that!  Actual fluorescent green indoor/ outdoor carpeting and cotton balls, carefully placed one by one on the tree branches.  It would have been a great place to be if you wanted to play soccer or suddenly found yourself with a nail-polish removal emergency.  Haha!

Can you imagine?  Trying to be all serious about getting married but mostly concentrating on not bursting out laughing everytime you see a plaster cast baby Jesus with a broken-off finger and an anorexic plastic cow with bony ribs sticking out ...

Dude, it was hilarious.

But my point - and yes I have one - is that I resisted the urge to make these altar steps green in homage to that astro-turf.

#101 Wedding Ring

I love how these blocks look all calm, & soft & wintery & elegant.  Perfect.  Exactly what I was going for. :)

Happy Anniversary, Honey.